Good morning!  Since it’s the first Monday of the month, it’s time for a new challenge at Cards in Envy!  Our challenge should put you in a Valentine mood because the theme for the next two weeks is “Love is in the Air.”

I’ve taken the theme pretty literally with the stamps that I chose. The images and sentiment are from three different Lawn Fawn sets, but they all work very nicely with each other.  The layout is from CAS(E) this Sketch (but I’ve turned it on its side), and I’ve used the colors for this week’s Dynamic Duos challenge.  I’ll be including the card in the next shipment I send to Operation Write Home.

So now it’s your turn! Check out the Cards in Envy site for all the challenge details and to see what the rest of the design team has made. Then share your creation(s) with us by 7:00 p.m. eastern time Sunday, February 16. We’d love to have you play along with us!

Supplies:
Stamps: Bannerific, My Silly Valentine, You’ve Got Mail (Lawn Fawn)
Cardstock: Real Red Core’dinations, Island Indigo, Basic Black (Stampin’ Up); Pure Luxury White (Gina K. Designs)
Ink: Tuxedo Black (Memento)
Other: markers (Copic)

Hello!  Today marks the start of a new challenge at Cards in Envy.  This time we’re looking “through the window” …  making cards that have a window in the front so that something on the inside of the card shows through.  As usual, cards for the challenge need to be A2 sized and have no thick, lumpy, bumpy embellishments.

This card ended up being a good example of what happens when I create on the fly (so to speak) and not really have a plan in mind for it.  It started off with my wanting this little bunny image to be seen through the window.  This small, sort of fancy rectangular die was a great size to use for the window.  Then I got the idea to use the largest die from that set of Nestabilities to create the shape of the card, since it is very nearly A2 sized.  (It’s actually a bit smaller, about 5 3/8″ x 4″.  But it’ll still fit just fine in an A2 envelope!)  I cut the card base, putting the fold of the card just inside the die so the fold wouldn’t get cut.  Then I cut the designer paper so that the curve of the die shape would hide the fold of the card once the paper was attached to the base.  I stamped the bunny and colored him… and that’s when things started not going as well.  I added a little stippling around the bunny to help set him off from the card base, but when I’m doodling freeform like that, I’m never quite sure whether to follow the shape of the image or the shape of the image panel.   I wanted the end of the sentiment panel that’s against the window to follow the shape of the aperture, so I figured that out, but then I thought that a standard pointy banner shape for the other end wouldn’t look right, so I cut the opposite end to follow the shape, too.  The card still looked too plain, so after a search through my embellishments, I finally found a couple of Prima flowers that coordinated with the colors in the designer paper, and added them to the corner diagonally opposite the window to help balance the design.  Larger flowers would probably have looked better, but I didn’t have any in the right colors. I didn’t think about using a flower punch until literally just now, as I’m typing this post!

Trying to photograph the card so the window would show depth took a few tries, but this one turned out all right.

Whew.  There ya have it.  Even though I don’t think it’s one of my better cards, it’s still good enough to send to Operation Write Home.

Thanks for stopping by today!  Go see what the rest of the Cards in Envy design team are looking at through their windows.  Then create a card of your own and link it to the Cards in Envy site by 7:00 p.m. Eastern time Sunday, February 2.  We’d love to see what you make!

Supplies:
Stamps: Mini Critters, Cute Critters (Sweet ‘n Sassy Stamps)
Cardstock: Pure Luxury Ivory (Gina K. Designs); Spice Cake designer paper (Stampin’ Up)
Ink: Tuxedo Black (Memento)
Other: Labels Eight Nestabilities dies (Spellbinders); markers (Copic); paper flowers (Prima Marketing); mini brad (Recollections)

Cards in Envy - Snow Buddy Like You!

Comments Off on Cards in Envy – Snow Buddy Like You!
Jan 062014

Hello!  I hope Monday is being kind to you today.  It’s a happy day over at the Cards in Envy challenge blog because we’re starting off the year with a new challenge!  This time our theme is “Snow Buddy Like You”.  We want to see your cards showing images of snowmen (and/or snowwomen).  Remember that for our challenges, all cards must be A2 sized and cannot have lumpy, bumpy embellishments more than 1/4″ thick.

I’ve combined a snowman patterned paper with a large stamped snowman image and OWH Stars & Stamps bonus sketch #31.  I have to admit that when I made this card, I was in a rush to get it finished and mailed off in a shipment to Operation Write Home before their submission deadline for winter and valentine cards.  So I didn’t take the time to heat emboss the snowman.  As the white ink dried on the black cardstock, it ended up taking on a greyish hue similar to that in the designer paper.  Score!  The cherry red strip was dry embossed with a snowflake embossing folder.  I didn’t really have a good place to put a sentiment, so I opted to just not use one, making this more of an any-occasion card for one of our military men or women to use to write home to their loved ones.

If you need additional inspiration, please go check out the Cards in Envy site and see what the rest of the design team has made.  Then create a snowbuddy card and share it with us on the Cards in Envy site by 7:00 p.m. Eastern time Sunday, January 19.  We’d love to have you play along with us!

Supplies:
Stamps: Kissmas & Mistletoe (Unity)
Cardstock: Basic Black, Cherry Cobbler (Stampin’ Up); designer paper from Winter Wonderland paper pack (Lizzie Anne Designs)
Ink: Whisper White craft (SU)
Other: Snowflakes embossing folder (Sizzix)

Hello!  Since it’s the third Monday of the month, it’s time for another challenge at Cards in Envy.  Our theme for the next few weeks is “Icy Hot”.  Show us your A2 size cards that feature either something icy cold, or something very hot.  Remember to keep your cards less than 1/4″ thick – after all, the “in envy” part of our challenge name means that the cards should fit in an envelope and be mailable at the standard first class postage rate.

I ended up putting my own spin on the challenge theme and featured things that are both hot and cold.  I’d seen a few “melted snowman” cards at Splitcoaststampers.com and decided to make one of my own.  The current challenge over at Seize the Sketch helped spark this idea, too, because the banner element of the sketch reminded me of cartoonish sunshine images.  I cut the snowman puddle shape freehand and added some various stamped and/or punched snowman parts – eyes, buttons, carrot nose, arms, and a heart to tie in with the sentiment.  The scarf is a scrap of ribbon I had left over from my last CAS – Colours and Sketches card; the photo probably doesn’t show that I snipped into the ends of the ribbon with scissors to resemble the fringe on the ends of a scarf.  I debated adding a hat, too, but thought the card would look too crowded.  The sentiment makes this fit in as as love-themed card for Operation Write Home.


What will you choose – icy, hot, or something combining the two? Share your work with us at the Cards in Envy site by 6:00 p.m. Central Time on Sunday, January 5, 2014.  (Because of the holiday season, there’s an extra week to participate!) Be sure to check out what the rest of the design team has made and give them some blog love, too! Thanks for stopping by today!

Supplies:
Stamps: Here’s the Scoop (Lawn Fawn); Snowman (Basic Grey)
Cardstock: Pure Luxury White (Gina K. Designs); Basic Black, Soft Sky, Certainly Celery, Daffodil Delight, Crushed Curry, Tangerine Tango, River Rock (Stampin’ Up)
Ink: Chocolate Chip, Tangerine Tango, Real Red (SU); Tuxedo Black (Memento)
Other: Grass border die (Sweet ‘n Sassy Stamps); Dahlia and standard circle Nestabilities dies (Spellbinders); River Rock ribbon (SU); 1/4″ hole punch

Hello!  How did it get to be December already?  Boy, the year has flown!

Since it’s the first Monday of the month, Cards in Envy is presenting a new challenge today:  “Tag, You’re It!”  Use a tag on your A2 sized card, remembering to keep the card flat enough to fit into a standard A2 envelope.  You can use a large tag or a small tag, a stamped tag or a die cut tag, so long as your card meets our challenge requirements.

Last week as I was going over my list of cards I needed to make for design team assignments, my older son reminded me that I also needed to make a card for my younger son’s birthday.  Until he mentioned it, it hadn’t dawned on me how quickly that December 1 birthday was approaching!  So my card for this challenge became my son’s birthday card.  He has liked penguins ever since he studied them in first grade, and he has commented before on how he likes one particular penguin stamp I have.  So it seemed like a no-brainer to use that stamp on his card.  The papers from Basic Grey’s Oh Baby! Boy collection work well for boys of most ages, so I’ve used a few of them here.  (One of them even shares my son’s name!)  Once again, I’ve used white cardstock covered with shimmery white paint to replicate snow.  I went through the OWH Stars & Stamps sketch archives looking for a sketch with a large rectangular panel that could be turned into a tag.  I hadn’t yet used sketch #17, so I decided to give it a try.  However, it looked better to use the mirror image of the sketch so the penguin wouldn’t seem to be looking off the edge of the card.

So now it’s your turn! Check out the Cards in Envy site for all the challenge details and to see what the rest of the design team has made. Then share your tagged creation(s) with us by 7:00 p.m. eastern time Sunday, December 15. We’d love to have you play along with us!

Supplies:
Stamps: Critters in the Snow, A Birdie Told Me, Happy Everything (Lawn Fawn)
Cardstock: Basic Gray (Stampin’ Up); Pure Luxury White (Gina K. Designs); “Matthew”, “Isaac”, and “Larkspur” designer papers from Oh Baby! Boy collection (Basic Grey)
Ink: Tuxedo Black (Memento)
Other: Frost White shimmer paint (SU); markers (Copic); grosgrain ribbon (Really Reasonable Ribbon); mini star brad (The Paper Studio)

Hello there!  I know a lot of people dread Mondays.  But today is a good one, because it’s time for a new challenge at Cards in Envy!  We have a fun one for everyone this time!  We’re calling it “Punch It”.  We want to see your punch art – artwork made from cardstock that’s been punched or die cut.  Rather than seeing a large shape used as a layer, we’d like to see main elements of your card design made from punches or dies.  As always, make sure your card is an A2 size (4.25″ x 5.5″) and is 1/4″ or less in thickness to fit in an envelope.

Over the last few years I’ve seen several cards in the Splitcoaststampers.com gallery where the card maker has used punches or dies to create the characters from Angry Birds.  I’ve always thought it would be fun to make one, and this challenge was the push I needed to go ahead and do it.  I used this particular card for inspiration and measurements.  I used the Word Window punch for the eyebrows and cut off the rounded ends.  I didn’t have a 3/8″ punch for the pupils of the eyes, and 1/4″ punches were too small and looked weird, so I used my 1/2″ punch.  For the beak, I punched a 1″ square, cut it in half diagonally, and then trimmed about 1/8″ off the hypotenuse of one triangle to get the smaller half of the beak. I had a lot of fun creating this bird, but I didn’t consider just how large it would end up being once the head and tail feathers were added.  I had it all assembled and I held it up to cardstock for the card base – and my jaw dropped (not in a good way) when I saw that it was too big to fit on a 4.25″ wide card.  Thankfully, it was just short enough to fit on a 4.25″ tall card, so I didn’t have to start all over and make a smaller bird.  I hadn’t originally planned to borrow the inspiration card’s starburst background idea, but in my state of near panic over the size of the bird, I couldn’t think of a better alternative.  After all, since the bird was going to take up most of the card front, there wasn’t but so much I could do!  To make it a little dissimilar to the inspiration card, I added some green to the bottom of the card to simulate grass.

So now it’s your turn! Check out the Cards in Envy site for all the challenge details, and share your punch art creation(s) with us by 7:00 p.m. eastern time Sunday, December 1. We’d love to have you play along with us!

Supplies:
Stamps: none
Cardstock: Poppy Parade, Whisper White, Basic Black, Daffodil Delight, Soft Sky, Baja Breeze, Wild Wasabi (Stampin’ Up)
Ink: Poppy Parade, Daffodil Delight (SU)
Other: 3.5″ standard circle Nestabilities die (Spellbinders); 1/2″ circle punch, Word Window punch (SU); 1″ circle punch, 1″ square punch (Creative Memories); heart punch (EK Success); sponge

Hello!  It’s Cards in Envy challenge introduction day, and we have a fun one this time!  We’re calling it “Say What?”, but all that means is that you choose a sentiment, quote or even a short poem to be the main focal image of your card.

I’ve decided to go with some fun spring-like papers and a birthday sentiment.  The edges of the panels have been sponged with cocoa brown ink.  The layout is OWH Stars & Stamps sketch #123.


What kind of sentiment will you choose?  Share your work with us at the Cards in Envy site by 7:00 p.m. Eastern time on Sunday, November 17.  Be sure to check out what the rest of the design team has made and give them some blog love, too!  Thanks for stopping by today!

Supplies:
Stamp: sentiment stamp (Studio G)
Cardstock: Pure Luxury White (Gina K. Designs); designer papers from Kioshi 6″ x 6″ paper pad (Basic Grey)
Ink: Close to Cocoa (Stampin’ Up)
Other: flowers (Prima Marketing); flower brad (Making Memories); sponge

Hi there!  It’s Cards in Envy challenge introduction day!  Our challenge for the next two weeks is “In the Spotlight” – showcasing cards that use the spotlight technique, where a part of a black and white image is popped up with color.  There’s a terrific tutorial for it here on the Splitcoaststampers.com website.

My image technically is grey and white, but it gives the same idea.  Actually I guess you could use any color ink for this technique, so long as you only spotlight a part of the image with full coloring.  I used a couple of square punches for my spotlight.  A lot of people tend to use circles and I wanted to do something a little different.  The layout for my card is Seize the Sketch #6.  This card also fits into the SCS “Scene of Serenity” Hope You Can Cling To challenge.

If you need additional inspiration, please go check out the Cards in Envy site and see what the rest of the design team has made.  What will you create with this technique?  Share your work with us on the Cards in Envy site by 7:00 p.m. Eastern time Sunday, November 3.  We’d love to have you play along with us!

Supplies:
Stamps: Changing Seasons (Stampin’ Up); Christmas Tags (Sweet ‘n Sassy Stamps)
Cardstock: Smoky Slate, Real Red, Basic Gray, Naturals White (SU)
Ink: Basic Gray, Real Red (SU)
Other: Premier colored pencils (Prismacolor); square punches (EK Success and Creative Memories)

Hello!  It’s the first Monday of the month, which means it’s time for a new challenge at Cards in Envy.  This time we’re getting into an October mood with Halloween cards – whether they are scary, creepy, silly or fun, anything that’s Halloweenish and is A2 sized and fits in a standard A2 envelope will work for this challenge.

I’ve always tended to focus on the fun aspects of Halloween – dressing up in costume and trick or treating.  I have to admit I’ve never much been a fan of skeletons and the Grim Reaper and the darker side of Halloween.  So in browsing through my stamps, I finally settled on creating a black cat wearing a witch’s hat.  The cat and the hat were stamped on a scrap piece of white cardstock, colored with Copics, and fussy cut, and then I attached the hat onto the cat’s head.  I used the current sketch from Seize the Sketch for the layout, turning the sketch on its side.  To make the banner tails match up evenly, I put all three layers together with temporary adhesive and cut them all at the same time.  The temporary adhesive allowed me to detach them and realign them, using permanent adhesive the second time.

I just realized that the dimension of the banner combined with the camera angle make it look like the black mat isn’t cut evenly where the banner meets it.  Trust me, it’s all even in real life.

So now it’s your turn!  Check out the Cards in Envy site for all the challenge details, and share your Halloween creation(s) with us by 7:00 p.m. eastern time Sunday, October 20.  We’d love to have you play along with us!

Supplies:
Stamps: Critters in the ‘Burbs, Hats Off to You (Lawn Fawn); Sweet & Spooky (Lizzie Anne Designs)
Cardstock: Pumpkin Pie, Basic Black, Whisper White, Razzleberry Lemonade designer series paper (Stampin’ Up)
Ink: Tuxedo Black (Memento)
Other: markers (Copic); dimensionals (SU)

Hello!  Since it’s the third Monday of the month, it’s time for a new Cards in Envy challenge!  The theme for the next two weeks is “A Little Bit Retro”.  Anything that reminds you of roughly the 1940s through the 1980s is fair game.  Remember, though, that the main requirement for Cards in Envy challenges is that your card must fit in an A2 sized envelope and not have any lumpy, bumpy embellishments that could push it over the first class postage rate.

I didn’t have any stamps or digital images that seemed to fit the retro theme.  Vintage, yes.  Retro, no.  So I looked through my designer papers and felt the Basic Grey “Offbeat” collection best represented a retro look.  I pulled out a few papers, coordinated some Stampin’ Up cardstock with them, and fit them into this week’s layout from Freshly Made Sketches.  Here’s the end result.

The rounded “blob” shapes in the one designer paper remind me a bit of the lava moving around in a lava lamp.  Groovy, huh?  And there’s some of the avocado green that seemed to be everywhere during the 1970s.

So what will you create with a retro flair?  Share your work with us at the Cards in Envy site by 11:55 p.m. Central time on Sunday, October 6.  Be sure to check out what the rest of the design team has made and give them some blog love, too!  Thanks for stopping by today!

Supplies:
Stamps: Birthday Greetings (Gina K. Designs)
Cardstock: Summer Starfruit, Early Espresso, Whisper White (Stampin’ Up); designer papers from Offbeat 6″ x 6″ paper pad (Basic Grey)
Ink: Early Espresso (SU)
Other: corner rounder punch (SU); mini brads (Recollections); circle punch (Creative Memories)

Good morning!  It’s the first Monday of the month, which means it’s time for a new challenge at Cards in Envy!  This time we’re being challenged to make manly, masculine cards to be sent to the men in our lives.  Remember, though, that the main requirement for Cards in Envy challenges is that your card must fit in an A2 sized envelope and not have any lumpy, bumpy embellishments that could push it over the first class postage rate.

I’ve used the challenge to make another card for my Operation Write Home stash.  Occasionally I need a gentle reminder that some of our heroes stationed overseas may be women wanting to send cards home to their husbands or fiancés, or that sometimes the men want to send cards home to their dads, brothers, or any other important man in their lives.  So this challenge was a good nudge for me to create something suitable for a hero to send home to a man.

My husband has always loved trains, so I thought the vintage train image was a good start for my masculine card.  I looked through the OWH sketch library for a layout that would work with this image.  Sketch #46 fit the bill, and when I consulted my checklist of OWH sketches, I hadn’t used it before, so hooray, I can check it off now!  The designer paper has a kind of rustic look to it that I thought fit well with the theme.  I tried several different shades of blue and liked this one the best.  I decided to emboss the image with copper embossing powder.  I wanted to use the copper brads as an embellishment.  As far as brads go, these are pretty flat.  I originally considered making a row of them on the blue, above the image panel.  But I decided to add a sentiment to the card, and used the brads in the corners instead.  I also embossed the sentiment – which probably would have turned out better if it had been a larger font,  but I suppose it isn’t too bad.  Unfortunately, I had a hard time getting it to be legible in a photo.


Be sure to check out the Cards in Envy site for all the challenge details and to see what the rest of the design team has created!  Then create a manly card of your own and share it with us using the linky tool on the site.  You have until Sunday, September 15 to play along with us!

Supplies:
Stamps: All Aboard, Three Little Words (Stampin’ Up)
Cardstock: Naturals Ivory, Midnight Muse, Spring Showers designer series paper (SU)
Ink: Champagne (Encore)
Other: copper brads, dimensionals (SU); copper embossing powder (Ranger)

Hello!  Today I’m excited to announce that I was recently invited to join the Design Team at the Cards in Envy challenge blog!  The main objective of Cards in Envy is “making cards that fit in envelopes” – in other words, creating A2 sized cards with no lumpy, bumpy embellishments, that can be mailed without additional postage.  Since this fits in so well with the cards I make for Operation Write Home, it was pretty much a no-brainer for me to accept the invitation!

So the challenge being introduced today is my first challenge as part of the CIE Design Team.  The challenges are presented on the first and third Mondays of each month, so there is plenty of time to join in!  This time, the challenge theme is “For the Birds”, which means the cards have to have at least one bird on them.

I’ve had this mailbox image stamped and colored and sitting on my desk for probably about a year.  Yes, really.  I’m fairly certain it started out as an idea for a card to fulfill some crafty challenge.  It was on a die-cut oval.  I figured since I haven’t used it in that form for so long, maybe I needed to do something else with it.  So I looked through the OWH Stars and Stamps sketches for a sketch I hadn’t yet used that had a space on it large enough to accommodate the mailbox.  I started with Sketch #1, and scored with Sketch #30.  I turned the sketch on its side.  I drew the sidewalk (no comments from the peanut gallery about my drawing skillz, please, LOL!) and used a light shade of blue to sponge in some sky.  The bird and envelope were stamped on scrap cardstock, colored, and fussy cut.  Then I fussy cut the mailbox from the oval background and attached it to its new background.  I added the envelope, and then I used dimensional adhesive to attach the bird.  Although it doesn’t really show in the photo, the red strip in the background is textured cardstock.  The sentiment is one that I think works really well for OWH cards.

So now it’s your turn!  Check out the Cards in Envy site for all the challenge details, and share your birdie creation(s) with us by Sunday, September 1.  We’d love to have you play along with us!

Supplies:
Stamps: You’ve Got Mail (Lawn Fawn)
Cardstock: Brilliant Blue, Basic Black, Real Red Core’dinations (Stampin’ Up); Pure Luxury White (Gina K. Designs)
Ink: Tuxedo Black (Memento); Soft Sky (SU)
Other: markers (Copic); dimensionals (SU); sponge

I’ve combined Dynamic Duos color challenge #63 with the current Freshly Made Sketches layout for today’s card.  I did take the liberty of turning the sketch on its side.  It doesn’t show well in the photo, but the two little banners have been stamped with a subtle linen design. The layers make this card eligible for the current Cards in Envy challenge, too.

And there’s another any occasion card for my Operation Write Home stash.

Thanks for stopping by today!  As always, all comments are read and appreciated!

Supplies:
Stamps: Punny Fruits & Veggies (Sweet ‘n Sassy Stamps); Linen (Stampin’ Up)
Cardstock: Pure Luxury Ivory (Gina K. Designs); River Rock, Pear Pizzazz, Garden Green, Spice Cake designer series paper (SU)
Ink: Tuxedo Black (Memento); Pear Pizzazz (SU)
Other: markers (Copic)

Wow – where has July gone?  It’s hard to believe the month is almost over – which means that my month of hosting the challenges at 52 {Christmas} Card Throwdown is nearly over, too.  I’ve had a lot of fun creating the challenges this month.

This week’s challenge is really kind of a cross between an embellishment and a technique challenge.  We’d like to see stitching on your cards!  You may use hand sewing, machine sewing, or use a marker or pen to draw some faux stitches on your card.  So long as we can easily see your stitching, it’s good – although we really would love to see something more creative than simply sewing on a button, ok?  🙂

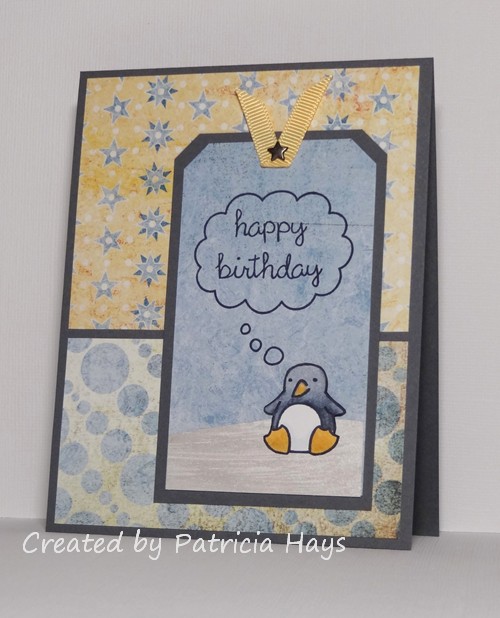
I will admit I went a little overboard on my card for the challenge.  I’ve dabbled in various crafts pretty much my entire life.  Between my teens and late twenties, until I had a curious toddler who loved to crawl into my lap, I enjoyed counted cross stitch.  Unfortunately, needles and little boys don’t mix very well, so I had to put my stitching things away.  I decided to give it a go again for this card.  I wasn’t able to find all of my old patterns, but I did come across a design for a wreath that didn’t look too complicated.  I have been pleasantly delighted to discover that many of the colors of embroidery floss I bought back in the day coordinate well with many of my cardstock colors!  So I chose a shade of green that is a color match for Wild Wasabi, added in the floss shade that was just one color number away from it, and picked a bright red that works with Real Red.  And after a little while, I ended up with this card:

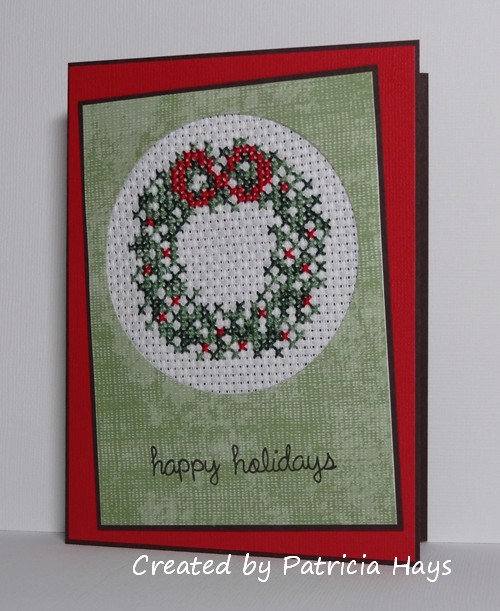
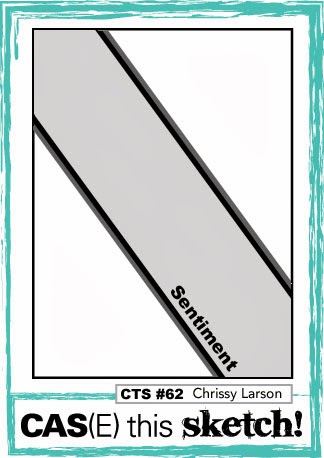
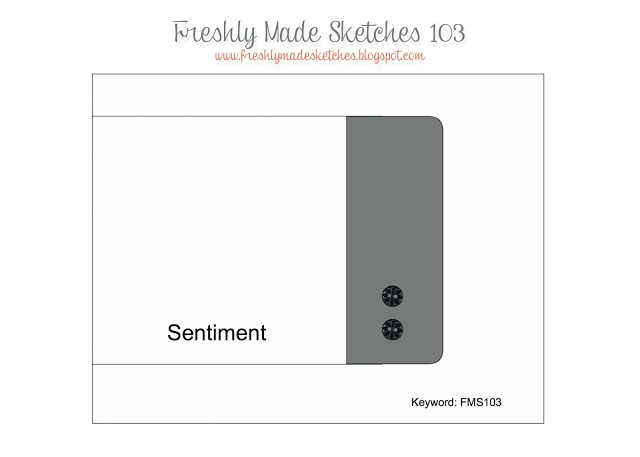
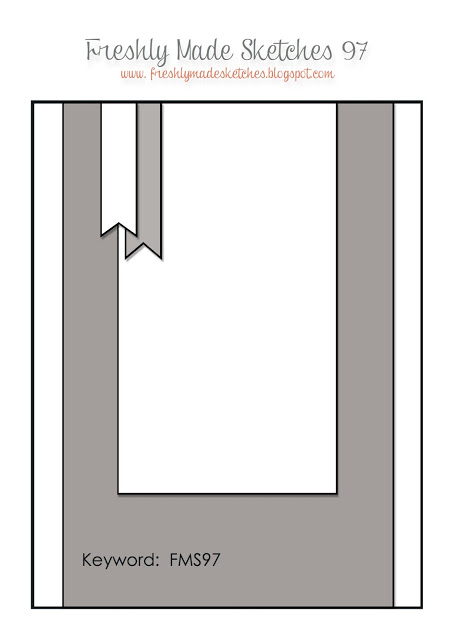
I was aiming for the 52{C}CT July sketch layout again, but the size of the panels was too large to allow the tilted panel to be put far enough askew to show underneath the focal panel.  So I decided to just tilt the focal panel and call it done.

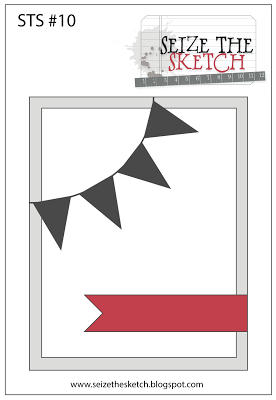
Here’s our challenge graphic:

The stitching makes this card fit into the OWH/Our Daily Bread Designs July challenge – and this card is actually quite flat and very do-able for OWH!  I’m also including it in the layers challenge at Cards in Envy.

And now it’s your turn to show us what you can create!  We’d love it if you joined our challenge this week.  You have until 1:00 pm Eastern time Friday, August 2 to link your card at the 52{C}CT site.

Thanks for stopping by today!  I hope you’ll come back again soon.

Supplies:
Stamps: Happy Everything (Lawn Fawn)
Cardstock: Early Espresso, Real Red Core’dinations, Afternoon Tea designer series paper (Stampin’ Up)
Ink: Early Espresso (SU)
Other: embroidery floss (DMC); 11-count Aida cloth (Charles Craft)

Hello!  The month of July seems to be flying by.  It’s hard to believe it’s the 20th already!

Over at 52 {Christmas} Card Throwdown, the challenge hostess gets to choose either a theme challenge or a recipe challenge for the third Saturday of the month.  I’m hosting this month, and I’ve decided to cook up a recipe challenge.  Don’t worry, it’s easy as 1, 2, 3!  That means using 1 ribbon, 2 patterned papers, and 3 gems on your card.

I’ve stayed with the 52{C}CT July sketch for the layout of my card, but turned it on its side.  For the one ribbon requirement, I made a tiny fork bow with the toddler fork my son used when he was little, and used it to dress up the larger penguin.  One of my designer papers is the falling snow design on the focal panel, and the other is the red snowflake pattern on the middle panel.  I’ve added a tiny pearl to the center of each of the three stamped snowflakes.  And there it is – 1, 2, 3!  I used shimmer paint on the white cardstock to make it look like light glistening on the snow.   It’s not one of my best coloring jobs on the penguins, but oh well.

This card fits into several other current challenges, too – the OWH Midweek Throwdown “Christmas in July” challenge, the Cards In Envy layers challenge, and the Merry Monday “Anything Christmas Goes” challenge.

I do have to acknowledge and thank my 14-year-old son for the input he gave on this card.  He preferred the look of pearls to rhinestones.  He also tickled my funny bone with his comments about the smaller penguin:  “That is THE most thoughtful penguin ever.  He has such a thoughtful look on his face.  It’s like he’s looking at nothing, but he sees everything.” 🙂

OK – that about wraps things up for this post!  Thanks for stopping by today!  Be sure to check out the samples the rest of the 52{C}CT design team has made.  Then go try the recipe yourself!  You have until 1:00 p.m. eastern time Friday, July 26 to link your card to the challenge post on the 52{C}CT website.

Supplies:
Stamps: Critters in the Snow, Pa-Rum-Pa-Pum-Pum, A Birdie Told Me (Lawn Fawn)
Cardstock: Baja Breeze, Basic Black (Stampin’ Up); Pure Luxury White (Gina K. Designs); designer papers from Fa La La collection petite paper pack (Lawn Fawn)
Ink: Tuxedo Black (Memento); Baja Breeze (SU)
Other: Frost White shimmer paint (Tsukineko); markers (Copic); ribbon (Offray); half pearls (KaiserCraft)

© 2019 Suffusion theme by Sayontan Sinha