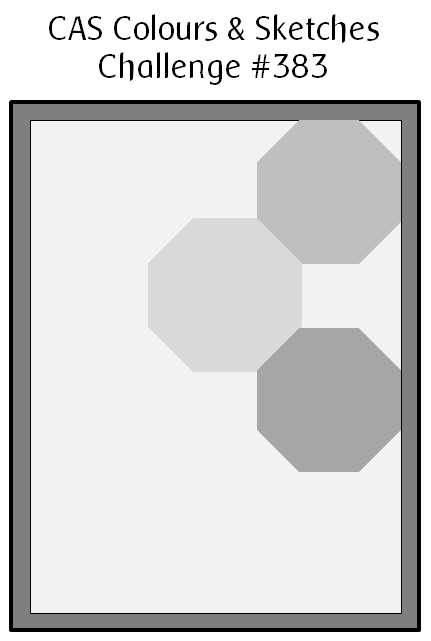
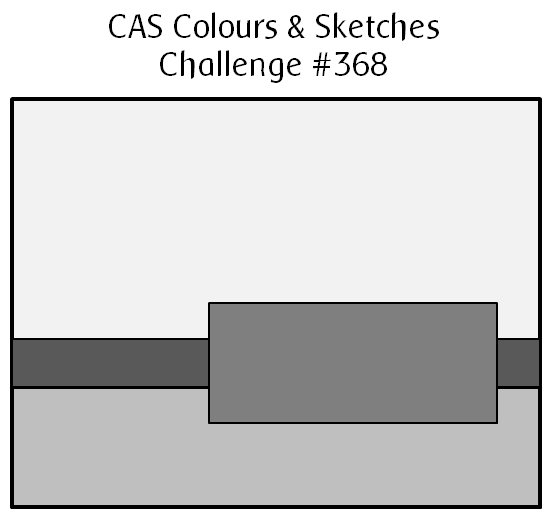
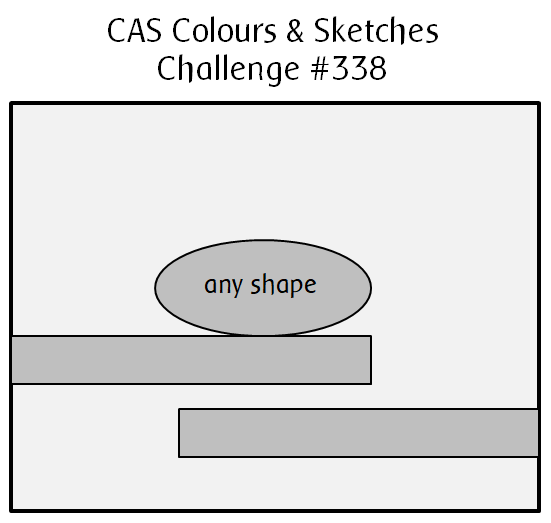
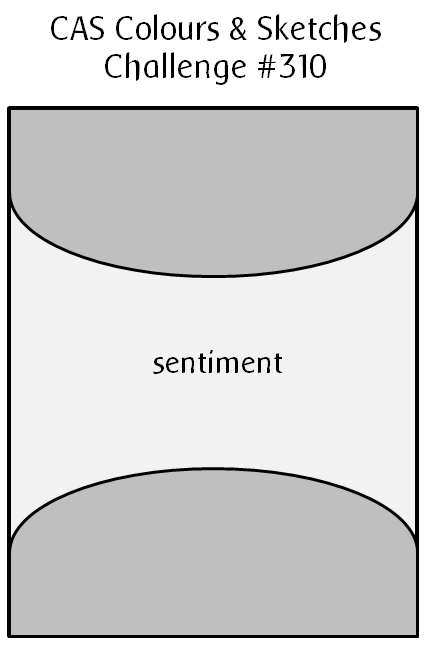
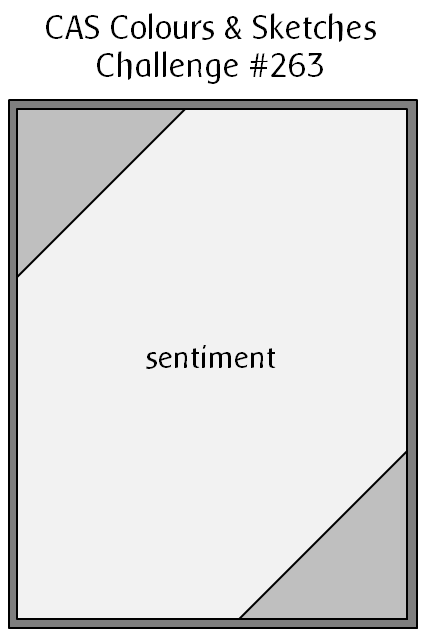
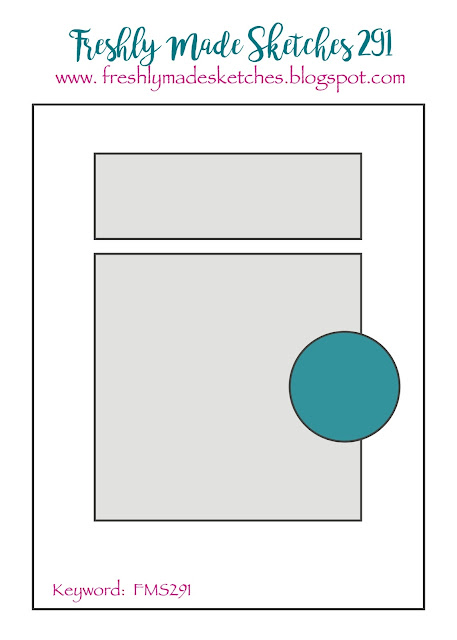
Hello there!  It’s time for the first sketch challenge of the month at CAS Colours & Sketches.  I think a lot of different variations can be done with the tag-like shape, and I’m looking forward to seeing what our challenge participants do with it!

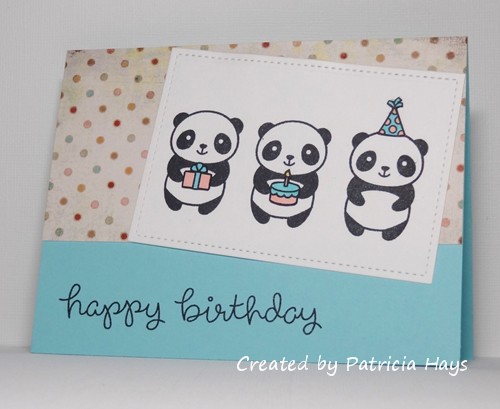
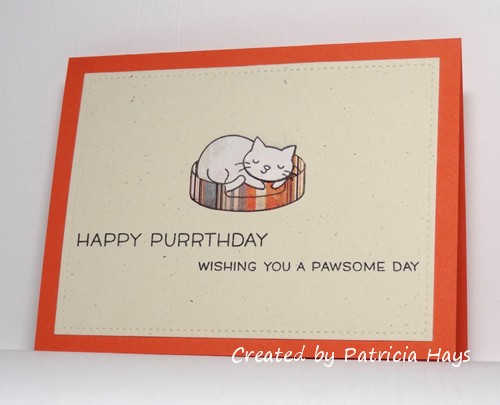
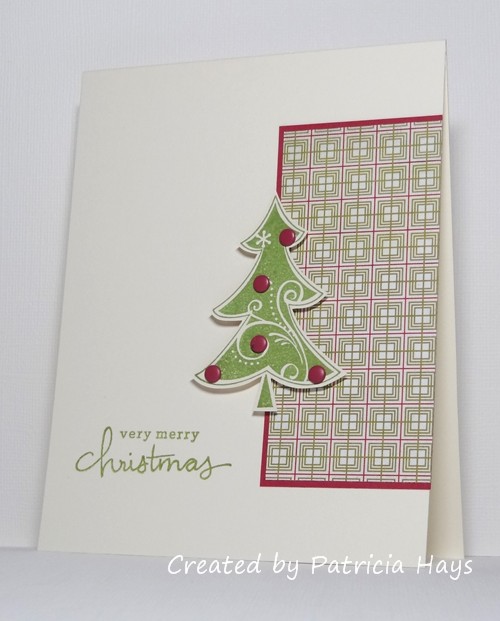
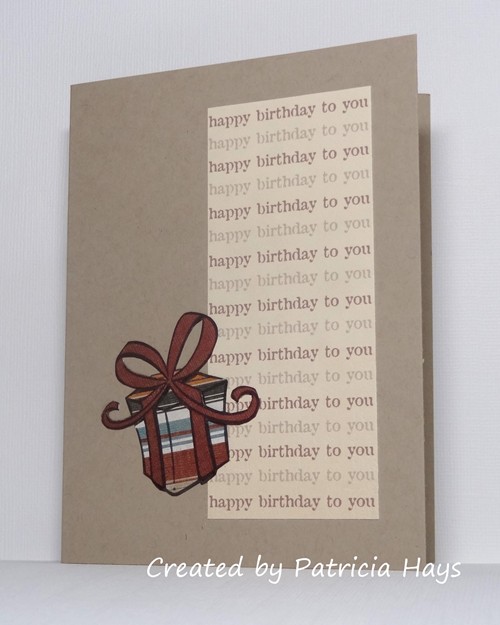
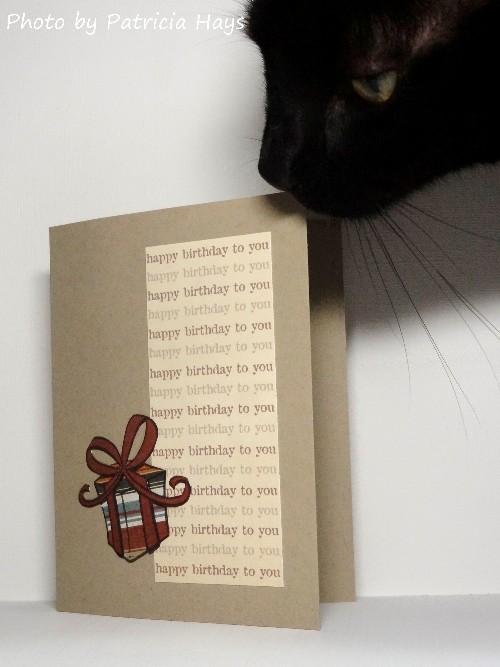
I needed to make a birthday card for my brother-in-law, and the sketch fit the bill perfectly.  I knew I wanted to use this image of a gift.  Even though it comes from a Christmas-themed stamp set, it works fine for birthday presents, too.  I stamped it onto two different designer papers, fussy cut it, and pieced it together.  It’s pretty fiddly to fussy cut around the bow and each time I do it I mentally ask myself why I continue to do it, LOL, but I do like the way it turns out.  I had a tall, narrow strip left over from some digital designer paper I had printed years ago.  Just a little bit of trimming made it the right size for the sketch.  Because it’s a repetitive text print, I didn’t think I needed to include a sentiment.  It also qualifies this card for the current challenge at Inkspirational

I had a furry, four-legged shadow while I was working on the card and photographing it.  I warned him that if he didn’t back off, he’d get his picture taken, too.  He didn’t seem to care.  Silly kitty.

What will you do with this sketch?  I hope you’ll try out something and share what you create with us!  Link your work to the CAS Colours & Sketches blog by 6:00 p.m. Eastern time Monday, September 19.  Thanks for stopping by today!

Supplies:
Stamp: Bows and Holly (Lawn Fawn)
Cardstock: Crumb Cake (Stampin’ Up); scraps from Pyrus 6″ x 6″ paper pad (Basic Grey); Vintage Birthday digital designer paper (Lizzie Anne Designs)
Ink: Tuxedo Black (Memento); printer ink

Hello there!  We have a sketch challenge opening up today at CAS Colours & Sketches.

I took a bit of liberty with the sketch by flipping it mirror image and by changing the shapes from octagons to hexagons and enlarging one of them.  I originally planned to use die-cut hexagons but for some reason that didn’t seem CAS enough to me.  So I used the cardstock from which I’d cut them as stencils and brushed ink into place on the main card panel.  I glued the die-cut snowflakes over the stenciled hexagons.  The larger snowflake was die-cut twice and stacked for a little more dimension.  I wasn’t sure what sentiment I wanted to use so I decided to just leave one off.  I might add one later, but really there’s no reason the card *needs* one.  The card still seemed a little plain, so I went digging through my embellishments and found a half-pearl in just the right color and size to adorn the largest snowflake.

I hope you’ll go see what the rest of the CC&S design team and our August guest designer have done with this sketch. Then make a card of your own and share it with us by 6:00 p.m. Eastern time Monday, August 17. Thanks for stopping by today!

Supplies:
Stamps: none
Cardstock: Soft Sky (Stampin’ Up); Curious White (Cryogen)
Ink: Soft Sky (SU)
Other: Stitched Snowflakes dies (Lawn Fawn); hexagon Nestabilities dies (Spellbinders); half pearl (Basic Grey)

Hello there!  It’s time for the last CAS Colours & Sketches sketch challenge for the month of July.  If you go to the challenge site and check out the design teams’ sample cards, you’ll see that we’ve represented the circular element of the sketch in a lot of different ways!

I had “Christmas in July” in the back of my mind, I think, because I’ve chosen to make a Christmas card.  I used one of my favorite snowflake dies to cut a snowflake from shimmery cardstock for the circular element.  I paired a snowflake print patterned paper with a scrap of very subtly patterned paper in a coordinating color for the horizontal striped part of the sketch.  I decided to stamp the sentiment with grey ink because black seemed like it would contrast too harshly with the soft minty colors.  I’ve used linen textured cardstock for the card base so it wouldn’t look quite so plain, but I’m not sure how well that shows in the photo.  I toyed with the idea of adding a rhinestone to the center of the snowflake but in the end decided to leave it as it was.

What will you do with this sketch?  I hope you’ll try out something and share what you create with us! Link your work to the CAS Colours & Sketches blog by 6:00 p.m. Eastern time Monday, August 3.  Thanks for stopping by today!

Supplies:
Stamp: Merry Messages (Lawn Fawn)
Cardstock: Solar White Classic Linen (Neenah); Cryogen White (Curious Metallic); patterned papers from Aspen Frost 6″ x 6″ paper pad (Basic Grey)
Ink: Going Gray (Stampin’ Up)
Other: Stitched Snowflake die (Lawn Fawn)

At CAS Colours & Sketches we have one last sketch challenge for the month of May.  It’s one that leaves some openness for interpretation, so it’ll be fun to see what our challenge participants make with it!

This monster was intended for a card a few weeks ago for a different challenge, but I didn’t like the way that card was shaping up so I stopped before gluing him to a card.  I stamped him on a piece of designer paper, fussy cut him, and then colored his spiny spikes and his teeth with markers.  I had coordinating scraps of designer paper that fit the background elements of this week’s sketch, so I decided to go ahead and use the monster now.  I took the liberty of squashing the sketch into a landscape-oriented card so that I had enough room for the sentiment.  I know it’s the same sentiment I used on last week’s card, but it still makes me smile.

I hope you’ll go see what the rest of the CC&S design team and our May guest designer have done with this sketch. Then make a card of your own and share it with us by 6:00 p.m. Eastern time Monday, June 1. Thanks for stopping by today!

Supplies:
Stamps: Little Monsters (Lizzie Anne Designs)
Cardstock: Soft Sky (Stampin’ Up); scraps from Phoebe 6″ x 6″ paper pad (Basic Grey)
Ink: Early Espresso (SU)
Other: markers (Copic)

It’s the last Tuesday in April, which means it’s the last week for a while that I’ll be hosting the challenges at CAS Colours & Sketches.  I’ve enjoyed seeing what our challenge participants have done with the ideas I came up with for our April challenges.  This week there’s a sketch to follow.

I’ve turned the sketch clockwise on its side to create a vertically formatted card.  I chose designer paper with flowers that coordinated pretty well with the stamp image I wanted to use, and picked a few scraps of solid color cardstock that went with the colors in the designer paper.  After I stamped the image on the solid green cardstock, I decided I’d add a little textural interest by attaching a Prima flower over the petals of the stamped flower.  I didn’t have a Prima in the right shade of red, so I colored an ivory one with Copic markers.  Then that looked too bold by itself, so I added a smaller ivory one on top of it, and secured the two in place with a tiny brad.  I used dimensional adhesive to attach the stamped panel to the card.  When I had the card all assembled, I felt there wasn’t quite enough visual definition between the stamped panel and the designer paper, but I knew that trying to take it apart to add a mat to the stamped panel would destroy it.  Instead, I carefully used a dark brown marker in the same color as the inked image to edge the stamped panel.  That tiny bit of brown helped a lot more than I expected, and allowed me to call the card finished.

What will you do with this sketch? I hope you’ll try out something and share what you create with us! Link your work to the CAS Colours & Sketches blog by 6:00 p.m. Eastern time Monday, May 4. Thanks for stopping by today!

Supplies:
Stamp: For a Friend (Stampin’ Up)
Cardstock: Pure Luxury Ivory (Gina K. Designs); Riding Hood Red and Pistachio Pudding (SU); scrap from Phoebe 6″ x 6″ paper pad (Basic Grey)
Ink: Early Espresso (SU)
Other: flowers (Prima); brad (Recollections); markers (Copic); dimensionals and Early Espresso marker (SU)

Hello there!  I hope you and your family are staying safe and healthy during these uncertain times.   Despite our being under stay-at-home orders, April seems to be flying by.  It’s hard for me to believe the month is nearly half over!

It’s sketch challenge week at CAS Colours & Sketches, and we have a nice little one for you this time.  It’s been a while since I made a birthday card so I went with that for my theme.  My panda stamp fit well stamped three times in the rectangular focal panel area.   I wanted to use a stitched rectangle die for that portion of the sketch and it’s a bit smaller than as shown on the sketch, but the idea of the sketch is still very evident.  I chose the colors for the party elements from the scrap of designer paper I used for the background area of the card.  In retrospect I think the card would have felt more balanced (or something like that) if I’d used the designer paper at the bottom of the card, but it’s too late to change that now.  Oh well.

What will you do with this sketch?  I hope you’ll try out something and share what you create with us!  Link your work to the CAS Colours & Sketches blog by 6:00 p.m. Eastern time Monday, April 20.  Thanks for stopping by today!

Supplies:
Stamps:  Party Panda, Party Animal (Lawn Fawn)
Cardstock:  Solar White (Neenah); Cool Caribbean (Stampin’ Up);  scrap from Blush 6″ x 6″ paper pad (Basic Grey)
Ink:  Tuxedo Black (Memento)
Other:  markers (Copic)

Hello there!  It’s sketch challenge week at CAS Colours & Sketches.

I went the easy route (for me) and did some paper piecing for the images on my card, rather than stamping and coloring.  It was a fun way to use some scraps of designer paper!  After I stamped the kitty, I stamped her head a couple more times, so that I could stack them and give her a little dimension.  After I had everything stamped I realized that the cat bed was actually shorter than the sentiment strip, which is opposite of the way the rectangular elements of the sketch are drawn, but I do think the sketch remains recognizable in my card.

What will you create with this sketch?  Share your work with us at the CAS Colours & Sketches site by 6:00 p.m. Eastern time Monday, March 16.  Be sure to check out what the other design team members have made, too!  Thanks for stopping by today!

Supplies:
Stamps: Furry Friends (Avery Elle); Meow You Doin’? (Lawn Fawn)
Cardstock: Solar White Classic Linen (Neenah); scraps from Blush 6″ x 6″ paper pad (Basic Grey)
Ink: Tuxedo Black (Memento)
Other: stitched circle die (Lawn Fawn)

Hello there!  It’s the second Tuesday of the month, which means it’s sketch challenge time again at CAS Colours & Sketches.

One of my newest stamp sets has images and sentiments that I thought worked really well with the sketch, and I had fun getting them inky for the first time.  I wasn’t in a coloring mood, so I stamped the images onto scraps of designer paper and fussy cut them.  I actually stamped the kitty’s head three times so I could stack them and give her some dimension.  The two different sentiment stamps fit in for the narrow rectangular elements of the sketch.

I chose the color for the kitty in honor of one of the cats in our neighborhood who occasionally visits our yard.  We haven’t seen her in a while so I hope she’s safe somewhere.  She’s all white and our cat is all black, so seeing the two of them is like a study in contrast, LOL.  (Photo credit goes to my younger son.)

Thanks so much for stopping by today! I hope you’ll make a card with this sketch and share it with us at CC&S. You have until 6:00 p.m. Eastern time Monday, September 16 to link your card at the challenge site.

Supplies:
Stamps: Meow You Doin’? (Lawn Fawn)
Cardstock: Tangerine Tango, Naturals Ivory (Stampin’ Up); scraps of designer papers from Ambrosia 6″ x 6″ paper pad (Basic Grey)
Ink: Tuxedo Black (Memento)
Other: Stitched Rectangle die (Lawn Fawn)

Hello!  It’s the second Tuesday of the month, which means it’s sketch challenge time at CAS Colours & Sketches.  Other shapes can be substituted for the sunshine element drawn on the sketch, but we would like for you to keep the triangular areas as triangles.

I’ve flipped the sketch mirror image for my card because I wanted to use this cute bunny stamp and he looked better facing the opposite direction from the way the sketch was drawn.  I chose some designer paper that had some neutral colors in it that would be easy to match to the base cardstock and to color for the bunny.  I stamped the bunny on a scrap of white cardstock, colored him, cut him out, and attached him to the card with dimensional adhesive so the card wouldn’t feel quite so flat.

Thanks so much for stopping by today! I hope you’ll make a card with this sketch and share it with us at CC&S. You have until 6:00 p.m. Eastern time Monday, May 20 to link your card at the challenge site.

Supplies:
Stamps: My Silly Valentine (Lawn Fawn)
Cardstock: Sahara Sand (Stampin’ Up); Solar White (Neenah); designer paper from Papyrus 6″ x 6″ paper pad (Basic Grey)
Ink: Onyx Black (VersaFine)
Other: Premier colored pencil (Prismacolor); odorless mineral spirits (Gamsol); dimensionals (Stampin’ Up)

Hello there!  It’s time for another sketch challenge at CAS Colours & Sketches.

I’ll admit my card didn’t turn out exactly the way I’d envisioned it in my mind, but I suppose it’s okay and that the sketch can be seen easily enough in it.  I deviated a bit from the simple curved lines, turning the bottom one into ground for my two animal friends, and turning the top one into a cloud-shaped speech balloon.  I moved the sentiment up into the speech balloon, but I think the animals help to fill in the middle area where the sentiment is indicated on the sketch.  I did get to use up some scraps for this card – in fact, even the card base was the leftover piece remaining in my cardstock folder from an earlier card.

And there ya have it.  We’d love to have you join in our challenge at CC&S!  You have until 6:00 p.m. Eastern time Monday, March 4 to link your card at the challenge site.  Thanks for visiting today!

Supplies:
Stamps: Furry Friends (Avery Elle); So Much to Say (Lawn Fawn)
Cardstock: Soft Sky (Stampin’ Up); Cryogen White (Curious Metallic); scraps from Ambrosia and Green at Heart 6″ x 6″ paper pads (Basic Grey)
Ink: Tuxedo Black (Memento)
Other: Speech Trio die, Landscape Trio die (Mama Elephant)

Hello there!  It’s time for the last CAS Colours & Sketches challenge of 2018, and we’re closing the year out with another seasonal challenge.  This week we’d like for our participants to choose one of our sketch challenges from 2018 and make a festive card with it.

I didn’t reach too far back in the archives in choosing challenge #293 for my card.  I picked this sketch because I had this tree stamped on a piece of cardstock sitting on my desk for I’m not sure how long, and I decided it would fit well into this sketch after I fussy cut it.  Although the tree image is pretty symmetrical, I don’t consider it to be a geometric shape (such as a circle or diamond or square).  I had a scrap piece of designer paper that matched the green ink I’d used, and it also fit well into the sketch with just a little trimming.  I matted it with a scrap of dark rose cardstock since that seemed to match the designer paper better than a true red.  After I attached that to the card base, I added a festive sentiment.  I used dimensional adhesive to attach the tree to the card so it would have more actual and visual separation from the patterned background.  As fate would have it, I also had enamel dots in the rose color so I used them as ornaments to decorate the tree.

CASCAS302

CC&S sketch 302-001

sketch 293

We’d love to have you join in our challenge at CC&S!  Check out the Past Sketch Challenges tab, pick one of the sketches from 2018, and make a holiday card.  You have until 6:00 p.m. Eastern time Monday, December 17 to link your card at the challenge site.  Thanks for visiting today!

Supplies:
Stamps: Season of Joy, Endless Wishes (Stampin’ Up)
Cardstock: Pure Luxury Ivory (Gina K. Designs); Rose Red (SU); scrap from Aspen Frost 6″ x 6″ paper pad (Basic Grey)
Ink: Pear Pizzazz (SU)
Other: enamel dots, dimensionals (SU)

Hello there!  It’s sketch challenge week at CAS Colours & Sketches.

I’ve turned the sketch on its side for my card.  I’m still working on a few more Mother’s Day cards to send to Send a Smile 4 Kids, and I hadn’t used this simple but sweet stamp for a long time.  I found a scrap of designer paper that had flowers similar to the ones on the stamp and used that for the triangular elements of the sketch, adding a die cut scalloped edge to them.  I used colored pencils to color the flowers in the sentiment, but I chickened out on coloring the letters.  I felt like none of my purple pencils really matched the purple card base very well to use them in an area as large as the letters.

CASCAS263

sketch 263

I have to confess that it isn’t one of my favorite cards I’ve ever made, but I think it’ll be all right for SAS4K.  Plus, since it doesn’t specifically say “Mother’s Day”, it could also be used as a birthday card that a child could give to his or her mom.  Yay for versatility!

What will you do with this sketch?  I hope you’ll try out something and share what you create with us!  If you need more inspiration, check out what the rest of the CC&S Design Team has made.  Then link your work to the CC&S blog by 6:00 p.m. Eastern time Monday, March 19.  Thanks for stopping by today!

Supplies:
Stamp: It’s Good to be Queen (Lizzie Anne Designs)
Cardstock: Perfect Plum (Stampin’ Up); Solar White (Neenah); scrap from Kioshi 6″ x 6″ paper pad (Basic Grey)
Ink: Tuxedo Black (Memento)
Other: Premier colored pencils (Prismacolor); Stitched Scalloped Borders die (Lawn Fawn)

Hello there!  It’s sketch week at CAS Colours & Sketches and we have a nice little one for you with some simple shapes.

As I was looking through my stamps, trying to figure out how to use the oval shape in the sketch, I came to a set that has several speech balloons.  I decided it would be fun to use one of them for the oval, but realized then I’d need something to be speaking.  So I added a couple of cute little birdies to dress up the sketch a bit.  I picked out designer paper for the stripes of the sketch.  I had coordinating scraps that were just the right size for the speech balloon and the birds, so I stamped them and fussy cut them to add to the card.  The bird on the left is attached with a pop dot to give a little dimension to the card.  As I was getting ready to take the photo of the card, I thought it needed a little something extra, so I made a literal last-minute decision to round the bottom right corner of the card to echo the shape of the speech balloon.  It’s a tiny detail but I think it does perk up the card.

CASCAS231

sketch 231

What will you do with this sketch?  There are so many possibilities!  I hope you’ll try out something and share what you create with us!  Link your work to the CAS Colours & Sketches blog by 6:00 p.m. Eastern time Monday, July 17.  Thanks for stopping by today!

Supplies:
Stamps: A Birdie Told Me, Sophie’s Sentiments (Lawn Fawn)
Cardstock: Soft Sky (Stampin’ Up); designer papers from Kioshi 6″ x 6″ paper pad (Basic Grey)
Ink: Tuxedo Black (Memento)
Other: dimensionals (SU); corner rounder (EK Success)

I have a quick post today to share a card made for an important man in my life – my dad.  He’ll be celebrating his birthday this weekend, and I’ll be lucky enough to visit with him on his special day.  He’s not one to turn down ice cream when it’s offered to him, LOL, so that’s why I thought he’d like the cute little ice cream cone.

FMS291

I’m combining several challenges here:  Less Is More, Freshly Made Sketches, AAA Cards, and The Paper Players.


Thanks for stopping by today!

Supplies:
Stamps: Here’s the Scoop (Lawn Fawn); Cake & Candles (Avery Elle)
Cardstock: Pure Luxury White, Pure Luxury Ivory (Gina K. Designs); Close to Cocoa (Stampin’ Up); scraps from Blush 6″ x 6″ paper pad (Basic Grey)
Ink: Close to Cocoa (SU)
Other: birthday embossing folder (ProvoCraft)

Hello!  Today’s post is to serve as a reminder that we have a fun technique challenge going on at Christmas Card Throwdown.  We’re hoping you’ll join us in creating Christmas or wintry cards using the starburst (a/k/a sunburst) technique.

I’ve created a second card for the challenge, and I’m sharing that today.  I used four different designs from a Basic Grey collection of holiday patterned papers.  I cut them into long, narrow rectangles and then cut the rectangles diagonally to form triangles.  I sponged the edges of the triangles with cherry red ink.  I fanned the triangles out over a piece of white linen textured cardstock, letting a little of the white show between the triangles.  When I was satisfied with the arrangement, I used double-sided tape to adhere the triangles to the white base.  After trimming the excess off the panel, I attached my starburst panel to a piece of cherry cardstock, which I then attached to the pale green card base.  The ornament image covers where the points of the triangles meet; I’ve attached it with dimensional adhesive to keep the card from feeling too flat.

52CCT 02-25-2017

Thanks for stopping by today!  Remember, you have until 7:00 p.m. Eastern time Friday, March 3 to share your own starburst card at the CCT site.

Supplies:
Stamp: Delightful Decorations (Stampin’ Up)
Cardstock: Pistachio Pudding, Cherry Cobbler (SU); Solar White and Solar White Linen textured cardstock (Neenah); designer papers from “Fruitcake” collection (Basic Grey)
Ink: Cherry Cobbler (SU)
Other: ornament punch, dimensionals (SU); sponge

© 2019 Suffusion theme by Sayontan Sinha