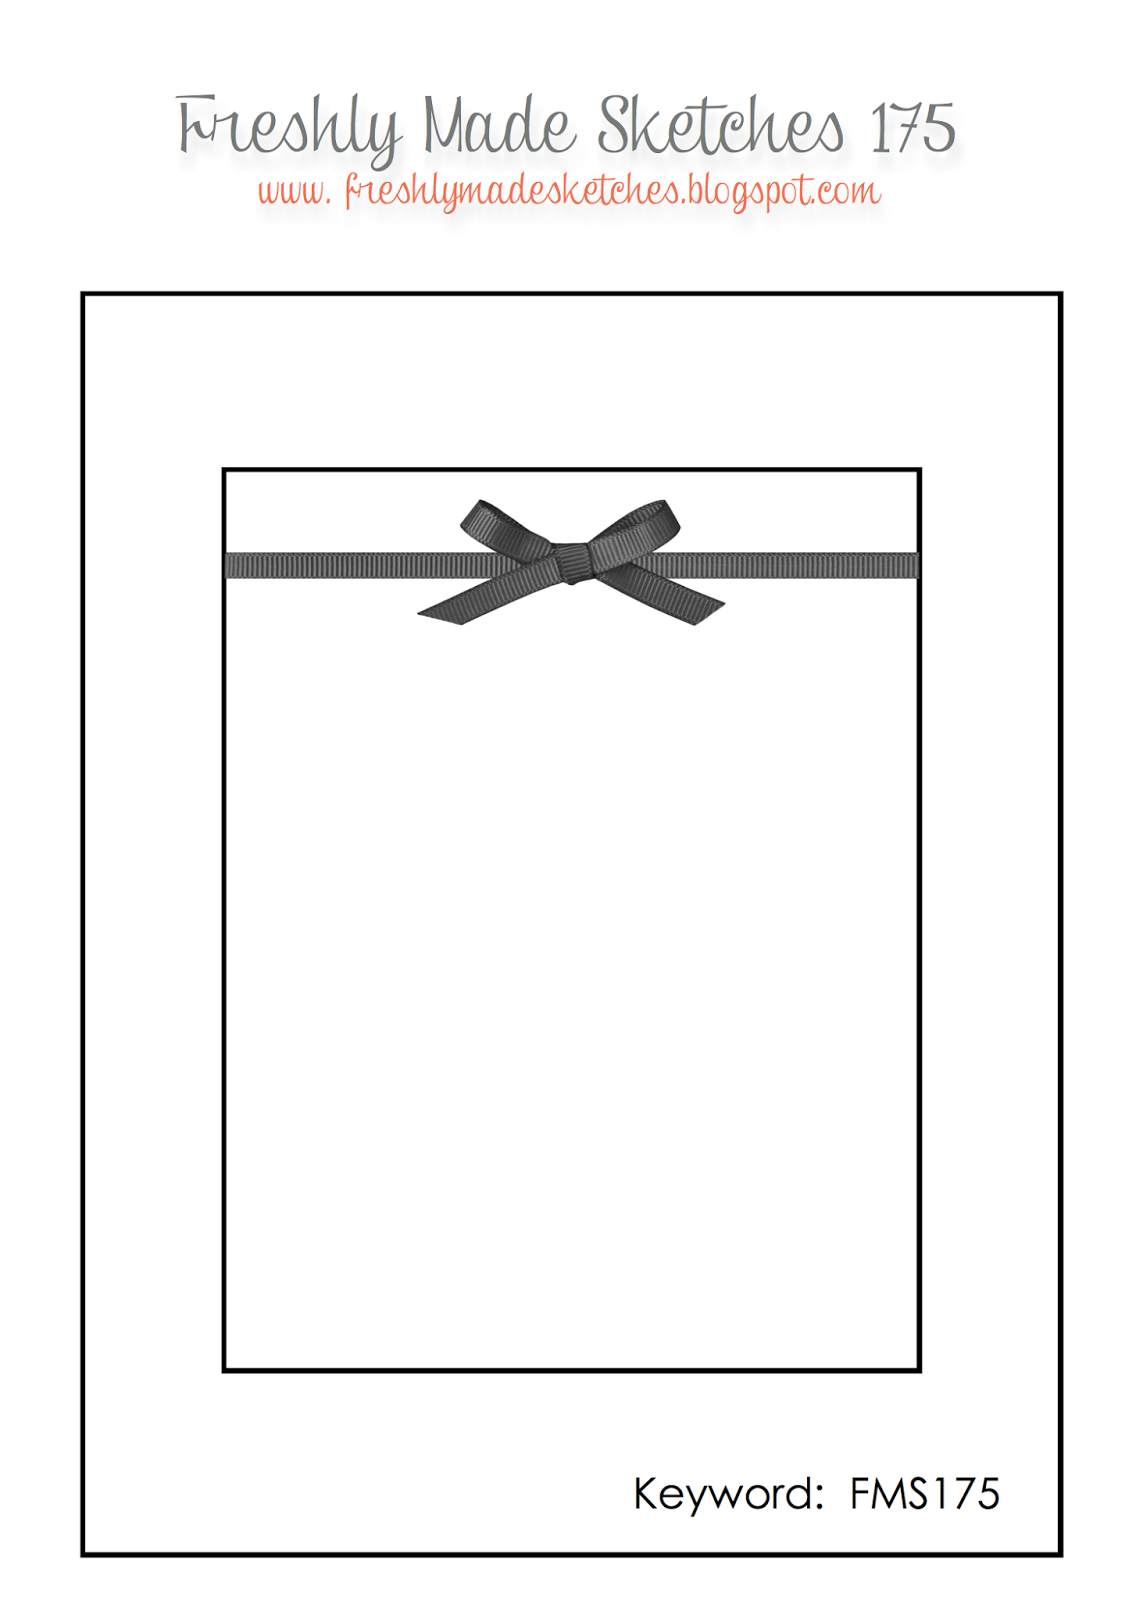
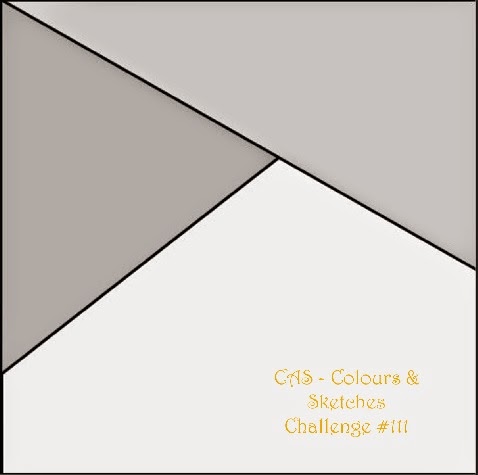
Hello!  It’s time for another sketch challenge at CAS – Colours and Sketches!   As always, the sketch can be rotated or flipped – so long as we can see the basic elements of the original sketch, it’s all good!

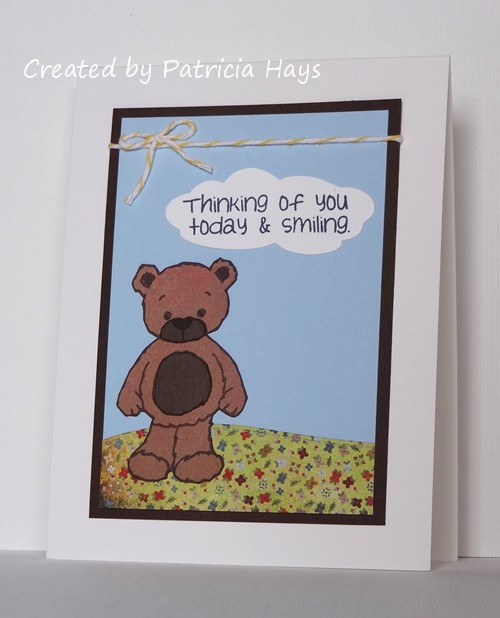
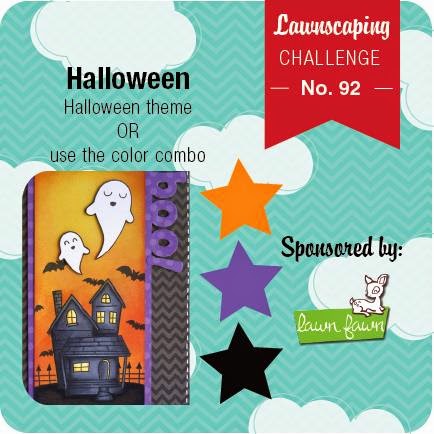
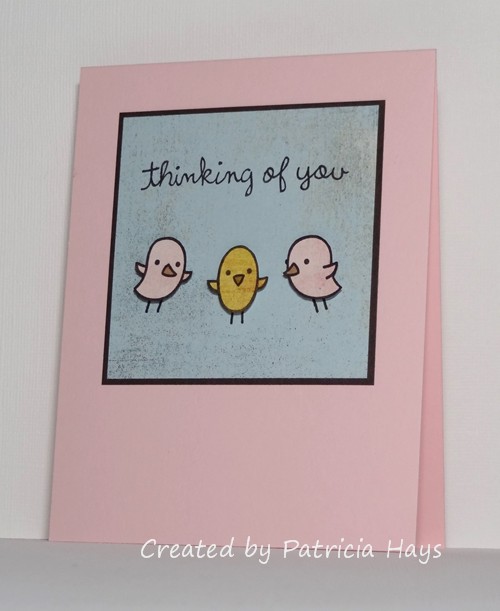
I’ve stretched the sketch out to a portrait-oriented rectangle for this card.  After a lot of thinking of various things I could use for the circular elements, I finally decided on these cute little birdies.  I stamped them onto scraps of designer paper, colored in their beaks, and fussy cut them.  I positioned them in place on the sky blue background, drew in the birds’ legs and the rightmost bird’s right eye, and then used dimensional adhesive to pop the birds up over the background. Admittedly, it’s not the most imaginative use of dimension, but it’s enough to qualify this card for the current Lawnscaping challenge.  The code word for the current challenge at Addicted to CAS is “cute”, and it’s “Clean and Simple” week at Addicted to Stamps, so I’m going to enter into those challenges, too.  And it’s a good card to add to my stash for Operation Write Home!

CASCAS119

Thanks for stopping by today!  I hope you’ll join us over at CAS – Colours and Sketches with your own take on this sketch!  You have until 7:00 p.m. Eastern time Wednesday, April 15 to link your card at the challenge website.

Supplies:
Stamps: Feathered Friends [for Simon Says Stamp]; Sophie’s Sentiments (Lawn Fawn)
Cardstock: Pink Pirouette, Early Espresso (Stampin’ Up); designer papers from Two Scoops 6″ x 6″ paper pad and Blitzen collection (Basic Grey)
Ink: Early Espresso (SU)
Other: dimensionals (SU); marker (Copic)

Hello!  I realize it seems a little strange to be talking about Christmas on the day before Easter, but really, is it wrong to be in the Christmas spirit of giving and love all year round?  I think not.

Since it’s the first Saturday of the month, it’s time for another sketch challenge at 52 {Christmas} Card Throwdown.  Our challenge hostess for the month of April is Louise, and she’s designed a sketch that’s perfect for using up scraps of designer paper or cardstock.  I have a tendency to hang on to all sorts of scraps “just in case I’ll need them sometime” – well, this card was the perfect time to use a lot of the scraps I’d been hoarding from one of my Basic Grey paper pads.  I did not cut into any whole sheets of designer paper for this card. (For that matter, even the card base was left over from another card.)  I did take the liberty of stretching the sketch out to a rectangle and turning it onto its side.  The sentiment from one of my older stamp sets fit nicely in one block. I drew in some faux cross stitching to connect the different designer papers, tying this card into the current Shopping Our Stash challenge.  As I was moving some things on my desk earlier this week, I found these dyed Prima flowers that were left over from a card I’d made quite a while back.  The color matched nicely for this card, so I decided to add them, attaching them with some brads.  The designer papers, the flowers, and the brads all count toward the “hoarded items” for the current Clear it Out challenge.

52CCT 04-04-2015

Go hop over to the 52{C}CT blog to see what the rest of the design team has created.  Then get your creative gears going and make your own Christmas or wintry card with this sketch, and share it with us using the linky tool provided at the 52{C}CT site.  We’d love to see what you do!  Thanks for stopping by today!

Supplies:
Stamp: Happiest of Holidays (Stampin’ Up)
Cardstock: Cherry Cobbler (SU); designer papers from Aspen Frost 6″ x 6″ paper pad (Basic Grey)
Ink: Cherry Cobbler (SU)
Other: Cherry Cobbler marker (SU); flowers (Prima Marketing); brads (Recollections)

Hello there!  It’s Saturday, which means it’s time for a new challenge at 52 {Christmas} Card Throwdown.  This week we have a technique challenge for you – using punch art to create the main focal point of your Christmas or wintry card.  You’re also welcome to use dies to create your artwork.

I will readily admit that punch art has always been challenging for me, and this time was no exception.  After a lot of browsing online, I finally found the directions to make a Santa head.  It looked easy enough, and I had the same punches that were called for in the instructions… well, almost.  Although I had the same shapes of punches, I did not have the same sizes as used in the online example.  So I had to modify a bit, especially with figuring the size I needed to make the hat.  Thankfully it ended up still being small enough to fit on a card.  I found some wiggly eyes in my craft stash and decided to use a couple of them instead of drawing in Santa’s eyes.  I guess it turned out all right even though I didn’t take the time to add shadowing to the punched pieces.  I did raise Santa up from the card front with some scrap cardstock shims.

52CCT 03-28-2015

So, now it’s time for you to check out the other design team members’ creations, and then make a card with your own punch art to link to the challenge site!  We’d love to see what you can do!  Thanks for stopping by today.

Supplies:
Stamps: none
Cardstock: Real Red, Whisper White textured, Blush Blossom (Stampin’ Up); designer paper from Arctic Frost 6″ x 6″ paper pad (Basic Grey)
Ink: none
Other: scalloped circle punch, circle punches, corner rounder punch (EK Success); wiggly eyes (source unknown)

Hello!  I know, I don’t often post on Sundays, but I wanted to share a card I made last night, combining several online challenges and using some of my older products.

The current Shopping Our Stash challenge theme calls for using numbers in some way, and at Clear It Out they want us to use products that are orange.  I remembered that in one of my older Basic Grey paper collections there was a print with numbers all over it, so I got that out, and by good chance, some of the numbers were an orangey color!  The current sketch at Freshly Made Sketches has a nice large panel that seemed like a good way to showcase the number print.  Another paper in the same Basic Grey collection had a orangey-yellow block pattern, and there was a coordinating more-or-less solid paper (from a distance it looks solid, but up close you can see streaks and color variations in it).  The sketch pulled the three papers together nicely.  I felt the numbers would work well for a birthday theme, so I stamped a party hat from one of my older Lawn Fawn stamp sets onto a scrap, colored it to coordinate with the papers, fussy cut it, and attached it in the place of the round element on the sketch.  I positioned the hat and the banner a bit lower than the way it’s drawn on the sketch to allow that sideways orange 8 to show.  (Or maybe it’s supposed to be infinity?)  It all came together like this:

FMS177

So there ya have it.  I figure it will be a good any age card to send to Operation Write Home.  Although the colors do suggest a boyish or masculine vibe, I think it’s pretty gender neutral.  And it felt good to finally cut into that number paper!

Thanks for stopping by today!  All comments are read and greatly appreciated.  Have a great day!

Supplies:
Stamps: Hats Off to You (Lawn Fawn)
Cardstock: Naturals White (Stampin’ Up); “Brigham”, “Zachary”, and “Marigold” papers from Oh Baby! Boy collection (Basic Grey)
Ink: Tuxedo Black (Memento)
Other: markers (Copic)

Hello again!  It’s time for another challenge at Cards in Envy.  For the next two weeks, we have a pretty easy theme for you to follow:  Anything Goes with a Bow.  That’s right – all you need to do for this challenge is to make an A2 sized card (4.25″ x 5.5″) with no embellishments more than 1/4″ thick so that it could be mailed at the standard postage rate – but it must include a bow of some sort.  You may use a bow made of ribbon, twine, or paper so long as it’s less than 1/4″ thick.  You could also choose to use an image of a bow.

I’ve combined our bow challenge with the current Freshly Made Sketches layout, which conveniently included a bow element.  I’ve taken the liberty of scooting the bow to the left of the main image panel.  I’ve paper pieced my scene using cardstock and Basic Grey papers.  I used a die to cut the basic cloud shape and then trimmed it down with my scissors so it would better fit in the space.

CIE 03-02-2015

This card was included in the package I sent to Operation Write Home last week.  I hope one of our heroes will enjoy sending it home to his or her child.

If you need additional inspiration, please go check out the Cards in Envy site and see what the rest of the design team has made.  Then create a card with a bow following our challenge guidelines and share it with us using the linky tool on the Cards in Envy site by 7:00 p.m. Eastern time Sunday, March 15.  We’d love to have you play along with us!  Thanks for stopping by today.

Supplies:
Stamps: Thoughtful Rhubarb (Sweet ‘n Sassy Stamps)
Cardstock: Pure Luxury White (Gina K. Designs); Bashful Blue, Early Espresso (Stampin’ Up); designer papers from Blush and Oxford 6″ x 6″ paper pads (Basic Grey)
Ink: Tuxedo Black
Other: cloud die (SNSS); stitched landscape die (Mama Elephant); Lemon twine (Really Reasonable Ribbon)

Hi there! It’s Cards in Envy challenge introduction day! For the next two weeks we have a theme challenge of Puppy Love.  Show us your A2 sized cards featuring at least one dog.  Remember to keep your cards flat enough to fit in an envelope and be mailed at the first class postage rate.

I don’t have a lot of dog stamps or digital images, so choosing which one to use wasn’t too difficult.  I decided to make a little scene with him.  Instead of stamping him on white cardstock and coloring him, I opted to stamp him on some off-white designer paper that has some subtle color variation in it.  I did add in some color to his nose, collar, and tag.  Fussy cutting him wasn’t too difficult.  I added a scrap of designer paper behind his head as a shim, since his rear was raised up from the blue panel by the grassy strip behind him.  That helped give him a little more separation from the blue sky.  This week’s sketch from Freshly Made Sketches provided the layout for my card.  For the smallest rectangular element of the sketch, I decided to use a quote balloon stamp that resembles a cloud.

CIE 02-16-2015

The puppy also ties into the February ODBD challenge at the Operation Write Home Stars & Stamps blog.

If you need additional inspiration, please go check out the Cards in Envy site and see what the rest of the design team has made.  What kind of puppy card will you create?  Share your work with us on the Cards in Envy site by 7:00 p.m. Eastern time Sunday, March 1.  We’d love to have you play along with us!

Supplies:
Stamps: Critters in the ‘Burbs, Chit Chat (Lawn Fawn)
Cardstock: Bashful Blue, Basic Black (Stampin’ Up); designer papers from Ambrosia and Oxford 6″ x 6″ paper pads (Basic Grey)
Ink: Tuxedo Black (Memento); Whisper White craft (SU)
Other: Grassy Border die (Lawn Fawn); white embossing powder (Stampendous); markers (Copic)

Hello!  This week is sketch week at CAS – Colours and Sketches, and I think this week’s sketch is a pretty neat one.  It has some interesting angles.

I’ve turned the sketch on its side for my card, and as usual, I’ve stretched it out into a rectangle.  Actually now that I’m looking at my card all assembled, it looks like I’ve kind of mirror reverse flipped the triangular parts too.  Anyway, I think it’s easy enough to tell that my card was inspired by the sketch.  The ink and card base match the dark blue designer paper better in real life than the photo shows.

CASCAS111

Be sure to see what the rest of the design team has done with the sketch!  Then create your own card and share it with us at the CC&S blog.  You have until 1:00 p.m. Eastern time Wednesday, February 18 to enter the challenge.  Thanks for stopping by today!

Supplies:
Stamps: Cake & Candles (Avery Elle)
Cardstock: Buckaroo Blue, Whisper White (Stampin’ Up); designer papers from Oh Baby! Boy collection (Basic Grey)
Ink: Buckaroo Blue (SU)

Hello!  I’ve made a couple more cards using the sketch from this week’s CAS(E) this Sketch! challenge.  This time I used one of my Mama Elephant stamp sets.  I know, the characters don’t have mouths, but I still think they are adorable.  It felt good to use some more of my older Basic Grey papers, too.  I used the mirror image of the sketch for the Cupid card so it wouldn’t look like he was shooting his arrow off the edge of the card.  It doesn’t show well in the photos, but I added some sparkle to the angel’s and Cupid’s wings with a glitter pen.

CTS109 loved

CTS109 heart day

Thanks for stopping by today!  Comments are always welcome and appreciated.

Supplies:
Stamps: Love from Above (Mama Elephant)
Cardstock: Almost Amethyst (Stampin’ Up); Pure Luxury White (Gina K. Designs); designer papers from Sugar Rush 6″ x 6″ pad (Basic Grey)
Ink: Tuxedo Black (Memento)
Other: Stitched Scalloped Borders die (Lawn Fawn); Wink of Stella pen (Zig)

Here’s a quick card I made combining the Lawnscaping challenge that ends tomorrow night with the CAS(E) this Sketch! challenge that ends Thursday morning.  I actually used the sketch in mirror reverse.  I’m not sure yet if I’ll give this card to my husband for Valentine’s Day or if it will go in my stash for Operation Write Home.

99 - CAS

Thanks for giving my card a closer look!  Comments are always appreciated – I do read every single one!

Supplies:
Stamps: Love ‘n Breakfast (Lawn Fawn)
Cardstock: Going Gray, Real Red (Stampin’ Up); Pure Luxury White (Gina K. Designs); designer paper from Sugar Rush 6″ x 6″ paper pad (Basic Grey)
Ink: Tuxedo Black (Memento)
Other: markers (Copic)

Hello!  We have a fifth Saturday this month, which means that at 52 {Christmas} Card Throwdown it’s “Pick a Previous” week!  This week, we’d like you to pick one of our previous sketch challenges from the archives and use that to inspire your Christmas or winter-themed card.

I went back a few years and chose the sketch from May 2012.  It’s been a while since I’ve created a card with this many panels and mats and such, so that was a fun twist for me.  I used a stamp from one of my newest stamp sets for the focal panel and chose my color scheme from the strip of tree print paper.  The horizontal strip is green cardstock stamped in chocolate brown with a random “scratchy” print stamp that I felt coordinated well with the sketchy look of the tree image.  The sentiment stamp I used is actually a long narrow stamp, with the words next to each other, but it was a bit too long to fit nicely in the space I had available.  So I stamped each word separately, centering “Merry” over “Christmas”.  I have to admit I’m pretty pleased with the completed card.

52CCT 01-31-2015

Which sketch will you pick?  There are over 30 from which to choose, so have fun deciding!  Then be sure to share your card with us at the 52{C}CT site by 7:00 p.m. Eastern time Friday, February 6.  Thanks for stopping by today!

Supplies:
Stamps: Mini Blueprints (Tim Holtz); Sanded (Stampin’ Up); sentiment stamp (Purple Onion Designs)
Cardstock: Chocolate Chip, Wild Wasabi, Naturals Ivory (SU); designer paper from Nordic Holiday 6″ x 6″ paper pad (Basic Grey)
Ink: Chocolate Chip (SU)

Hello!  It’s time for technique challenge week at 52 {Christmas} Card Throwdown!  Our January hostess, Deborah, has lined up a fun technique to try: inlaid dies.

I decided to use the current Freshly Made Sketches challenge for my layout.  After going through my patterned papers and choosing some scraps that would fit the card and the layout, I decided it looked better if I turned the sketch upside-down. The “Joy” die cut takes the place of the “any shape” element of the sketch.  Positioning the die cut took a little planning to make sure it would be legible.  The only part of die cutting and getting the sentiment fit into place that proved to be difficult was the tiny fill-in for the loop at the end of the “y”.  The card looked rather plain once it was all assembled, so I decided to add a few enamel dots in one corner for a little something extra.

52CCT 01-24-2015

What will you do with your dies?  Be sure to share your wintry or Christmasy card with us at the 52{C}CT site by 7:00 p.m. Eastern time Friday, January 30.  We’d love to see what you create!

Supplies:
Stamps: none
Cardstock: Smoky Slate (Stampin’ Up); designer papers from Nordic Holiday 6″ x 6″ paper pad (Basic Grey)
Ink: none
Other: Wonderful Wreath die, enamel dots (SU)

Hello there!  It’s the first Monday of the month, which means it’s time for a new challenge at Cards in Envy.  We’re kicking off 2015 with a challenge called “Make it a Banner Year!”  We’d like to see you use at least one banner on the card you create for this challenge.  Remember that for our challenges, all cards must be A2 sized (4.25″ x 5.5″) and cannot have lumpy, bumpy embellishments more than 1/4″ thick.

OWH Stars & Stamps sketch #226 was perfect for this challenge!  I’ve turned the sketch 90° on its side.  It seems like at the beginning of each year, I think to myself, “OK, this year I’m finally going to use up some of my older supplies”… and then I get distracted by new materials and never quite seem to completely use up the older things.  This year I’m starting off on that trend with some older designer paper, which I used for the background panel of my card.  The turquoise banner is also from the same 6″ x 6” pad.  I pulled two colors from the floral paper for my solid color cardstocks, and white for my sentiment panel.   The sentiment panel covered up a fair amount of the turquoise in the floral paper, so I added some enamel dots to help bring out that color.  The “Happy” and “to you” words in the sentiment are actually in an outline font; I’ve colored them in to make them a little bolder.

CIE 01-05-2015

What type of banners will you use on your card?  Visit the Cards in Envy site to check out what the rest of the design team has made.  Then link your own card there by 7:00 p.m. Eastern time Sunday, January 18.  We’d love to have you join in the fun!  Thanks for stopping by today.

Supplies:
Stamps: Cake & Candles (Avery Elle)
Cardstock: Pumpkin Pie, Poppy Parade, Whisper White (Stampin’ Up); designer papers from Gypsy 6″ x 6″ paper pad (Basic Grey)
Ink: Poppy Parade (SU)
Other: Pumpkin Pie marker, enamel dots (SU)

Hello!  It’s time to start a new year of challenges at 52 {Christmas} Card Throwdown!  I know it may seem odd to be making Christmas cards now, since the Christmas season is just about over.  But at 52{C}CT we present a different card making challenge each Saturday, with the idea that if you participate all year long, you’ll have a wonderful stash of lovely cards built up ready to send in December.  Or, if you’re like me and you prefer to send the same card design to everyone on your mailing list, you can create a great assortment of cards to donate to an organization of your choice, such as Operation Write Home, a church ministry, or your local hospital’s cancer center.

Each month of 52{C}CT challenges starts off with a sketch challenge.  Our January hostess, Deborah, has created one that’s rather clean and simple in design, but could be dressed up with embellishments if you choose.  The star shown in the sketch can be made any shape.  I’ve used a snowman from one of my newest stamp sets.  I used dimensional adhesive to attach him to the card.  When I was cutting the designer papers, I cut them to size as rectangles, and then cut them diagonally to make the triangles.  This resulted in two triangles from each designer paper, so I ended up making two cards – one in portrait orientation as the sketch was drawn, and one turned on its side in landscape orientation.

52CCT 01-03-2015 portrait

52CCT 01-03-2015 landscape

Be sure to visit the 52{C}CT blog to welcome our newest design team members – Julie, Tanja, and April!  Once you’ve been inspired by the design team’s work, make a Christmas or wintry card of your own using this sketch.  Share it with us by linking it at the 52{C}CT site by midnight GMT/7:00 p.m. Eastern time Friday, January 9.  We’d love to have you join us!  Thanks for stopping by today.

Supplies:
Stamps: Be Jolly (Avery Elle)
Cardstock: Pure Luxury White (Gina K. Designs); Real Red (Stampin’ Up); designer papers from Nordic Holiday 6″ x 6″ paper pad (Basic Grey)
Ink: Tuxedo Black (Memento)
Other: Be Jolly die (Avery Elle); markers (Copic); dimensionals (SU)

Hello there!  It’s time for another Christmas-inspired challenge at CAS – Colours and Sketches.  This week we’re asking our challenge participants to take one of our previous sketches and make a Christmas or wintry card with it.

I went back about 13 months and used sketch #51.  It’s such a versatile one!  Once again, I’ve stretched the sketch out to a rectangle.  I opted to use a snowflake for the large circular element.  It’s raised up with dimensional adhesive to give it a little separation from the background.  I also added a single rhinestone to give the card a little holiday sparkle.

CASCAS104

We have a lot of sketches from which to choose.  Go check them out at the Sketch Challenges Archive tab on the CAS – Colours & Sketches site – and while you’re there, also see what the rest of the design team has made!  Be sure to link your own card at the site by 1:00 p.m. Eastern time Wednesday, December 17.  Thanks for stopping by today!

Supplies:
Stamps: Festive Flurry (Stampin’ Up); Critters in the Snow, Happy Everything (Lawn Fawn)
Cardstock: Naturals White (SU); “Glisten” designer paper from Fruitcake collection (Basic Grey)
Ink: Blue Bayou (SU)
Other: Festive Flurry Framelits die, rhinestone, dimensionals (SU)

Hello, and welcome to another Monday!  Since it’s the third Monday of the month, it’s time for a new challenge at Cards in Envy.  For the next couple of weeks we’re getting into a Halloween mood by focusing on a theme of “Any Witch Way You Can”.  Cards for this challenge should show a witch, or something that easily depicts a witch (such as a witch’s hat or shoes) – and be an A2 card (4.25″ x 5.5″) and flat enough to fit in an envelope for mailing.  Your card can be scary, cute, or anything in between.

I took the cute route with my card.  I really don’t have any witch stamps, but I do have a Lawn Fawn Halloween-themed set.  The cat wearing a witch hat was my solution for this challenge.  I felt that making her appear to be riding the broom helped her look even more like a witch.  I colored the cat as close to black as I could without losing the details of her face and still providing contrast with the hat.  I pieced the background together using a few designer papers.  The stars are cut from the blue paper to show the yellow underneath.  I’ve used one of my go-to sketches from the OWH Stars & Stamps blog for the layout, but scooted the image panel toward the center of the card since I decided not to put a sentiment on it.

CIE 10-20-2014

This card just “might” be a sneak peek of an upcoming Hope You Can Cling To challenge at Splitcoaststampers.com, too!  I’m not at liberty yet to reveal just what the details of that challenge could be.  You’ll just have to keep checking in at SCS to see.  It also fits in with the current Lawnscaping challenge.

Thanks for stopping by today!  Now go check out what the rest of the Cards in Envy design team has made.  I’m sure they’d love it if you visit their blogs and leave a comment.  Then share your own witchy card with us at the CIE site by 7:00 p.m. Eastern time Sunday, November 2.  We’d love to have you play along with us!

Supplies:
Stamps: Critters in Costume (Lawn Fawn)
Cardstock: Marigold Morning (Stampin’ Up); Pure Luxury White (Gina K. Designs); designer papers from Oh Baby! Boy collection (Basic Grey)
Ink: Tuxedo Black (Memento)
Other: markers (Copic); Landscape Trio and Starburst Cover dies (Mama Elephant)

© 2019 Suffusion theme by Sayontan Sinha