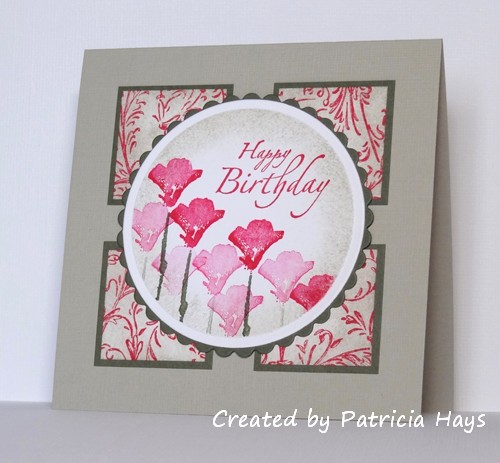
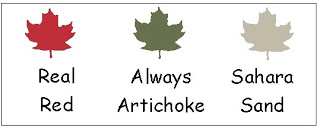
My mom just celebrated her birthday, and today I’m sharing the card my family gave her.  I used the CAS – Colours and Sketches double challenge #27 as my inspiration for the layout and color scheme.  It’s been a long time since I’ve made a square card, so it was nice to work with that smaller size for something a little different (the card is 4.25″ square).  The card base is textured cardstock, but the texture unfortunately doesn’t show well in the photo.  For the darkest flowers, I inked the stamp with my red marker, then pulled off a bit of the ink with a tissue, and then ran the brush tip of the marker against the edges of the rubber to add a bit more darkness around the edges of the flower.  The lighter flowers are just second and third generation stampings – where I stamped the image again without reinking the stamp.  I hope that still keeps the card in qualification for the color part of the challenge.  For the small squares, I stamped the red flourish on white cardstock.  The white still looked a bit too bright against the card base, so I sponged some ink in the same color as the card base to tone it down.


I’m not going to embarrass my mom by putting her picture on here, but she said that her family made her birthday the best one she’s had.  I hope she has many more happy years!

Supplies:
Stamps: A Real Wild Poppy (Hero Arts); Filigree and It’s Your Birthday (Stampin’ Up)
Cardstock: Sahara Sand textured, Always Artichoke, Whisper White (SU)
Ink: Real Red, Sahara Sand (SU)
Other: Real Red and Always Artichoke markers (SU); standard circle and petite scalloped circle Nestabilities dies (Spellbinders); sponge

Hello!  It’s been a very rainy, dreary week here, and I’m just finally starting to feel better after battling a nasty cold, that last night I just really felt the need to make something cheery.

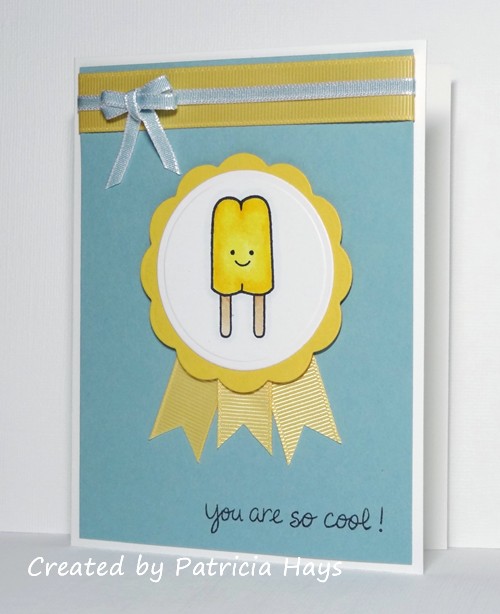
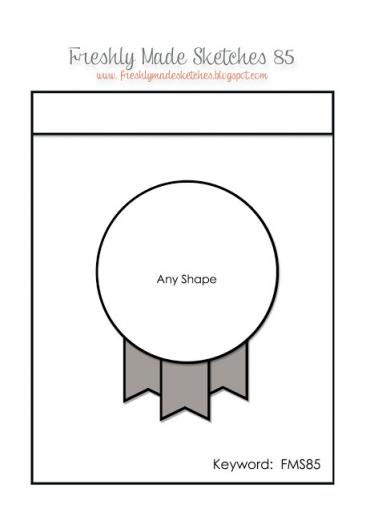
For me, it’s hard not to smile when I look through my Lawn Fawn stamps.  I’ve had their ice cream themed set for a while now and decided it was finally time to use it.  Several challenges also fit together to help me make today’s card.  One of this week’s colors at Dynamic Duos is Daffodil Delight, and I’ve always felt it is a “happy” yellow.  Paula’s Virtual Card Making Party challenge is to create a card for a child, using a sketch for the layout.  I like making cheery cards for our heroes overseas to send home to their children, so I just had to find a sketch.  Freshly Made Sketches provided a good one.  Since popsicles are a tasty way to cool down on a hot summer day, this card fits into JoAnn’s Virtual Card Making Party challenge to make a summer-themed card.  And here is how it all came together:

You’ll have to forgive me for the poor lighting.  I tried tweaking with my photo editing program and this was the best I could get.  Trust me when I say that the popsicle face does not look splotchy and fluorescent in real life.

I can’t speak for anyone else, but the card does put a smile on my face and helps me remember that brighter days will come.

Thanks for stopping by today!  All comments are read and appreciated… which brings me to add, I want to apologize for the fairly strict spam catcher settings that tend to consider comments by WordPress users and international users as spam.  Please know that I do review every comment that is put in my blog’s spam folder, and if it’s a legitimate comment, I am more than happy to approve it.

Supplies:
Stamps: Here’s the Scoop (Lawn Fawn)
Cardstock: Pure Luxury White (Gina K. Designs); Baja Breeze, Daffodil Delight (Stampin’ Up)
Ink: Tuxedo Black (Memento)
Other: Baja Breeze taffeta ribbon (SU); Buttercup grosgrain ribbon (Really Reasonable Ribbon); standard circle and big scalloped circle Nestabilities dies (Spellbinders); markers (Copic)

Saturday means it’s time for another 52 {Christmas} Card Throwdown challenge! This week we have a fun theme that I guess is kind of a cross between a technique challenge and an embellishment challenge – punch art. You can join in by making a Christmas or winter card using punches to create your focal point, and linking it to the 52{C}CT website by 1:00 pm Eastern time Friday, May 2. Check out the challenge site for all the details.

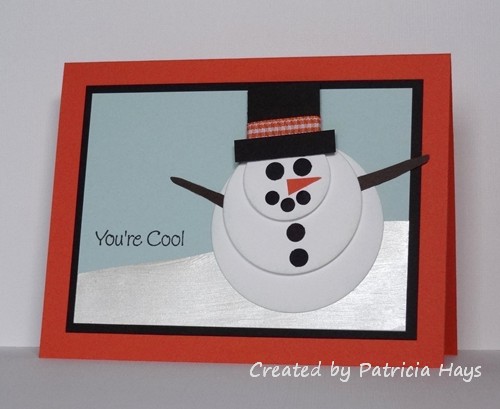
I saw a darling snowman card in the Splitcoaststampers.com gallery a couple years ago and have wanted to give it a try.  I thought the perspective of looking down at the snowman was a fun alternative to looking at him at something nearer to eye level.  This challenge was just the nudge I needed to go ahead and try it.  I confess that I fudged a little on the “punch” aspect with regard to the circles for the snowman – my punches were either too large or too small, so I used my Nestabilities dies to cut them.  The edges of them are very lightly sponged with blue ink to add some visual dimension (so very lightly that it doesn’t really show in the photo.  Ooops.).  The top part of the hat (the crown?) was made with a square punch, and the brim is just a narrow scrap of cardstock that I cut to fit.  I also cut the arms and nose from scraps of cardstock.  I used my 1/4″ circle punch for the eyes and buttons, and the circles for the mouth were done with my old “anywhere punch” from setting eyelets.  I chose the ribbon to decorate the hat by color coordinating it with the snowman’s “carrot” nose, and that’s also how I chose the color for the card base.   I used my shimmer paint on the snow for the ground.  I didn’t have a whole lot of room for a sentiment, so I chose a short one that will make this a cute “any reason” card to donate to Operation Write Home for one of our heroes to use this coming winter.  (I know I still need to put a light-colored liner inside of it.)  Even though the different parts of the snowman are raised up with dimensional adhesive, I think the card will smoosh flat enough to go through the mail all right.  In real life, the dimension helps prevent the hat from visually blending into the black mat so much.

The layout for my card was taken from this week’s Inkspirational challenge.

So, there you have it.  Thanks for stopping by today!  I hope you’ll join us and play along with 52{C}CT this week!

Supplies:
Stamps: Two Scoops for Flopsey (My Favorite Things)
Cardstock: Tangerine Tango, Basic Black, Soft Sky, Early Espresso, Whisper White (Stampin’ Up)
Ink: Tuxedo Black (Memento)
Other: standard circle Nestabilities dies (Spellbinders); 1″ square punch (Creative Memories); 1/4″ circle handheld punch (source unknown); 3/16″ hole punch (Making Memories); Frost White shimmer paint (SU); orange gingham ribbon (Offray)

Sweet 'n Sassy Digi Challenge #100

Comments Off on Sweet ‘n Sassy Digi Challenge #100
Apr 122013

Hello!  It’s time for the 100th weekly challenge at Sweet ‘n Sassy Digi Challenge! This week’s challenge, unfortunately, comes with some bittersweet news.  Because the clear stamps and dies part of the Sweet ‘n Sassy Stamps business is booming, Korin (the owner) is needing to let some things in her life go – and sadly, this challenge blog is one of those things.  This week’s challenge will be the last Sweet ‘n Sassy Digi Challenge.  All the current Sweet ‘n Sassy digital images will continue to be sold in the Sweet ‘n Sassy Stamps online store, but there will be no more regularly scheduled new digi releases.

However, since 100 challenges is still a major milestone, we are going out with a celebratory bang!  One participant in this week’s challenge will receive 3 Sweet ‘n Sassy digital images of his/her choice.  Participants who use a SNSS digital image in their work may link their project twice, for an additional chance to win.  Please see the SNSDC site for all the details on how you can win this fun prize.

This week’s challenge is Pick Your Favorite!  Take a look through the previous Sweet ‘n Sassy Digi Challenges and choose one of them to inspire your project.  When you write your challenge description, please share which challenge you used.  Remember to use a digital image as the main focal point of your creation!

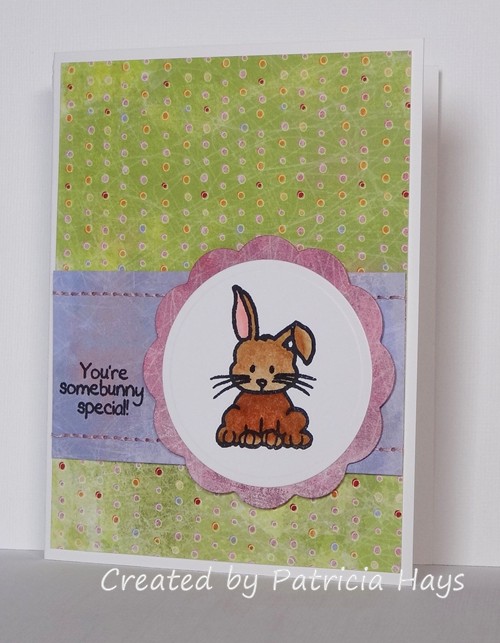
I had a really hard time settling on one previous challenge, and I didn’t have time to make multiple cards.  So I’ve combined three of my favorite challenges into this one card.  Those of you who have been reading my blog for some time know how much I enjoy making cards for Operation Write Home – for our country’s military men and women who are stationed overseas to be able to write to their loved ones at home.  A lot of those heroes have children waiting at home for them.  So I felt compelled to use SNSDC93, a card for a child.  I just love all the cute Sweet ‘n Sassy critters, so that tied SNSDC99 into today’s card.  I also like stitching on my cards (even though I don’t do it very often) so that incorporated SNSDC77.  I was also aiming for SNSDC58, to make a clean and simple card, but I used one of the OWH Stars & Stamps bonus sketches for the layout and it turned out more accurately described as clean and layered.

Thank you to everyone who has supported the Sweet ‘n Sassy Digi Challenge blog through their participation in the challenges.  I know I’ll miss being part of the SNSDC design team.

Supplies:
Digital Image: Bunny Love (Sweet ‘n Sassy Stamps)
Cardstock: Pure Luxury White (Gina K. Designs); designer papers from Sugar Rush 6″ x 6″ paper pad (Basic Grey)
Ink: printer ink
Other: markers (Copic); standard and big scalloped circle Nestabilities dies (Spellbinders); embroidery floss (DMC)

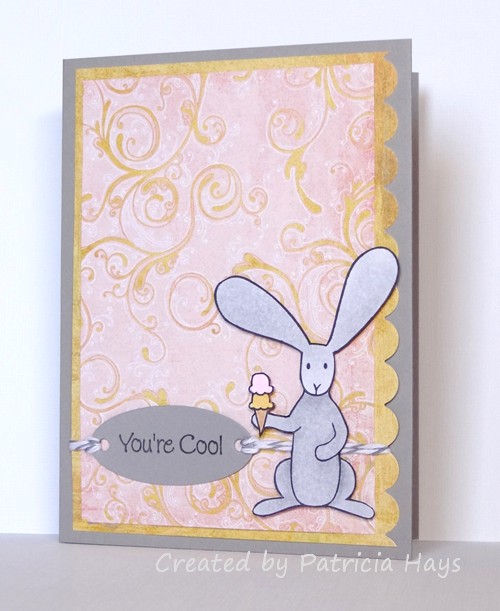
Here’s a card I put together pretty quickly this morning, just in time to enter into the Inkspirational color challenge of pink, banana and slate.  I used Stampin’ Up’s retired color Going Gray for my slate color.  The layout for this card is this week’s OWH Stars & Stamps sketch, substituting the bunny for the circle.  I fussy cut the bunny after I colored him, and he’s attached to the card with dimensional adhesive. I also incorporated the OWH Midweek Throwdown challenge of using tags and twine.

Thanks for stopping by today!

Supplies:
Stamps: Two Scoops for Flopsey (My Favorite Things)
Cardstock: Going Gray (Stampin’ Up); Pure Luxury White (Gina K. Designs) [for the bunny]; designer papers from Two Scoops 6″ x 6″ paper pad (Basic Grey)
Ink: Tuxedo Black (Memento)
Other: markers (Copic); dimensionals (SU); Oyster twine (Really Reasonable Ribbon); petite oval Nestabilities die (Spellbinders)

I almost titled this post “stripping for Dad” but decided that was a bit too provocative!  ha ha ha

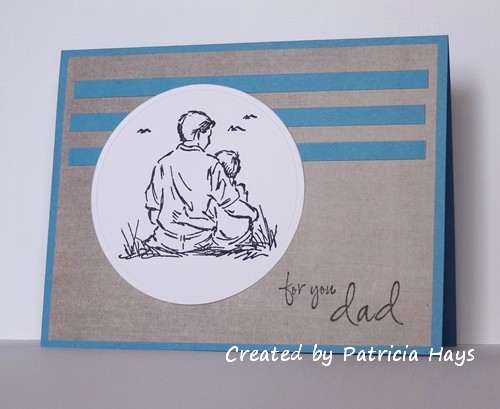
The title comes from the current Cards in Envy challenge to create a card using strips of paper rather than using ribbon as an embellishment.  I kept my card pretty simple, without embellishing the strips.  The layout was inspired by OWH Sketch #89, but I used a circle for my focal point.  I had this image already stamped and cut into the circular shape, and decided I’d go ahead and use that even though it wasn’t exactly what the sketch called for.  I also shifted the circle over to the left to accommodate the sentiment.


And there’s another card that’s on its way to Operation Write Home, to be ready for one of our heroes to send home to his or her dad for Father’s Day.

Supplies:
Stamps: Seaside Sketches (Stampin’ Up); Masculine Messages (Gina K. Designs)
Cardstock: Marina Mist (SU); white (Papertrey Ink); designer paper from “Memoirs” 6″ x 6″ paper pad (Inque Boutique)
Ink: Tuxedo Black (Memento)
Other: standard circle Nestabilities die (Spellbinders)

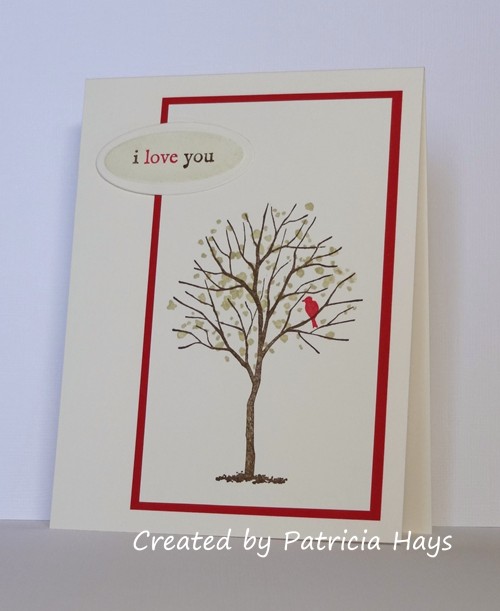
CAS – Colours and Sketches presented a color challenge over the last week, and here’s the card I finally got around to making for it.  Once again, I’ve used the layout from Inkspirational challenge #12.  This time I added a mat behind the focal panel.

This card is going to Operation Write Home.  I like that the colors are neutral enough that this card could be sent to either a man or a woman.

Thanks for stopping by today!

All supplies are from Stampin’ Up unless otherwise noted:
Stamps: Branch Out, Three Little Words
Cardstock: Real Red; Pure Luxury Ivory (Gina K. Designs)
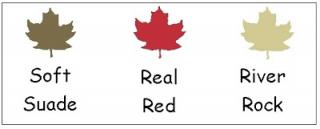
Ink: Soft Suede, River Rock, Real Red
Other: petite oval Nestabilities die (Spellbinders)

I’m honored and excited to be this week’s sample maker for the Operation Write Home Stars and Stamps Sketch Challenge! If you haven’t joined in the OWH/Our Daily Bread Designs challenge for the month of March yet, this sketch is perfect for it.

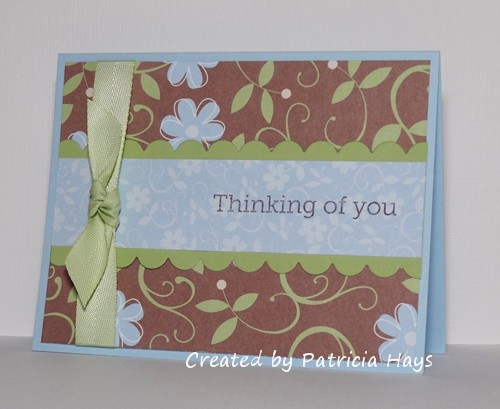
I’ve made two sample cards with this sketch.  On the first card, I’ve created an extra layer so that the ribbon could be wrapped around to the back of it.  I chose to use a simple knot bow to help keep the card USPS-machine-friendly. But other than that, I followed the sketch pretty closely.  It felt good to use two of my older designer papers for this card. The sentiment is from one of the OWH/Hero Arts clear stamp sets.

The second card is a one-layer card.  I decided to use a border stamp to create the scalloped elements.  I will admit that even after 10 years of stamping regularly, I still get nervous about stamping on one-layer cards!  I added another border stamp, which looks a lot like faux stitching, between the scalloped borders.  I stamped that in silver, and the ink glared a little on the right side of the photo.  Sorry about that.  I didn’t have anything handy to use as a stamp positioner imaging sheet for the border stamps, so I had to just eyeball getting them straight. The stitching one is a little bit off but I guess that just adds to the handmade feel of the card. Instead of a ribbon and bow, I used a scrap strip of silver metallic paper for the vertical stripe part of the sketch.  I created a faux prize blue ribbon to take the place of the bow.  Even though it’s attached with dimensional adhesive, it still lies flatter than a ribbon bow would.  To accommodate the length of the “blue ribbon”, I moved the horizontal elements up higher on the card, keeping in mind the The Rule of Thirds as discussed in March OWH Design Bootcamp segment.   The deadline for sending Father’s Day cards to the OWH shippers is coming up on April 30, so I’m starting to get some cards made to be prepared for that.

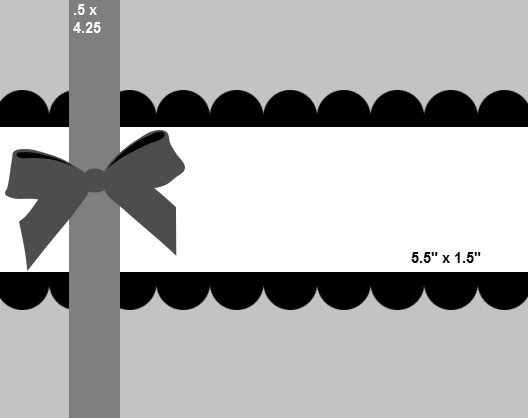
Here’s what the actual sketch looks like:

So now it’s your turn! I’d love to see what you can make with this sketch. Be sure to link your creations on the OWH Stars and Stamps blog. Thanks for stopping by today!

Supplies for the Thinking of You card:
Stamps: Year Round Sentiments (Hero Arts)
Cardstock: Bashful Blue, Certainly Celery, Petal Patch designer series papers (Stampin’ Up)
Ink: Chocolate Chip (SU)
Other: Certainly Celery twill ribbon (SU); scalloped border die (Papertrey Ink)

Supplies for the Dad card:
Stamps: Quinn’s ABCs (Lawn Fawn); Riveting (Stampin’ Up)
Cardstock: Pure Luxury White (Gina K. Designs); Brilliant Blue, Brushed Silver (SU)
Ink: Brilliant Blue (SU); silver (ColorBox)
Other: standard circle and big scalloped circle Nestabilities dies (Spellbinders)

Hello! Happy Friday! Are you ready for another Sweet ‘n Sassy Digi Challenge?

This week’s challenge is Happy Birthday, Fellas. Make a birthday card for a guy of any age from 1 to 101! Just be sure you use at least one digital image for the focal point of your card. You’re not required to use a Sweet ‘n Sassy digital image, but we do love it when our participants use them.

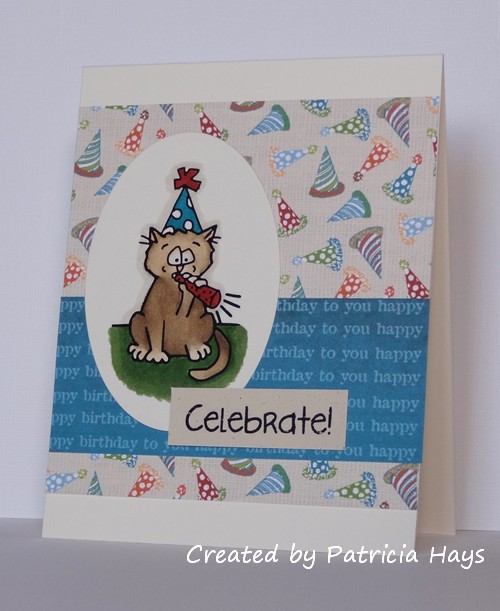
I noticed I’d had this image for a while and hadn’t used it yet, so I figured this challenge was a perfect opportunity to change that. Tank the cat is in a party mood with his hat and his horn. The “Celebrate!” sentiment comes with the image. However, I’ve used my photo editing program to separate the two so I can print them individually. The designer papers are actually from a set of digital designs, too, but the company that created them is no longer in business. I’ve been trying to play catchup on some of the OWH Stars and Stamps sketches that I’ve missed. Today’s card uses sketch #150.

So, now it’s your turn to show us what you can create for a guy! Link your project at the Sweet ‘n Sassy Digi Challenge site by midnight eastern time Thursday, March 28. Remember that for every project you submit throughout the month of March, you will get one entry to be eligible for winning 3 digital images of your choice from the Sweet ‘n Sassy Stamps store! Be sure to play along every week, and to go visit the rest of the design teams’ blogs for more inspiration. Thanks for stopping by today!

Supplies:
Digital Image and sentiment: Celebrate (Sweet ‘n Sassy Stamps)
Cardstock: Pure Luxury Ivory (Gina K. Designs); Naturals Ivory (Stampin’ Up); Vintage Birthday digital designer paper (Lizzie Anne Designs)
Ink: printer ink
Other: markers (Copic); petite oval Nestabilities die (Spellbinders)

Hello! Happy Friday! Can you believe it’s March already? Time sure does fly when you’re having fun, and I’ve been having fun with a lot of cardmaking challenges lately. Since it’s Friday, that means it’s time for a new Sweet ‘n Sassy Digi Challenge! Are you ready for it?

This week’s challenge is All Things Girly. Make a card suitable to give a girl of any age from 1 to 101! Just be sure you use at least one digital image for the focal point of your card. You’re not required to use a Sweet ‘n Sassy digital image, but we do love seeing our challenge participants use them.

Since Spring is trying to get here, I’ve chosen an image suitable for the season. Spring makes me think of pastel colors, so I picked some from the designer paper. The sentiment is from a Sweet ‘n Sassy clear stamp set called “Christmas Tags”, but it includes several sentiments that can be used year round, such as this “thank you”. I thought the script font went well with the feminine theme. The sketch used for the layout comes from this week’s ‘ABC’ Challenges.

So, now it’s your turn to show us what kind of girly creation you can make! Link your project at the Sweet ‘n Sassy Digi Challenge site by midnight eastern time Thursday, March 7. Remember that for every project you submit throughout March, you will get one entry to be eligible for winning 3 digital images of your choice from the Sweet ‘n Sassy Stamps store! If you use a Sweet ‘n Sassy digital image, you’ll get two entries! Be sure to play along every week, and to go visit the rest of the design teams’ blogs for more inspiration. Thanks for stopping by today!

Supplies:
Digital Image: Butterfly & Flower (Sweet ‘n Sassy Stamps)
Sentiment Stamp: Christmas Tags (SNSS)
Cardstock: Almost Amethyst (SU); Pure Luxury White (Gina K. Designs); designer papers from Kioshi 6″ x 6″ paper pad (Basic Grey)
Ink: printer ink; Tuxedo Black (Memento)
Other: standard circle Nestabilities die (Spellbinders); markers (Copic)

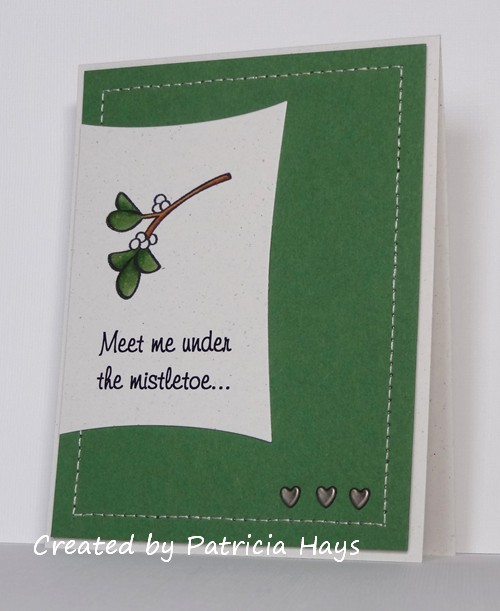
I’ve been considering different ideas for this week’s 52 {Christmas} Card Throwdown challenge all week.  This time it’s a theme challenge of hearts and love.  I’ve gone through different sentiments and images that I could use.  But then I thought, what love-related thing do people do at Christmastime but really not at other times of the year?  Kiss under the mistletoe.  That’s what.  So I decided to do something along that line.  I’ve combined that thought with the layout for Freshly Made Sketches #74, adding an extra panel to the sketch.  I did some hand stitching around the edge of the extra panel to tie in with the “All Stitched Up” ABC Challenge.  I love the look of stitching on cards, but I always underestimate how long it takes me to do it!  The result is this rather clean and simple card:


I kept the heart/love theme going with the sentiment and the heart-shaped brads.  The mistletoe image is a stamp, but I created the sentiment using Microsoft Word.  This card will be going into the stash I’m creating to send to Operation Write Home later this year, and I think it’ll be a cute one for one of our military heroes to send home to a loved one this Christmas season.  I thought about using pearls for the mistletoe berries, but I hesitated to go with that idea because I felt that would be overdoing it.  Since the green panel is attached with dimensional adhesive and I already had the brads on there, I didn’t want to make the card too bulky.

Thanks for stopping by today!

Stamps:  Bows and Holly (Lawn Fawn)
Cardstock: Naturals White, Garden Green (Stampin’ Up)
Ink: Tuxedo Black (Memento); printer ink
Other: Wonky Squares Nestability die (Spellbinders); markers (Copic); pewter heart mini brads (Making Memories); embroidery floss (DMC); dimensionals (SU)

Hello!  It’s Friday!  And because it’s the third Friday of the month, it’s New Digi Release Day at Sweet ‘n Sassy Stamps!   Lots of great new digital stamp sets are being introduced today – four adorable bunny rabbit images, a set of sentiments, and a set of springtime images such as butterflies, bees and a flower.  The rest of the Sweet ‘n Sassy Digi Challenge design team and I are showcasing different ones today, so please check out everyone’s blogs so you can see all the fun new stuff!  Be sure to leave a comment on each of the design team members’ blogs, too – one of us is a mystery blogger, and one person who comments on her blog post will be chosen at random to receive the entire new release!  Links are over in the left sidebar, but if you lose track while visiting around, you can always go back to the Sweet ‘n Sassy Digi Challenge blog and start anew.  And yes – there are lots of new links over there because we have five new design team members!  Please join me in giving a warm welcome to Lawren Folkes, Jamie Moore, Debbie Owens, Melissa Shultz, and Ann Tuck!

Our Digi Challenge this week is 3-2-1.  For your project that uses a digital image as its focal point, you’ll need to use 3 of one item, 2 of a different item, and 1 of something else.  When you write up your blog post or upload description, please include details to let us know what your 3-2-1 items are.  Be sure to link your project to the Sweet ‘n Sassy Digi Challenge blog by midnight Thursday, February 21.  You aren’t required to use a Sweet ‘n Sassy digital image, but we do enjoy seeing our participants use them (and you get the chance for extra perks if you do – see the Digi Challenge site for more details!).

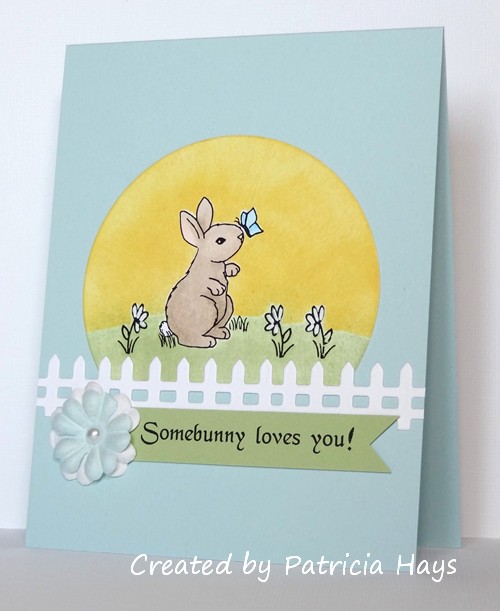
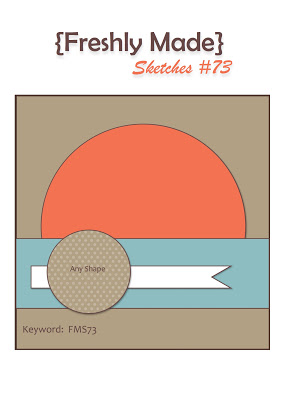
I’ve used the new image Bunny 1 and two of the images from Spring Add-ons – so the “3” part of my card is three different digital images.  My “2” things are two dies – the circle and the fence.  And I’ve used one pearl to embellish the center of the layered Prima flowers.  I played around with resizing and rotating the images so I could have the butterfly lighting on the bunny’s nose, and so that the flowers would be facing in different directions.  Because the deadline for submitting Easter cards to Operation Write Home has passed, I opted to create a non-seasonal sentiment in Microsoft Word and printed that out to use.  I was trying to go for the look of the bunny and the flowers against a backdrop of the rising sun.  I’m not sure I’ve accomplished that successfully, but I’m OK with how the card turned out.  Once again, I’ve used Freshly Made Sketches #73 for the layout, but this time I’ve turned it into a tall rectangle.
Thanks so much for stopping by today!  Comments are always welcome.  To show my appreciation to my visitors, I’m offering some Spring-y blog candy to one person who leaves a comment on this blog post by 9:00 pm eastern time on Thursday, February 21!  Want to see?
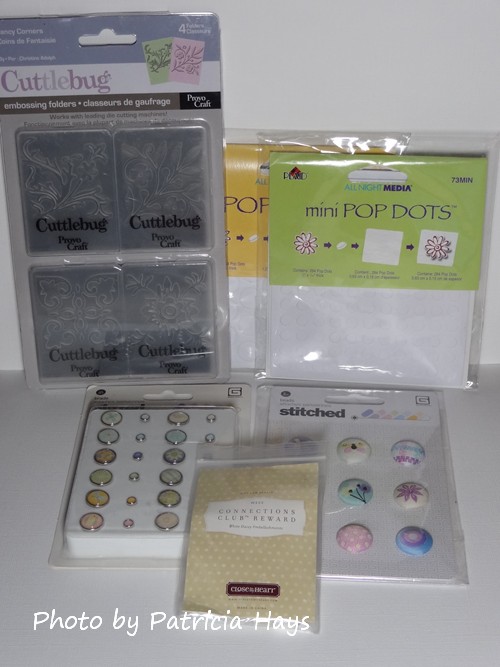
There’s a set of Fancy Corners embossing folders, two packages of Pop Dots, a package of Basic Grey stitched brads, a package of Basic Grey glazed brads, and a package of white daisy embellishments from Close to My Heart.  The Basic Grey products coordinate with their Kioshi papers.  If this blog post receives more than 25 comments, I’ll add in a few other goodies.  I’ll be monitoring comments for spam, so only legitimate comments will be counted for the random drawing.  The winner will be announced in my Sweet ‘n Sassy Digi Challenge post on Friday, February 22, 2013.  Be sure to leave your email address in the email input field so I’ll have a way to contact you if you’re the winner! 🙂

Supplies:
Digital Images: Bunny 1, Spring Add-ons (Sweet ‘n Sassy Stamps)
Cardstock: Soft Sky, Certainly Celery (Stampin’ Up); Pure Luxury White (Gina K. Designs)
Ink: printer ink; Certainly Celery, Daffodil Delight (SU)
Other: fence die (SNSS); standard circle Nestabilities die (Spellbinders); flowers (Prima); half pearl (KaiserCraft); markers (Copic); white gel pen (Uni-ball)
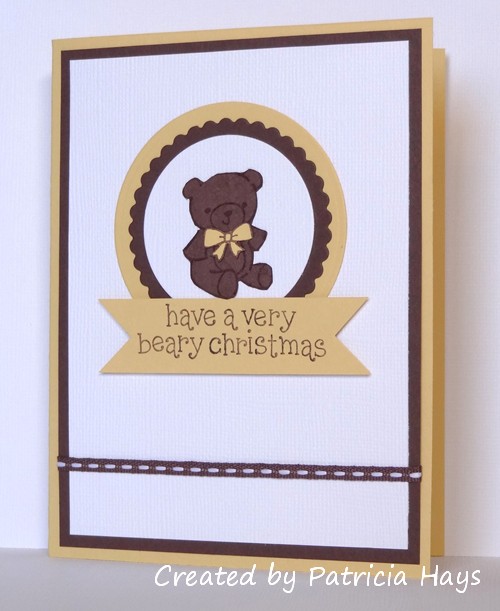
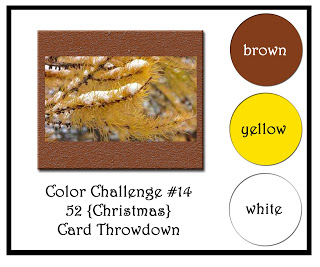
This week’s color challenge at 52 {Christmas} Card Throwdown is a bit unusual – brown, yellow and white.  I had originally thought I’d try to make something with some of my scenic stamps.  But when I was putting away my stamps used for the card in my last blog post, my eye stopped on the teddy bear included in one of the stamp sets.  And the proverbial light bulb went on in my head.

It’s hard to see in the photo, but the bear has a bit of fuzzy texture.  I achieved that by working with a scrap of chocolate brown cardstock to loosen the fibers in it, and then gently pulling the front and back apart into two pieces.  The fuzziness was left behind where the paper was separated.  I wanted the main image panel to have some texture too, to give the card more visual interest.  None of my embossing folders nor texture plates seemed to be the right thing, so I decided to use textured cardstock.  The layout of this card is this week’s OWH Stars & Stamps sketch.


So hooray – there’s another Christmas card to stockpile and send to Operation Write Home later this year.  I think this one would be cute to send home to a child, don’t you?  Thanks for stopping by today!

Supplies:
Stamps: Pa-Rum-Pa-Pum-Pum (Lawn Fawn)
Cardstock: So Saffron, Chocolate Chip, Whisper White textured (Stampin’ Up)
Ink: Chocolate Chip (SU)
Other: Seaside Ribbon Originals, square punch [for notching the banner] (SU); standard circle and petite scalloped circle Nestabilities dies (Spellbinders)

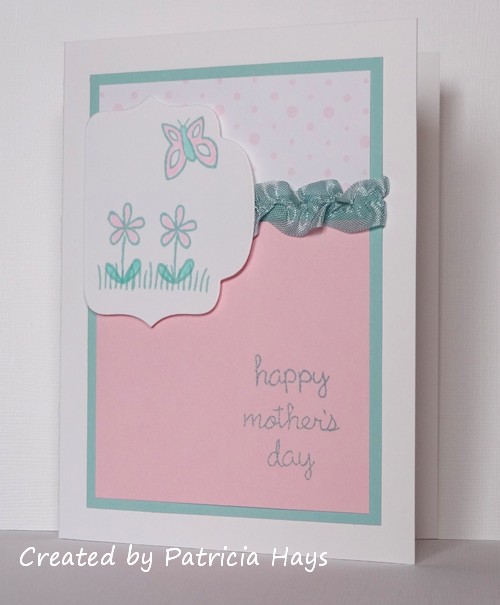
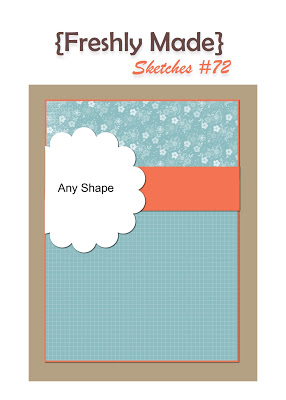
I’ve combined the most current Freshly Made Sketches and Dynamic Duos challenges for today’s card.  The pastel colors seemed to lend themselves well to another Mother’s Day card for my next shipment to Operation Write Home.  I hadn’t done any ribbon ruffling for a while, so it was fun to do that to add a feminine touch to the card.  And it felt good to use some more of my designer papers that are several years old.


Thanks for stopping by today!

Supplies for this card:
Stamps: Critters in the ‘Burbs, Happy Everything (Lawn Fawn)
Cardstock: Pure Luxury White (Gina K. Designs); Pool Party, Berry Bliss designer papers (Stampin’ Up)
Ink: Pool Party (SU)
other: Pool Party seam binding (SU); markers (Copic); Labels Nine Nestabilities die (Spellbinders)

Happy Friday! It’s time for another Sweet ‘n Sassy Digi Challenge! This week’s challenge is an easy one: Anything Goes! Simply make something featuring a digital image. It can be a card, a gift bag, a tag, a scrapbooking layout, or an altered project. The sky’s the limit! Share your artwork over at the Sweet ‘n Sassy Digi Challenge website before midnight eastern time Thursday, January 24. We’d love to see what you create! Although we especially enjoy seeing what our challenge participants make with Sweet ‘n Sassy digital images, you can use a digi from any stamp company.

Today is especially exciting because Sweet ‘n Sassy Stamps is introducing 7 new digital images!  That’s right, 7!  Let me tell you, they are ADORABLE.  Each is a different animal with a sentiment to match.  The rest of the design team and I are showcasing different ones this week, so please check out everyone’s blogs so you can see all the new cuties!  Links are over in the left sidebar.  And yes – there are two new links over there because we have two new design team members!  Welcome, Lori Finch and Amy Wright!

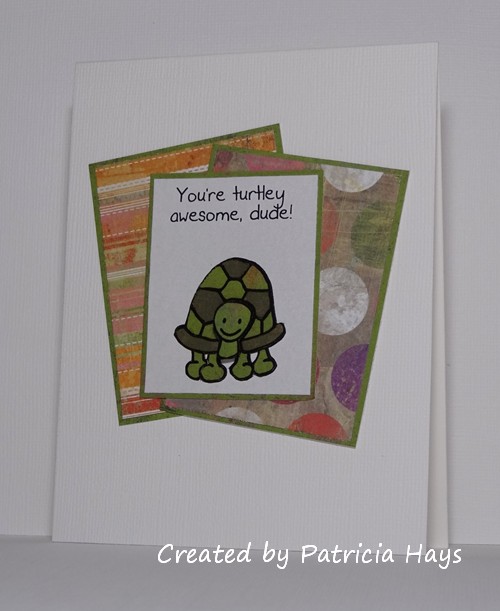
I have two projects for you today.  The first one uses the Turtley Awesome image and its accompanying sentiment.  I chose this image because I wanted to add a card that could be sent to a boy to my Operation Write Home stash.  The layout for this card started off as this week’s Splitcoaststampers.com sketch challenge, but I decided to leave off one of the sketch elements.  I’ve paper pieced the turtle using two shades of green designer paper, and I used dimensional adhesive to pop its head out of its shell.  Although there isn’t a dominating amount of green on this card, I think it still fits into this week’s OWH Midweek Throwdown challenge.


My other project is another card for Operation Write Home.  I chose to use the image from Thank Ewe in a different way.  I added a little bit of coloring to the lamb to give it some visual dimension (although it would also be cute with the head popped up like I did with the turtle), paired it with this week’s Stars & Stamps sketch, and added a sentiment from one of the Sweet ‘n Sassy clear stamp sets.  And ta-da: an Easter lamb!  I did mirror-image the sketch so the lamb wouldn’t appear to be looking off the edge of the card.  The oval element of the sketch reminds me of an Easter egg!


So now it’s time for you to check out what the rest of the design team has done with the other new images, and then create your own project to share with us!  Thanks for stopping by today.  Have a fabulous weekend!

Supplies for the turtle card:
Digital Image: Turtley Awesome (Sweet ‘n Sassy Stamps)
Cardstock: textured white (Bazzill); Pure Luxury White (Gina K. Designs); designer papers from Green at Heart 6″ x 6″ paper pad (Basic Grey)
Ink: printer ink
Other: dimensionals (Stampin’ Up)

Supplies for the lamb card:
Digital Image: Thank Ewe (Sweet ‘n Sassy Stamps)
Sentiment Stamp: Egg-Cited Cocoa (SNSS)
Cardstock: Pure Luxury White (Gina K. Designs); Elegant Eggplant (Stampin’ Up); designer papers from Green at Heart 6″ x 6″ paper pad (Basic Grey)
Ink: printer ink; Tuxedo Black (Memento)
Other: dimensionals (SU); markers (Copic)

© 2019 Suffusion theme by Sayontan Sinha