Hello!  If you’re looking for my Operation Write Home Bunny Blog Hop post, don’t feel bad – I’m still making my way through all the blogs, too!  You’re welcome to read and comment on today’s post (or any others) too, but if you’re in a hurry and just want the Blog Hop post, click here.

Because it’s Monday, I have a new Paper Therapy challenge to share with you!  This week’s challenge is to make a monochromatic card.  You have until Saturday, March 12 to upload your card to the Paper Therapy challenge forum – and because it’s the first Monday of the month, you could even win a prize!  I don’t know exactly what the prize is, but I can pretty well guarantee you that it’s something related to cardmaking and something you’d probably like having in your craft stash!

I had a harder time coming up with today’s card than I thought I would.  I’ve done a number of monochromatic cards in the past so the concept of it wasn’t difficult.  Deciding what color to focus on and whether or not I had embellishments to coordinate with it was the hard part!  Blues?  Greens?  Purples?  Pinks?  Reds?  I kept coming back to wanting to do something with browns and this sketch from the OWH Stars & Stamps blog.  And as it turned out, I didn’t even use any sort of embellies, LOL.  Funny how that happens sometimes, isn’t it?

You may be wondering why I chose to make a Father’s Day card in March.  Or, maybe you know me well enough by now and have correctly guessed that it’s going to Operation Write Home.  I’m planning to send a few Father’s Day cards in the box I’m sending at the end of the month since OWH will be needing them soon.

Maybe it’s just my monitor, but trust me – the card base and background piece for the trees does match the light stripes in the designer paper better in person than it appears in the photo.

Thanks for stopping by today! Be sure to check out the other Paper Therapy design team members’ blogs, linked over in the left sidebar.

Supply list:
Stamps: Lovely as a Tree (Stampin’ Up); Dream Big (Lizzie Ann Designs)
Cardstock: Naturals Ivory, Chocolate Chip, Recollections designer paper (SU)
Ink: Chocolate Chip (SU)

I like cupcakes.  So, what better way to start off a Monday than with a card showcasing not one, but two cupcakes?  🙂

This week’s Paper Therapy challenge is a sketch challenge.  This cupcake stamp fit perfectly into the diamond shaped elements on the sketch, so I decided to make a birthday card featuring that image.  I used some Shimmerz paints to color the cupcake and its wrapper.  I had a hard time capturing the shimmer when I took the photo, but trust me, it’s there.

And now I have another card to send to Operation Write Home.

Here is the sketch:

And here is the list of supplies for today’s card. 

Stamps: Bitty Basics, Birthday Whimsy (Stampin’ Up)
Cardstock: Purely Pomegranate, Whisper White, Berry Bliss designer series paper (SU)
Ink: Purely Pomegranate (SU); Onyx Black (VersaFine)
Other: Purely Pomegranate ribbon, Chocolate Chip corduroy brad (SU); Choc-o-lot and Opal paints (Shimmerz); square punches (EK Success)

It’s Monday!  Are you ready for another Paper Therapy challenge?  This week the challenge is to use the negative part left over from a die cut.

The card I made for this challenge was a really quick and easy one.  I used the frame left over from cutting out the So Saffron oval on my “quick as a bunny” card.  To give some depth to the card, I used dimensional adhesive to attach the frame to the card base.  The flowers and sentiment are stamped directly onto the card base.  I used my Stampin’ Up markers to add a bit of shading to the flowers. I chose the sentiment with Operation Write Home in mind.  I’m trying to build up a stash of cards to send to them by the end of March.

Supplies:
Stamps: Spring Garden (Stampin’ Up); Tag Lines (Gina K. Designs)
Cardstock: Very Vanilla, So Saffron (SU)
Ink: So Saffron, Mellow Moss (SU)
Other: Stampin’ Write markers, dimensional adhesive (SU); petite oval Nestabilities die (Spellbinders)

Be sure to check out the other Paper Therapy Design Team members’ work on their blogs, listed in the sidebar on the left.  They’ve done some great stuff this week!

Today I’m super excited to be participating in the Virtual Valentine’s Day Blog Hop!  A group of over 50 crafters has been organized by the fabulous Taylor Usry and we are all showcasing Valentine projects on our blogs today!  If you’ve just arrived from Wendy Price’s awesome blog, welcome!  If you came here for my weekly Paper Therapy challenge post, I hope you’ll take the time to hop to at least some of the other blogs in the group because you’ll be in for a real treat for your eyes.

Before I get to my card, I thought you’d want to know that there is a terrific assortment of 21 prizes from 19 different sponsors being given away in connection with the Hop.  Prize winners will be drawn from random comments on the participating blog hop posts – so, the more blogs you visit and comment on, the more chances for you to win!  You can comment until 6:00 pm EST on Thursday, February 17 to be eligible for a prize, and winners will be announced on Friday, February 18.  What kind of prizes are being awarded?  Check out this list:

Stamp Insanity –  1 digital stamp set of the winner’s choice
Meljens Designs – 4 digital images of the winner’s choice
Pixie Dust Studio – 2 digital images of the winner’s choice
Lizzie Anne Designs – $10 gift certificate to the Lizzie Anne Designs store (donated by Taylor Usry)
Christian Paper Crafts – 1 year general membership
Paper Pretties – 3 total winners: 1 person will receive Timeless Love acrylic stamp set; 2 people will receive 5 digital images of their choice from the store
Karber Digital Images – winner’s choice of 2 digital images
Di’s Digi Downloads – 5 digital images of the winner’s choice
The Scrappychick Boutique – 2 6″x6″ Cosmo Cricket paper pads to one winner
Stampendous – 4 cling rubber stamps from their new release to one winner
Pink Cat Studio – 5 digital images of the winner’s choice
Amber Ink – $10 gift certificate to the Amber Ink store
Simply Betty Stamps – 3 digital images of the winner’s choice
Mark’s Finest Papers – 1 stamp set of the company’s choice to the winner
Dreamweaver Stencils – 1 “love” stencil, 1 rose stencil, pearlescent embossing paste and a palette knife
Chi Chi Memories Designs – Meaning of Love Digital Stamp Set to one winner
Little Potato House – $20 gift certificate to the Little Potato House store
Kenny K digis: 4 digis to one winner
Kraftin’ Kimmie Stamps: winner’s choice of 2 rubber stamps

So… now, on to today’s card.  This week’s Paper Therapy challenge is to make a Valentine – and that played into this blog hop perfectly!  Like a lot of my cards, today’s has a story behind it.  Remember a few weeks ago I shared the card I planned to give my husband?  That didn’t pan out.  I got hit with the flu the middle of last week, which messed up my plans for making cards for my family to send to my parents and my husband’s parents.  Because I was under a time crunch and the card I’d made for my husband was so quick and easy to make, I ended up making a twin of it and mailed them out Friday afternoon.  Unfortunately, that left me back at the drawing board for my husband’s card.

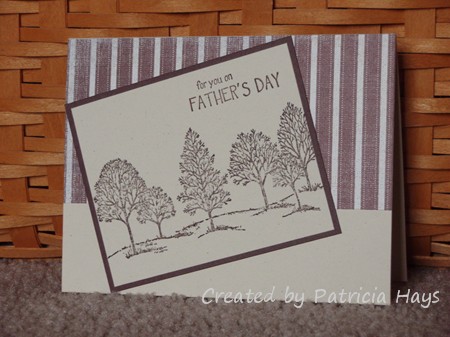
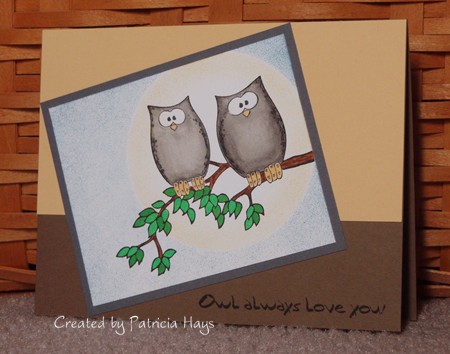
I didn’t think I should use a tree image again – and besides, I’d used a tree image on the Valentine I gave him last year.  He’s not into the red and pink thing, with hearts and lots of mushy stuff.  Love birds didn’t seem “right.”

Then I remembered I had a sweet bunny image from Amber Ink.  Oh yes – that would work.  And I decided to color the bunnies brown rather than grey, because we don’t need any additional reminders of our grey hares, um, hairs.  The Chocolate Chip and Soft Sky striped paper seemed like a good idea, to stay away from the traditional girly looking Valentine colors.  My first attempt at printing out a sentiment didn’t go very well so I decided I’d just scrap that idea and write something about hugs or snuggle bunnies inside.  Then I thought about using Liquid Applique on the bunnies’ tails to make them look fluffy. The bunnies are popped up from the background with dimensional adhesive.

And the card gradually came to life:

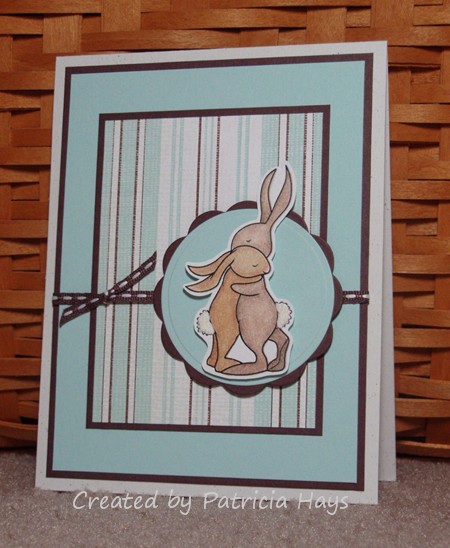
And of course there’s the additional pun of bunnies on a card for a blog hop.  🙂

Thanks for stopping by today and reading through this really long post.  The next stop on this tour of Valentines is Maria Levine’s lovely blog.  However, if you somehow get stuck or lost, you can always go back to Taylor’s blog and find your way again.  Be sure to thank Taylor for organizing this hop!  Enjoy a happy Valentine’s Day!

Supplies for today’s card:
Digital image: Bunny Hug (Amber Ink)
Cardstock: Naturals White, Chocolate Chip, Soft Sky, Afternoon Tea designer paper (Stampin’ Up)
Other: Seaside Ribbon Originals ribbon, dimensionals (SU); Premier colored pencils (Prismacolor); odorless mineral spirits (Houston Arts); Liquid Applique (Marvy Uchida)

Hey everyone. I’m sorry for the lack of posts during my recent blog makeover.  There’s still one kink that needs to be worked out regarding the calendar, but otherwise, I’m back.

Today’s card is for this week’s Paper Therapy challenge.  This time it’s a color challenge – rose red, pink, lavendar and white.  The colors made me think of flowers, and I took the liberty of adding a bit of green for leaves.  Unfortunately the photo doesn’t capture the shimmer of the white cardstock. I decided to keep the card relatively simple, without adding embellishments, because of the shimmer.

All supplies are from Stampin’ Up.
Stamps: Roses in Winter
Cardstock: Shimmery White, Rose Red, Pretty in Pink
Ink: Pretty in Pink, Rose Red, Almost Amethyst, Mellow Moss

Another Monday morning, another Paper Therapy challenge!  This week we have a color challenge to use colors similar to Stampin’ Up’s Marina Mist, Ruby Red, Certainly Celery and So Saffron.

I’ve been personally challenging myself to try to use some of my stamp sets I haven’t inked recently.  Although I’ve used the sentiments from today’s set, I don’t think I’ve ever used this image before.  The flower blossoms reminded me of daffodils so I colored them yellow, but then I noticed the foliage isn’t really daffodil stems and leaves.  Oh well.  Artistic license, I suppose.  I didn’t want a big mat all the way around the image, so I decided to use a squareish shape behind the image instead of another mostly rectangular shape.

I’m not sure I like the button embellishment.  I wanted to use it for an extra pop of the red color, but it seems a little big and “clunky” compared to the rest of the card.  Maybe I should have added a loop of the celery ribbon behind it to give it more of a visual foundation.  Or maybe I should’ve used a wider ribbon instead of this grosgrain.  Oh – what about using a wider ribbon, tying it in a bow and putting the button in the center of the bow?  But I wanted to keep the card reasonably easy to mail because it’s going in my stash for Operation Write Home.  So, what are your thoughts?  How can I improve the embellishment on this card?

Supplies:
Stamp: Always in My Thoughts (Stampin’ Up)
Cardstock: Basics White (Papertrey Ink); So Saffron, Marina Mist (SU)
Ink: Onyx Black (VersaFine)
Other: Certainly Celery grosgrain ribbon, button (SU); embroidery floss (DMC); Premier colored pencils (Prismacolor)

Also – congratulations to Bernie Thomas!  She’s the winner of the blog candy I was giving away during last weekend’s Made With Heart Blog Hop!  Bernie’s comment read:

Wow I love this.  So clean and simple but stunning!  My DH stole my heart 32 years ago.
Blessings  Bernie

Bernie, I’ll be in touch with you via the email address you left with your comment.   I hope you and your husband share many more happy Valentine’s Days together!  Enjoy your prize!

Good Monday morning!  It’s time for the next Paper Therapy weekly challenge!  This week the challenge is to make a card in a shape other than a rectangle or a square.

With Valentine’s Day coming up in less than a month, it seemed only natural to make a heart-shaped card.  I used Heart 3, a digital image from InStyle Stamps, for the main focal point.  Aren’t the elaborate swirls in it just fabulous?  I sized it to about 4″ x 4″, printed it out in black, and cut around it with my trusty Cutterbee scissors, leaving about a 1/8″ border all around the image.   I decided to add some Prima flowers to the solid part of the heart, and my red ones were a nearly identical color match to Stampin’ Up’s Poppy Parade cardstock.  I cut a piece of Poppy Parade to 4 1/4″ x 8 1/2″, folded it in half for my card base, used temporary adhesive to attach the printed heart to the card, and then cut around it to get my heart-shaped card.  Then I took the printed heart off so I could attach the flowers with some gold brads, and re-adhered it with permanent adhesive.

And there it is – a very sweet and simple card, but it will be easy to mail to someone to show them a little love.

Supplies:
Digital Image: Heart 3 (InStyle Stamps)
Cardstock: Poppy Parade, Whisper White (Stampin’ Up)
Other: flowers (Prima Marketing); gold brads (SU)

If you are in the mood for more Valentine projects, be sure to stop by this coming weekend because I’ll be participating in the Made With Heart Valentine Blog Hop!  The hop runs from Friday, January 21 through Sunday, January 23.  There will be lots of fantastic projects to see and probably even some blog candy up for grabs along the way.  Who knows – I may even surprise my readers by giving away some goodies!  🙂


In the spirit of full disclosure, the image used on today’s project was provided to me by InStyle Stamps to aid in promoting their products.

I have some exciting news today! I was selected as a Guest Designer for Splitcoaststampers’ Clean and Simple challenges, and this is my week to serve in that capacity! I’m thrilled to have been chosen from the many people who tried out for the winter design team.

Since it’s Monday, it’s also time for a new weekly challenge at Paper Therapy!  We have a sketch challenge this week.  I combined the sketch with this week’s SCS Clean and Simple theme, “A Day in the Snow.” 

When I learned the CAS challenge theme, I knew I wanted to use this snowman designer paper. Isn’t it darling?  I had originally planned to use a different sentiment.  Then in Friday’s mail I received this stamp, which I’d won as a trivia contest prize.  It was perfect for the theme so I decided to use it instead of my first choice.  I turned the sketch sideways – here’s how it was originally drawn:

I hope that my readers will join in the challenges this week at both Paper Therapy and Splitcoaststampers!  I’d love to see what y’all create!

Here are the supplies for today’s card:
Stamps: Winter Wishes (Unity)
Cardstock: Always Artichoke, Cherry Cobbler, Naturals Ivory, Bordering Blue (Stampin’ Up); snowman designer paper from Winter Wonderland paper pack (Lizzie Anne Designs)
Ink: Bordering Blue (SU)
Other: Always Artichoke grosgrain ribbon (SU); Bordeaux grosgrain ribbon (Offray); snowflake punch (EK Success); half pearl (KaiserCraft); Snowflake embossing folder (QuicKutz)

It’s Monday – which means it’s time for the first Paper Therapy challenge of 2011!   This week, the challenge is to find a project on one of your favorite blogs (but not your own blog – LOL!) and “CASE” it.  Some people define “CASE” as “Copy And Share Everything”. I originally learned it as “Copy And Selectively Edit” so that’s what I did. 

I actually made this card just before Christmas.  I needed something in which I could include an iTunes card for our family friends’ teenage son.  Because I literally had only about a 90 minute chunk of time to work on this project (and that included finding what I wanted to CASE!), I needed something that would be really quick and easy.  My inspiration piece came from a blog post by Taylor Usry.  I love so much of Taylor’s work that I knew I wanted to use something from her blog.  This particular card looked so clean and easy to replicate that I chose it to CASE.  I kept the white background and the red accent color, but changed the black to green and the popcorn theme to Christmas ornaments.  The large ornament was stamped on a scrap of white cardstock and cut out.  A 1/4″ hole punch was the perfect thing for “cutting out” the center of the ornament loop!

I hope you’ll take the time to visit Taylor’s blog and fall in love with her work.  Be sure to visit the other Paper Therapy design team members’ blogs and comment on their work, too!  They’ve made some fabulous things this week!

Supplies:
Stamps: Fun With Shapes, Short & Sweet (Stampin’ Up); Build-a-Bauble (Lizzie Anne Designs)
Cardstock: Real Red, Garden Green (SU); Basics White (Papertrey Ink)
Ink: Real Red, Garden Green (SU); Silver (ColorBox)
Other: Silver organdy ribbon (SU); red satin ribbon (Offray)

This is just a quick post today to wish all of my readers a wonderfully joyous and merry Christmas! 

This week’s Paper Therapy challenge is to create a Christmas card or scrapbook layout.  I used a monochromatic color scheme for my card.  I’ve always liked the swirls in this tree image and decided this year was time to use it.

Supplies:
Stamps: Season of Joy (Stampin’ Up); Seasonal Sayings (Gina K. Designs)
Cardstock: Certainly Celery, Confetti Cream, Certainly Celery Patterns designer paper (SU)
Ink: Certainly Celery (SU)
Other: Certainly Celery twill ribbon (SU); star mini brad (The Paper Studio)

It’s Monday – which means it’s time for another Paper Therapy weekly challenge!  This week it’s all about snowflakes. 

This was a really easy card to make.  First I lightly brushed some Shimmerz paint on some scraps of two shades of blue cardstock.  While I was letting the Shimmerz dry, I cut the layers for the rest of the card and stamped the sentiment on the shimmery white panel.  Then I punched my snowflakes from the shimmery scraps, glued them to the card, and added some self-adhesive half pearls.

So now that you’ve seen my card, go visit the other Paper Therapy Design Team members’ blogs (they’re linked in the middle sidebar) and leave them a little love.  Then go make a snowflake card of your own and upload it to the Paper Therapy weekly challenge thread by Saturday, December 18.  I know it’s a super busy time of the year but we’d love to have you play along with us!

Supplies:
Stamps: Sincere Salutations (Stampin’ Up)
Cardstock: Shimmery White, Baja Breeze, Soft Sky (SU)
Ink: Baja Breeze (SU)
Other: Angel Wings paint (Shimmerz); snowflake punches (EK Success); half pearls (Basic Grey)

This week’s Paper Therapy challenge is a sketch challenge.  After you have the chance to check out what the other design team members have made with it, why don’t you play with us too?

I think what I like best about this card is that the polka dots, the scallops, the pearls and the flower make it look feminine, yet it doesn’t use a lot of traditionally feminine or pastel colors. 

Supplies:
Stamp: Happy Birthday (Lizzie Anne Designs)
Cardstock: Vintage Cream (Papertrey Ink); various papers from Blush 6″ x 6″ paper pad (Basic Grey)
Ink: Taken with Teal (Stampin’ Up)
Other: petite oval and petite scalloped oval Nestabilities dies (Spellbinders); small scalloped border die (PTI); flower (Prima Marketing); self adhesive pearls (KaiserCraft)

Are you ready for another Paper Therapy weekly challenge?  This week’s challenge is to create a card with a bow and a button. 

My card is another one for Operation Write Home.  I thought the color scheme was a fun change from the typical red and pink and white Valentine scheme.  I tied a bow with the embroidery floss through the buttonholes and attached the button on top of a faux bow I made from ribbon scraps. 

I hope you’ll participate in the challenge, too!

Supplies:
Stamps: So Much Love (Lizzie Anne Designs)
Cardstock: Crushed Curry, Whisper White, Razzleberry Lemonade designer paper (Stampin’ Up)
Ink: Onyx Black (VersaFine), Rich Razzleberry (SU)
Other: Rich Razzleberry ribbon (SU); button (Papertrey Ink); embroidery floss (DMC); markers (Copic); sponge

Happy Monday! It’s time for another Paper Therapy weekly challenge! This week the challenge is to make a card for either a man or a boy. Please consider playing along with us this week! Take a few minutes to check out what the rest of the Paper Therapy Design Team made – links to their blogs are in the sidebar.

I’ve been keeping the Operation Write Home special Valentine mission in the back of my mind lately, so I decided to make a card that would work for that. I’ve had this stamp set from Gina K Designs for a while now and decided it was definitely time to put it to use.  I used one of Jeanne Streiff’s cards as inspiration for what to do with the owl panel, and the layout comes from last week’s OWH Stars & Stamps Sketch Challenge.  I used a Nestabilities die large enough to frame the owls to cut a circle from an index card, and used both the card and the cutout as masks for sponging the moon and the sky. The image is colored with Copic markers.

When my 11-year-old son saw this card, he paused, thinking about the sentiment.  Then he said, “That’s like the worst joke ever!”  I guess he isn’t as big a fan of puns as I am.

Supplies:
Stamps: Owl Always Love You (Gina K Designs)
Cardstock: So Saffron, Soft Suede, Basic Gray (Stampin’ Up); Basics White (Papertrey Ink)
Ink: Night of Navy, So Saffron (SU); Onyx Black (VersaFine)
Other: markers (Copic); sponges

This week’s Paper Therapy challenge should be easy for everyone to join in!  The assignment?  Make a thank you card.  See? Easy! I hope you’ll take the time to participate in the challenge with more of the Paper Therapy family!

I sat down last Thursday, November 11, to make my design team sample.  Being Veteran’s Day, and being involved with Operation Write Home, made me want to make a card to thank someone in the service for their duty overseas.  I personally can’t imagine what it would be like.  The risks of combat are scary enough, but to be dealing with that thousands of miles away from home and family is likely much more difficult than many people realize.  I know that OWH accepts “Any Hero” cards to encourage our servicemen and servicewomen.  I thought about sending one in the package I sent at the end of October, but I wimped out because I wasn’t sure what to write in it.  But with today’s card, I’m going to muster up a little courage of my own to write a thank you note to one of our military “over there”. 

I wanted to do something somewhat patriotic, but I really don’t have any Americana type stamps or digital images. The colors in this designer paper are kind of antique-y red, white and blue and I felt they’d fit the bill.  I also thought the stamped stars would work well with the layout from my fabulous with buttons card.  And then I came up with what has become probably the most unusual embellishment I’ve used on a card.

The stars on the bottle caps from my husband’s Starr Hill Northern Lights Pale Ale reminded me of the stars on the United States flag, so I asked him to save me a few.  I just knew I could figure out some way to use them on a card, and yep… I did.   I read on Splitcoaststampers about flattening bottle caps in a Big Shot, so I figured my Big Kick would work just as well.  I put one of the caps between my two oldest cutting plates, put them on top of the platform, and ran it through.  And oh my!  The process went so smoothly!  I thought, “WOW!  That worked like a charm!”…  until I realized that the fluted edge of the bottle cap had become FIRMLY stuck in the cutting plate.  OOOOOPS!  But as you can see below, I did manage to pry it out. 

So here’s my card.  I hope it’ll help show some brave military member that the sacrifices he or she is making are appreciated.

Supplies:
Stamps: All Year Cheer I, Starring You (Stampin’ Up)
Cardstock: River Rock, Ruby Red, Blue Bayou, Whisper White, Western Sky designer paper (SU)
Ink: Onyx Black (VersaFine); River Rock (SU)
Other: Blue Bayou ribbon (SU); markers (Copic); sponge; bottle cap

© 2019 Suffusion theme by Sayontan Sinha