Hi, and Happy New Year! We’ve made it through another week, and now it’s Friday again, which means it’s time for another Sweet ‘n Sassy Digi Challenge! This week’s challenge should be pretty fun: Use a new product or technique and a digital image to make your project. Share your work over at the Sweet ‘n Sassy Digi Challenge website before midnight eastern time Thursday, January 10. We’d love to see what you create!
The new product I chose to work with isn’t entirely brand new to the crafting world. I had bought a set of Faber Castell Gelatos at a scrapbooking/stamping store in Florida when my family was visiting my in-laws over Thanksgiving, but with the busy-ness of preparing for Christmas, I didn’t have a chance to do anything with them until now. So I browsed YouTube for video tutorials using this coloring medium and learned several different techniques to use with them. I’ve tried mine out in two different ways, so I have two cards for you today. Both cards use the same floral images.
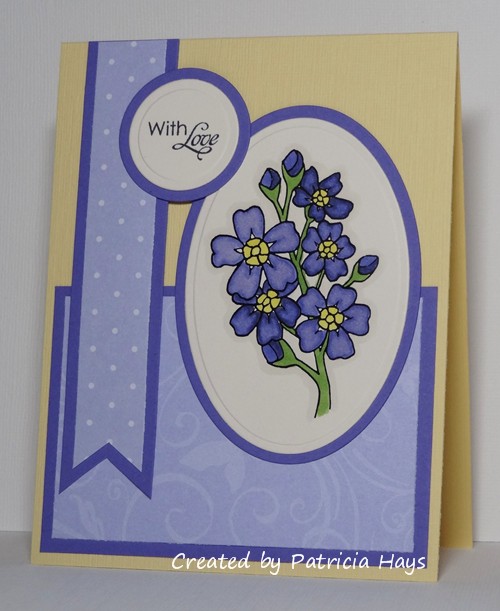
For the flowers on the first card, I rubbed two colors of the Gelatos on the flowers, not trying to be totally precise on getting the color to cover the flower. Then I used my fingertip to blend the colors together to completely cover the image, before cutting the flower images from the cardstock. A couple things I noted: 1) The colors blended more easily the heavier I applied them to the paper, and the warmer my fingers were, and 2) The colors wash off fingers VERY easily, with no staining! The Gelatos I have are metallic, but the shimmer seemed to disappear into the cardstock after several hours. On the card below, you can still see a bit of shimmer on the flower on the right. I wanted the sentiment on this card to take up a fair amount of vertical space, but I also wanted one that would be practical for Operation Write Home. So I took one of the choices from the Mother’s Day Sentiments digital set, used my photo editing software to break each word into its own file, and then reassembled the words into three lines instead of the original one long, narrow line. I used one of my newest Nestabilities dies to cut the sentiment panel, and then framed it with cardstock that coordinated with the colors I used for the flowers.

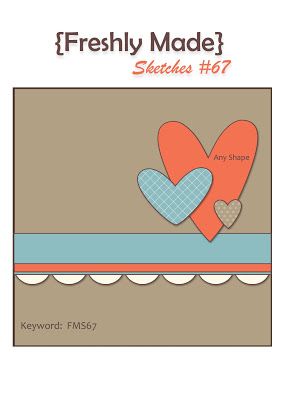
The packaging stated that the Gelatos can be blended either with or without water, so I tried watercoloring some of the flower images with them. I applied the Gelatos to the cardstock, and then blended them with a slightly wet paintbrush. Wow! The colors blended SO easily! It was almost like magic. I let the images dry completely before cutting them out. I noticed that the watercolored images turned out a tiny bit lighter in color than the ones I blended with my fingertip, but they retained a whole lot more shimmer than the finger-blended ones. However, if you rub the watercolored images with your finger, a little of the shimmer comes off on your finger. This doesn’t happen with the finger-blended ones. So I’m a bit hesitant about using the watercolored ones on cards for Operation Write Home. (NOTE – Not all Gelatos are metallic like mine are. This is 100% totally a guess, but I’d think that images watercolored with non-metallic Gelatos would be all right for OWH.) I decided to make a birthday card with the watercolored flowers, and I’ll send it to one of my friends. I used the current Freshly Made Sketches layout for this card, stretching it out to a rectangle. You can tell from the photo that these flowers have more shimmer than the ones on the first card. I used a sentiment from a clear Sweet ‘n Sassy stamp set on this card, rather than trying to put the entire card base through the printer. On both this card and the first one, the purple cardstock coordinates better with the rest of the card in real life than the picture shows.

 So, there you have it – two different ways to use Faber Castell Gelatos. Thanks for stopping by today! Now it’s your turn to show off what you can create with something that is new to you, using a digital image for your main focal point! I’m looking forward to seeing what you link to the Sweet ‘n Sassy Digi Challenge site!
Supplies for the “you are loved” card:
Digital Images: Six Petal Flowers, Mother’s Day Sentiments (Sweet ‘n Sassy Stamps)
Cardstock: Pure Luxury White (Gina K. Designs); Ballet Blue, Eggplant Envy (Stampin’ Up)
Ink: printer ink
Other: Metallic Gelatos (Faber Castell); dimensionals (SU); Wonky Rectangle and Classic Rectangles Plain Nestabilities dies (Spellbinders)
Supplies for the “happy birthday” card:
Digital Image: Six Petal Flowers (Sweet ‘n Sassy Stamps)
Sentiment Stamp: Make a Wish (SNSS)
Cardstock: Pure Luxury White (Gina K. Designs); Ballet Blue, Eggplant Envy (Stampin’ Up)
Ink: printer ink; Tuxedo Black (Memento)
Other: Metallic Gelatos (Faber Castell); scallop die (SNSS); dimensionals (SU); plum twine (Really Reasonable Ribbon); Victoria embossing folder (ProvoCraft)