Hello!  I hope your weekend has gotten off to a good start!  If you’re in the United States, I hope you had a wonderful Thanksgiving.

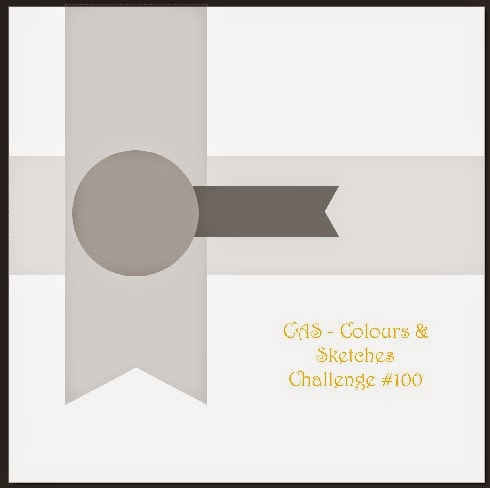
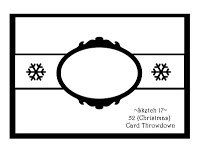
Because it’s a fifth Saturday of the month, this week at 52 {Christmas} Card Throwdown we have a “Pick a Previous” challenge for you.  Jacqueline, our challenge hostess, is asking us to choose a previous 52{C}CT sketch for our inspiration this time.  You can find the previous sketches in the “sketches archive” tab at the 52{C}CT website.

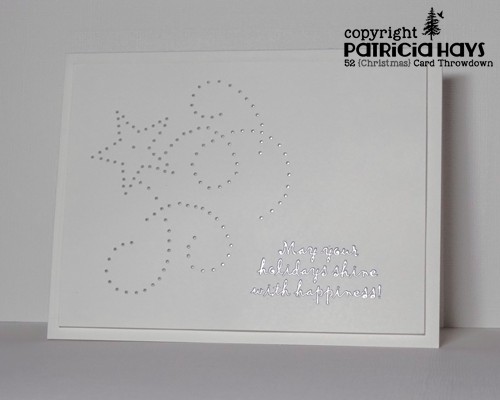
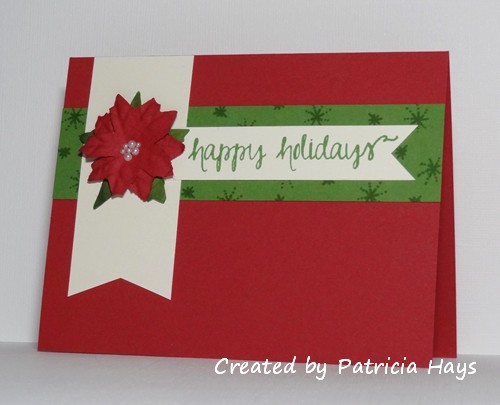
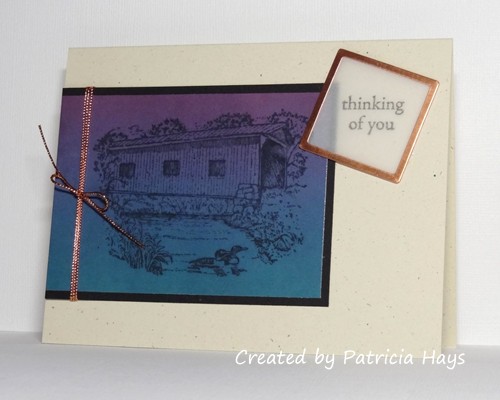
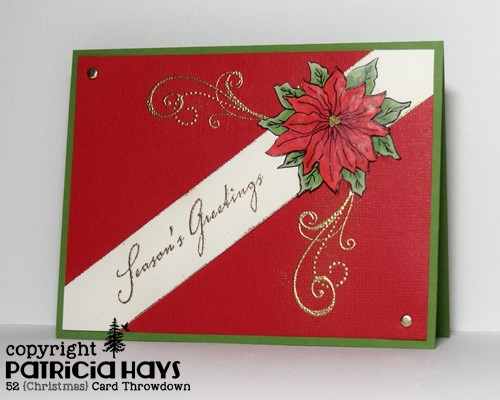
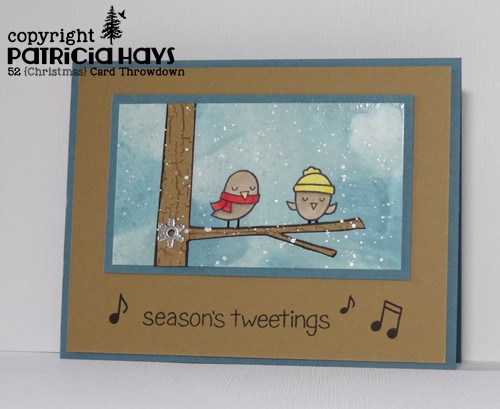
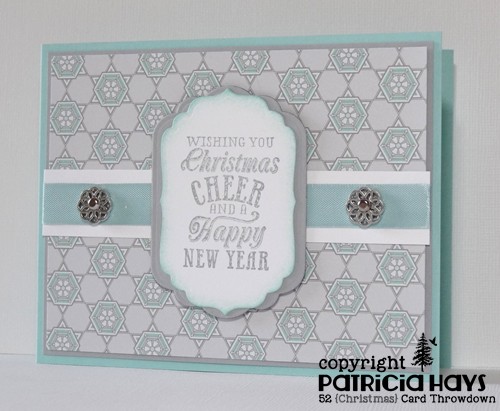
I decided to revisit the May 2013 sketch.  Back then I used an embossing folder on the background with a deep, rich color scheme and made a card without a sentiment on the front.  Today’s card is kind of the opposite.  I’ve used designer paper with a pastel color scheme, and the sentiment is the main focus of the card.  Without any further ado, here it is…

52CCT 11-29-2014

Sketch 17

Which sketch will you pick?  There are over 30 from which to choose, so have fun deciding!  Then be sure to share your card with us at the 52{C}CT site by 1:00 p.m. Eastern time Friday, December 5.  Thanks for stopping by today!

All supplies, except for the dies, are from Stampin’ Up.
Stamp: Christmas Messages
Cardstock: Pool Party, Smoky Slate, Whisper White, Winter Frost designer paper stack
Ink: Pool Party, Smoky Slate
Other: Pool Party seam binding, dimensionals, silver Hodgepodge Hardware, sponge; Labels Four and Labels Eleven Nestabilities dies (Spellbinders)

Hello everyone!  It’s a little hard to believe that Christmas is just over a month away!  This week at 52 {Christmas} Card Throwdown we have a technique challenge for you.  Get out your poking tools because we’re doing some paper piercing!

I did a Google search for paper piercing patterns and found an image for this nice swirly star pattern.  Unfortunately, the website it was originally blogged on appears to be defunct now, but I was able to copy and paste from the Google Images and use it that way.  I decided to keep the card white on white, with silver accents, pairing the design with a heat embossed sentiment from one of my oldest stamp sets.  The main focal panel is raised with dimensional adhesive so the piercing doesn’t flatten.  I attached a piece of silver foil cardstock to the card base, behind the pierced area, so the silver shines through the holes.  It was hard capturing that in the photo, but I did it at the risk of making the sentiment hard to read.  It says, “May your holidays shine with happiness!”

52CCT 11-22-2014

Now it’s your turn to visit the 52{C}CT blog and see what the rest of the design team has created this week!  Then pull out your piercing tool and show us what you can do with this technique.  Link your card to the challenge site by 1:00 p.m. Eastern time Friday, November 28.  We’d love to have you join us!  Thanks for visiting here today.

Supplies:
Stamp: Make a Wish (Stampin’ Up)
Cardstock: Pure Luxury White (Gina K. Designs)
Ink: silver (ColorBox)
Other: piercing tool (Making Memories); silver embossing powder (Ranger); dimensionals (SU)

Hello!  This week at CAS – Colours and Sketches we have another color challenge for you.  Once again, it’s using a metallic along with two other colors.

I’ve combined the color challenge with the CAS(E) this Sketch! challenge that will be closing later this morning.  Well, it’s a kind of loose interpretation, but the card layout was definitely inspired by the sketch.  And it’s their 100th sketch – what a milestone!  I had these heat embossed die cut stars left over from a different project, and it was nice to put them to use here.  It doesn’t show well in the photo, but the words “make a wish” are also heat embossed.

CASCAS101

Be sure to check out what the rest of the CC&S Design Team has done with these colors!  Then share your own card with us by linking it to the challenge post by 1:00 p.m. Eastern time Wednesday, November 26.  We’d love to have you join us!

Supplies:
Stamps: Cake & Candles (Avery Elle)
Cardstock: Lost Lagoon, Smoky Slate, Whisper White, Whisper White textured (Stampin’ Up)
Ink: Lost Lagoon (SU); silver (ColorBox)
Other: Bracket Edge die (My Favorite Things); star die (Sweet ‘n Sassy Stamps); silver embossing powder (Ranger)

Hello again!  It’s time for another challenge at Cards in Envy.  For the next two weeks, we have a super easy theme for you to follow:  Thankful for You.  That’s right – all you need to do for this challenge is to make an A2 sized thank you card (4.25″ x 5.5″) with no lumpy, bumpy embellishments so that it could be mailed at the standard postage rate.  See – I told you it was easy!  🙂

For my card, I’ve used the current layout from CAS(E) this Sketch!.  For the triangles, I cut a square of designer paper and coordinating mats from colored cardstock.  Then I cut the squares across the diagonal to get the triangles.  This allowed me the supplies to make two “twin” cards at once.  Yay!  After I adhered the triangles to the card bases, I trimmed off the excess from the vertical edges of the cards.  The cards are super simple in style, but I think they will be all right for Operation Write Home since the colors aren’t specific to any particular season.

CIE 11-17-2014


If you need additional inspiration, please go check out the Cards in Envy site and see what the rest of the design team has made.  Then create a thank you card following our challenge guidelines and share it with us on the Cards in Envy site by 7:00 p.m. Eastern time Sunday, November 30.  We’d love to have you play along with us!  Thanks for stopping by today.

All supplies for today’s card are from Stampin’ Up.
Stamp: Trendy Trees
Cardstock: Sahara Sand, Tangerine Tango, Island Indigo, Sycamore Street designer paper
Ink: Tangerine Tango

Hello there, and happy Saturday to you!  It’s time for another theme challenge at 52 {Christmas} Card Throwdown:  Christmas windows.  The perspective can be either looking into the window or looking out from the window.  So long as the window is the main focus of the card, it’s good.

I’ve owned this cute rubber stamp of a boy and his dog looking out a window for… um… let’s just say a pretty long time.  Even though I think it’s adorable, I’ve always been rather intimidated by it because I worry that my coloring skills won’t do it justice.  Well, this challenge provided me with the opportunity to push myself past that fear.  I guess I did OK.  One of the reasons the stamp has bothered me is that there is no background to the window – so that way, the user can choose to put it on whatever type of building he or she pleases.  I decided the easiest thing to do would be to add it to cardstock embossed with the brick embossing folder.  I highlighted the bricks with a few swipes of my white ink pad.  I was trying to follow the current Freshly Made Sketches challenge for the layout, so I tried making the one rectangular element into a snowdrift up against the side of the building, under the window.  I put a few scrap cardstock shims behind the window to give it some dimension, but in hindsight I’m not entirely sure that was the best idea.  Then there was the horizontal twine-like element of the sketch.  The realist in me couldn’t figure out a logical reason for that in my scene.  So I opted to just add a simple little bow to the snowflake, which takes the place of the button-like sketch element. The sentiment is made up from two different stamps. Since it seems to me like the boy is looking out of the window, perhaps missing somebody who is far away, it made me think of kids whose parents are stationed overseas with the military. Even though it’s too late to send this card to Operation Write Home to be used this holiday season, it’ll keep for next year.

52CCT 11-15-2014

Go check out the other design team members’ windows – this is one time where it’s okay to be a “peeping Tom”, LOL!  🙂  Then create your own card featuring a Christmas window and share it with us at the 52{C}CT site.  We’d love to have you join in the fun and creativity!  Thanks for stopping by today.

Edited on November 19, 2014:  I’m so honored to have been named one of the “Perfect Princesses” at Freshly Made Sketches!  Thank you to Linda for choosing my card!

Supplies:
Stamps: Billy and Sparky at Window (eat cake graphics); Trendy Trees (Stampin’ Up); Christmas Tags (Sweet ‘n Sassy Stamps)
Cardstock: Soft Sky, Soft Suede (SU); Pure Luxury White (Gina K. Designs)
Ink: Craft White (SU); Tuxedo Black (Memento)
Other: Brick embossing folder (Tim Holtz); Premier colored pencils (Prismacolor); odorless mineral spirits (Hampton Arts); snowflake punch (EK Success); Cherry twine (Really Reasonable Ribbon)

Wow!  Today marks the beginning of the 100th challenge at CAS – Colours and Sketches!  What a milestone!  Lizy, our challenge hostess for November, has drawn up a nice little sketch for us to work with this week.  You’re welcome to change up the shapes a bit or turn the sketch on its side, just so long as we can recognize the general idea of the sketch.  I’ve stretched it into a rectangle for my card.

I’ve been on a bit of a kick lately to use up some older supplies, and that carried through on today’s card.  I had one remaining red poinsettia from a package of paper flowers, so I decided to use that as the focal point of the card.  The red cardstock is a color that’s been retired for a while, and I already had this card base cut to size, waiting to be used.  The green and vanilla cardstocks used here were scraps left over from other projects.  I just dressed them up by cutting the vanilla into the banner shapes and by stamping some small starbursts on the green.  The only “new” things here are the stamp sets I used and the package of pearls I opened to get the sizes I wanted for the center of the poinsettia.

CASCAS100

I’m also entering this card into the current challenge at AEIHeartU.  It’s been a while since I’ve played along there.

Challenge 18

I hope you’ll join us at CAS – Colours and Sketches!  Go check out what the rest of the design team has made.  Then link your own card at the site by 1:00 p.m. Eastern time Wednesday, November 19.  Thanks for stopping by today!

Supplies:
Stamps: Storybook, So Happy (Avery Elle)
Cardstock: Riding Hood Red, Gumball Green, Very Vanilla (Stampin’ Up)
Ink: Gumball Green (SU)
Other: poinsettia (Making Memories); half pearls (SU)

Hello!  Last week I was so busy finishing up cards for the Hope You Can Cling To challenges at Splitcoaststampers.com that I didn’t take time to blog many of them.  Today’s card is the one I made for a challenge asking participants to create their own background without using designer papers.  It ended up being an example of what one can put together using supplies that have been ignored for a long time.

When I’d had my glossy cardstock folder out from working on this card, I noticed that I had this piece with a brayered background and a peaceful covered bridge image.  I figured this particular HYCCT challenge would be the perfect time to finally create a card with it.  The current Freshly Made Sketches challenge sketch showed a panel that looked to be about the size of my bridge scene, but in a vertical rather than horizontal format.  So I turned the sketch on its side and used it that way.  For the snowflake element shown in the sketch, I decided to go old school with a metal edged vellum tag, and I stamped the sentiment on that.  Some copper cording finished the card.

FMS161

Thanks for stopping by today!  All comments are read and greatly appreciated.  🙂  Hope your week is off to a great start!

Except for the inks, all supplies for this card are from Stampin’ Up.
Stamps: Changing Seasons, Always in My Thoughts
Cardstock: Naturals Ivory, Basic Black, Glossy White
Ink: Stained Glass rainbow pad (Adirondack); Tuxedo Black (Memento)
Other: copper cording, copper metal edge tag

Hello again!  It’s color challenge week at 52 {Christmas} Card Throwdown, and we have a very traditional combination for you to work with: red, green, and your choice of either metallic silver or metallic gold.

My card ended up as a rather traditional styled card.  I opted for a classic poinsettia image for my red and green.  I used the paper tole technique on the poinsettia to give it some dimension.  Unfortunately, it also gave the poinsettia a bit of glare that I couldn’t avoid when I was photographing the card.  The large red panel is textured cardstock, which gives the card some subtle visual interest.  I did go a little out of the ordinary with the sentiment panel, attaching it diagonally across the card.  The sentiment panel is edged with a bit of gold embossing to coordinate with the gold embossed sentiment and flourishes.  A couple of gold brads finish off the card.

52CCT 11-08-2014

Now it’s your turn to show us what you can make with these colors!  If you need more inspiration first, go visit the 52{C}CT site and see what the rest of the design team has created.  Be sure to link your card at the 52{C}CT site by 1:00 p.m. Eastern time on Friday, November 14.  We look forward to having you join us!

Supplies:
Stamps: Season of Joy, Scenic Season (Stampin’ Up)
Digital Image: Poinsettia (Sweet ‘n Sassy Stamps)
Cardstock: Gumball Green, Real Red textured (SU); Pure Luxury Ivory (Gina K. Designs)
Ink: gold (ColorBox); printer ink
Other: gold embossing powder (Ranger); gold brads (Making Memories)

Greetings!  It’s time for another color challenge at CAS – Colours and SketchesLizy is our challenge hostess this month, and she’s chosen a very classic color combo.

When I saw metallic gold on the challenge rubric, I got a little excited.  I knew I wanted to combine a few things I’ve tried over the last few months.  After I stamped the border of red polka dots, the vanilla panel got spritzed with some gold pearl mist spray.  Unfortunately, the shimmer from it doesn’t show very well in the photo.  I used textured cardstock to die cut the heart.  I gave it some swipes with my VersaMark ink pad and heat embossed it with gold powder to give the edges some shiny definition.  Using dimensional adhesive to attach the heart gives it even more separation from the background.

CASCAS99

Be sure to check out what the rest of the CC&S Design Team has made!  Then create your own clean and simple styled card with these colors and link it to the CC&S site by 1:00 p.m. Wednesday, November 12.  We’d love to see what you make!

Supplies:
Stamps: Grunge Borders (Sweet ‘n Sassy Stamps); Masculine Messages (Gina K. Designs)
Cardstock: Real Red, Very Vanilla, Very Vanilla Textured (Stampin’ Up)
Ink: Real Red (SU); VersaMark (Tsukineko)
Other: Heirloom Gold Perfect Pearls Mist, gold embossing powder (Ranger); Heart #2 Sizzlits die (Sizzix); dimensionals (SU)

Here’s a quick card I made for the current Freshly Made Sketches challenge just before the challenge deadline.  I chose the chicken image and sentiment so that the card fits into the Chicks Stick Together challenge for Splitcoaststampers.com’s Hope You Can Cling To.  The chicken is a digital image that I purchased online, but I created the sentiment myself using Microsoft Word. I doodled some dots around the edges of both circles (although it’s hard to see the pale yellow dots around the chicken).  The patterned papers are some old, old scrapbooking papers from my stash.  The red paper has a faint splatter print, and the yellow paper has a subtle plaid print.

OLYMPUS DIGITAL CAMERA

Thanks for stopping by today!  🙂

Supplies:
Digital Image: Hey Chicky (Sweet ‘n Sassy Stamps)
Cardstock: So Saffron (Stampin’ Up); Pure Luxury White (Gina K. Designs); patterned papers from Cottage Papers Collection (Keeping Memories Alive)
Ink: printer ink
Other: markers (Copic); standard circle Nestabilities dies (Spellbinders)

Cards in Envy - Pumpkin Patch

Comments Off on Cards in Envy – Pumpkin Patch
Nov 032014

Hi there! It’s Cards in Envy challenge introduction day! For the next two weeks we have a theme challenge of Pumpkin Patch.  Show us your A2 sized cards featuring at least one pumpkin.  Remember to keep your cards flat enough to fit in an envelope and be mailed at the first class postage rate.

Since Halloween has passed, I didn’t want to use a jack-o-lantern image.  I chose this cute Rhubarb the teddy bear digital image for my card and colored it with Copic markers.  I’ve combined a couple other challenges along with the Pumpkin Patch challenge.  The layout is this past week’s sketch challenge at Splitcoaststampers.com, and the teddy bear lets the card qualify for the Warm Fuzzies Hope You Can Cling To challenge.

CIE 11-3-2014

If you need additional inspiration, please go check out the Cards in Envy site and see what the rest of the design team has made.  What kind of pumpkin card will you create?  Share your work with us on the Cards in Envy site by 7:00 p.m. Eastern time Sunday, November 16.  We’d love to have you play along with us!

Supplies:
Digital Image: Rhubarb’s Autumn Day (Sweet ‘n Sassy Stamps)
Cardstock: More Mustard, Dusty Durango, Autumn Vine designer paper (Stampin’ Up); Pure Luxury White (Gina K. Designs)
Ink: printer ink
Other: markers (Copic); standard circle and big scalloped circle Nestabilities dies (Spellbinders); small scalloped border die (Papertrey Ink)

Hello!  The year is passing by quickly, and it’s time to turn a new page on the calendar.  Our 52 {Christmas} Card Throwdown challenges this month start off with a sketch challenge.  This is a nice one that can be kept very simple or be dressed up.  As always, you’re welcome to turn the sketch on its side or manipulate it into a rectangle.  So long as the basic shapes of the sketch are easily recognizable in your card, it’s all good.

I’ve stretched the sketch out into a landscape-oriented rectangle and created a little scene on the focal panel.  I’m still drawn to the cute little birdie stamps, so I’ve turned the part of the sketch that’s drawn as a ribbon with a bow into a tree trunk.  I took the artistic liberty of adding in a tree branch for the birdies to perch upon.  The sky background was made with an “ink smash” technique.  I dripped a few drops of reinker in two shades of pale blue onto glossy cardstock, and then laid another piece of glossy cardstock on top of it to “smash” the ink between them.  I carefully pulled the two cardstock pieces apart and set them aside to dry.  While I was waiting for the ink to dry, I worked on the tree and the birds.  Once I got the scene all assembled, I knew I wanted to use a snowflake-shaped eyelet in the place of the bow on the sketch, but something still seemed to be missing.  So I decided to add some “falling snow” to the scene by dipping a small paintbrush into shimmer paint and flicking it onto the scene (after I’d covered the birds with sticky note masks, because I didn’t want to risk messing them up).  I originally planned to use some small snowflake stamps for the little embellishments drawn on the sketch, but I decided instead to use the musical notes because the size of them worked better.

52CCT 11-01-2014

Before I let you go off to create your own card for this challenge, I want to invite you to consider joining in our 52 {Christmas} Card Throwdown design team search!  We’re looking to add a few people to our team.  New members will start their terms in January 2015.  All you need to do to apply is to participate in each of our challenges this month, and to include the note “DT” in your name when you link your cards to the challenge posts.  So what are you waiting for?  Go for it and show us what you can do!  🙂  Be sure to link your card using this week’s sketch by 1:00 p.m. Eastern time Friday, November 7.

Supplies:
Stamps: Winter Sparrows, Feathered Friends [for Simon Says Stamp] (Lawn Fawn); Weathered (Stampin’Up)
Cardstock: Blue Bayou, Baked Brown Sugar, Glossy White (SU); Pure Luxury White (Gina K. Designs)
Ink: Tuxedo Black (Memento); Baked Brown Sugar (SU)
Other: markers (Copic); Soft Sky and Baja Breeze reinkers, Frost White shimmer paint (SU); snowflake eyelet (source unknown)

© 2019 Suffusion theme by Sayontan Sinha