Are you ready for another Paper Therapy weekly challenge?  This week’s challenge is to create a card with a bow and a button. 

My card is another one for Operation Write Home.  I thought the color scheme was a fun change from the typical red and pink and white Valentine scheme.  I tied a bow with the embroidery floss through the buttonholes and attached the button on top of a faux bow I made from ribbon scraps. 

I hope you’ll participate in the challenge, too!

Supplies:
Stamps: So Much Love (Lizzie Anne Designs)
Cardstock: Crushed Curry, Whisper White, Razzleberry Lemonade designer paper (Stampin’ Up)
Ink: Onyx Black (VersaFine), Rich Razzleberry (SU)
Other: Rich Razzleberry ribbon (SU); button (Papertrey Ink); embroidery floss (DMC); markers (Copic); sponge

Today’s card is just a quick and simple one that combines two recent Splitcoaststampers Clean & Simple challenges. Last week they had a sketch to follow, and this week the challenge was to use sponging as a technique. I decided to make another card for the Operation Write Home special mission and this is what I ended up with.

I don’t often use heart shapes on cards, so I don’t feel like I can justify the purchase of the heart-shaped Nestabilities dies set. I have a few Sizzix dies but they’re all pretty small. So for the heart on this card, I traced around one of my cookie cutters and cut it out with my trusty Cutterbee scissors.

Supplies:
Stamps: So Much Love (Lizzie Anne Designs)
Cardstock: So Saffron, Whisper White (Stampin’ Up)
Ink: Onyx Black (VersaFine); Rose Red (SU)
Other: So Saffron and Rose Red grosgrain ribbon (SU); sponge; Premier colored pencils (Prismacolor); odorless mineral spirits (Houston Arts)

going out on a limb

Comments Off on going out on a limb
Nov 242010

The Clean & Simple crew at Splitcoaststampers is currently searching for new design team members, so last week I decided to give it a shot and make a card for the first challenge in the selection process.  I have to be honest – I was so underwhelmed by my card that I haven’t even made a blog post for it yet.  So I was totally stunned to be chosen to advance to round two of the selection process! 

Today’s card is what I just submitted for round two.  They called it the “crazy relative” challenge, and the requirement was to make a card naming a relative.  Well, when I read “crazy”, this stamp was the first thing that entered my mind.  Unfortunately, there’s not enough sunlight this morning for my camera to capture the texture in the yellow cardstock, so you’ll have to take my word for it that it’s textured. 

I’ll find out on Saturday whether or not I’m eligible for round three of the selection process.  Wish me luck!  🙂

Supplies:
Stamps: You’re My Sister (Stampabilities)
Cardstock: Whisper White, Rich Razzleberry, Barely Banana textured (Stampin’ Up)
Ink: Onyx Black (VersaFine)
Other: Rich Razzleberry ribbon (SU); Premier colored pencils (Prismacolor)

Happy Monday! It’s time for another Paper Therapy weekly challenge! This week the challenge is to make a card for either a man or a boy. Please consider playing along with us this week! Take a few minutes to check out what the rest of the Paper Therapy Design Team made – links to their blogs are in the sidebar.

I’ve been keeping the Operation Write Home special Valentine mission in the back of my mind lately, so I decided to make a card that would work for that. I’ve had this stamp set from Gina K Designs for a while now and decided it was definitely time to put it to use.  I used one of Jeanne Streiff’s cards as inspiration for what to do with the owl panel, and the layout comes from last week’s OWH Stars & Stamps Sketch Challenge.  I used a Nestabilities die large enough to frame the owls to cut a circle from an index card, and used both the card and the cutout as masks for sponging the moon and the sky. The image is colored with Copic markers.

When my 11-year-old son saw this card, he paused, thinking about the sentiment.  Then he said, “That’s like the worst joke ever!”  I guess he isn’t as big a fan of puns as I am.

Supplies:
Stamps: Owl Always Love You (Gina K Designs)
Cardstock: So Saffron, Soft Suede, Basic Gray (Stampin’ Up); Basics White (Papertrey Ink)
Ink: Night of Navy, So Saffron (SU); Onyx Black (VersaFine)
Other: markers (Copic); sponges

a piece of cake

Comments Off on a piece of cake
Nov 192010

Here’s a quick and easy card I made for a friend who’s celebrating her birthday this week. It actually uses the same layout I used on my last card, but this time it’s turned sideways and the focal point is an oval instead of a rectangle. I cut the Nestabilities ovals, did a little sponging on the white one, stamped the cake image, ran the white cardstock through my Big Kick with an embossing folder, layered some ribbons, and assembled the whole thing.  Ta-da… a birthday card.

Supplies:
Stamps: Vintage Birthday (Lizzie Anne Designs)
Cardstock: Purely Pomegranate, Chocolate Chip, Whisper White (Stampin’ Up)
Ink: Purely Pomegranate, Chocolate Chip (SU)
Other: Chocolate Chip satin ribbon, Purely Pomegranate stitched ribbon (SU); Victoria embossing folder (Provo Craft); petite oval and petite scalloped oval Nestabilities (Spellbinders); sponges

We’ve had a lot of rain and dreary weather the last few days, so it’s great to see the sun peeking out from behind the clouds this morning. Today’s card seems to fit that mood too. I think the sentiment on it, “wishing you a day full of sunshine”, could be used for most any occasion – thinking of you, encouragement, birthday, or even just because. The layout is an adaptation of Lizzie Anne Designs sketch challenge #150.

Supplies:
Stamps: Turn Toward the Sun (Lizzie Anne Designs)
Cardstock: Basics White (Papertrey Ink); Larkspur, Marigold, Blue Bonnet and Buttercup from Oh Baby! Boy collection (Basic Grey)
Ink: Onyx Black (VersaFine)
Other: markers (Copic); rectangle and scalloped rectangle Nestabilities dies (Spellbinders)

This week’s Paper Therapy challenge should be easy for everyone to join in!  The assignment?  Make a thank you card.  See? Easy! I hope you’ll take the time to participate in the challenge with more of the Paper Therapy family!

I sat down last Thursday, November 11, to make my design team sample.  Being Veteran’s Day, and being involved with Operation Write Home, made me want to make a card to thank someone in the service for their duty overseas.  I personally can’t imagine what it would be like.  The risks of combat are scary enough, but to be dealing with that thousands of miles away from home and family is likely much more difficult than many people realize.  I know that OWH accepts “Any Hero” cards to encourage our servicemen and servicewomen.  I thought about sending one in the package I sent at the end of October, but I wimped out because I wasn’t sure what to write in it.  But with today’s card, I’m going to muster up a little courage of my own to write a thank you note to one of our military “over there”. 

I wanted to do something somewhat patriotic, but I really don’t have any Americana type stamps or digital images. The colors in this designer paper are kind of antique-y red, white and blue and I felt they’d fit the bill.  I also thought the stamped stars would work well with the layout from my fabulous with buttons card.  And then I came up with what has become probably the most unusual embellishment I’ve used on a card.

The stars on the bottle caps from my husband’s Starr Hill Northern Lights Pale Ale reminded me of the stars on the United States flag, so I asked him to save me a few.  I just knew I could figure out some way to use them on a card, and yep… I did.   I read on Splitcoaststampers about flattening bottle caps in a Big Shot, so I figured my Big Kick would work just as well.  I put one of the caps between my two oldest cutting plates, put them on top of the platform, and ran it through.  And oh my!  The process went so smoothly!  I thought, “WOW!  That worked like a charm!”…  until I realized that the fluted edge of the bottle cap had become FIRMLY stuck in the cutting plate.  OOOOOPS!  But as you can see below, I did manage to pry it out. 

So here’s my card.  I hope it’ll help show some brave military member that the sacrifices he or she is making are appreciated.

Supplies:
Stamps: All Year Cheer I, Starring You (Stampin’ Up)
Cardstock: River Rock, Ruby Red, Blue Bayou, Whisper White, Western Sky designer paper (SU)
Ink: Onyx Black (VersaFine); River Rock (SU)
Other: Blue Bayou ribbon (SU); markers (Copic); sponge; bottle cap

I have to say I learned quite a few things during Operation Write Home’s Valentine blog hop. The most enjoyable thing was seeing all the fantastic cards others have created, and realizing that they are all going to help spread some happiness to our brave military members far from home and to their families here in the states.

One really neat thing I found out is that if OWH receives 4000 Valentines by December 1, Archway Cookies will donate 4000 cookies to our troops overseas!  Click here for more details on this special mission!

I also discovered some super cute digital images from a company called K ‘n K Designs.  Katlyn, the company owner, is being generous enough to offer the Valentine Kolar set FREE if you email her by noon (central time) Monday, Nov. 15!  See the K ‘n K Designs website for more details.

I thought Kolar was really cute, and I have to admit I love freebies, so I went for the offer.  Today’s card is my first creation with this set.  I kept it pretty quick and simple.  I also wanted to keep it fairly generic so it could be given to either a boy or a girl of any age.  The sky and grass are sponged, and Kolar is colored with Copic markers.  The ribbon does match the red heart better in real life than it does in the photo.

Supplies:
Digital Images: Valentine Kolar (K ‘n K Designs)
Cardstock: Certainly Celery (Stampin’ Up); Basics White (Papertrey Ink); “Orange Slices” from Sugar Rush 6″ x 6″ paper pad (Basic Grey)
Ink: Bashful Blue, Certainly Celery (SU)
Other: markers (Copic); ribbon (Offray); petite oval and petite scalloped oval Nestabilities (Spellbinders); sponges

So with this card and the one in yesterday’s post, now I have two Valentine’s Day cards ready to send Operation Write Home for the cookie mission! I realize this is an especially busy time of year for everyone, with Thanksgiving and Christmas coming soon, but I hope that my cardmaking friends will join me in this endeavor.  My goal is to send 10 by the end of November. Think I can do it? 🙂

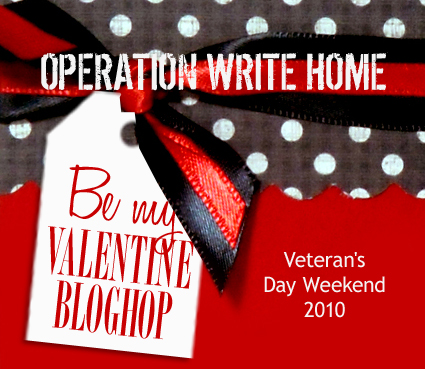
I know it probably seems weird to be gearing up for Valentine’s Day right now, but for Operation Write Home, ’tis the season! 

If you’re unfamiliar with Operation Write Home, it’s an organization that collects handmade greeting cards to send to our military members stationed overseas.  Our troops in Iraq, Afghanistan, Kuwait, and at sea can then send cards home to their loved ones – since they can’t easily get out to the Hallmark store or Walmart or whatever to buy a card.  You are also welcome to send “any hero” cards to encourage our brave men and women overseas.  For more details, click on the link above or the one in my sidebar to visit Operation Write Home’s website. 

Because of the lag time in sending the cards out to the Middle East, and then allowing time for the troops to mail them back home, OWH works its seasons ahead of the calendar.  The deadline for sending Christmas, Hanukkah and Kwanzaa cards has passed, so now they are working on collecting Valentines.  If you’d like to make some handmade Valentines for them, you’ll need to mail them to one of the OWH shippers by January 7, 2011.

If making cards to donate doesn’t interest you, you can still help Operation Write Home in another effort.  Jo-Ann Fabric and Craft Stores recently held a Craft for a Cause Contest, and Operation Write Home was one of the three organizations that received the most donations.  Now, the top three organizations are in a contest for votes.  The one that receives the most votes by December 4, 2010 will receive $50,000 from OWH!  Please click on this link to vote, and vote often!  But remember you can vote only once per 24-hour period.

And now, here’s today’s card.  I really wanted to make it a little fancier, with scalloped borders or some of my Nestabilities, but nothing worked with the size of this image.  So I opted for just a simple straight edged mat with punched corners embellished with pearls.  When I got the pearls out, I wondered if they’d work on the sash of the dress – and it turned out they fit quite nicely there. 

Supplies:
Stamps: Ava Holding Balloons (In Style Stamps); So Much Love (Lizzie Anne Designs)
Cardstock: Basics White (Papertrey Ink); Real Red (Stampin’ Up)
Ink: Onyx Black (VersaFine)
Other: markers (Copic); self adhesive pearls (KaiserCraft); ticket corner punch (SU); Angel Wings paint (Shimmerz)

Here’s a funny.  Whenever I photograph one of my cards, I take at least 3 or 4 shots of it, and then choose the one that looks the best.  I think I took 5 pictures this time – and as I was looking at them up close on my computer, I realized NONE of them showed off the Shimmerz paint on the wings.  Not a one.  So back to my photo staging area I went.  Because I took the photo at night, I was using my small Ott-Lite lamp to shine light on the card.  It took me a while to get it adjusted to pick up the glimmer.  Lesson learned – when all else fails, turn the lamp upside down so the light shines up onto the card.  Seriously.  It worked!

If you came here from Giselle’s Cross My Heart Papercrafts blog, thanks so much for stopping by!  The next link in today’s blog hop will take you to Operation Write Home’s Homefront Blog, where you can learn even more info about this fantastic organization, and start off at the top of the blog hopper list.

The Hope You Can Cling To challenges at Splitcoaststampers.com wrapped up last weekend, and I was lucky enough to be able to spend a lot of time Saturday working on challenge cards.  Today’s post shows off one of them. 

For this particular challenge, the idea was to have some part of the image raised up from the card with dimensional adhesive.  I chose to pop up the blossoms for some flowers.  The leaves are stamped directly onto the focal panel.  I stamped the blossoms on a different piece of cardstock, cut them out, and then used dimensional pop dots to attach them to the panel.  It was nice using this retired stamp set again, too.  The card actually came together pretty quickly and easily once I decided on my design and color scheme.

I hope it brings a smile to the person who eventually receives it.

Supplies:
Stamps: Best Blossoms (Stampin’ Up)
Cardstock: Pale Plum, Perfect Plum, Whisper White (SU)
Ink: Perfect Plum, Pale Plum, Mellow Moss (SU)
Other: dimensionals (SU)

It’s time for the 6th weekly Paper Therapy challenge!  This week was a really tough one for me.  Kristin, the Paper Therapy site owner, picked out an ad for an inspiration challenge.  You’ll have to go to the Paper Therapy challenge board linked in the first sentence to see the ad, which was a *very* interesting photo!  After a lot of thought, I finally decided to create this:

My main objectives were to capture the reflection, the texture, and the colors, especially the black.  My background colors behind the trees ended up more muted than I really wanted, but oh well.  You can’t tell from the photo that the image panel is done on glossy cardstock, which emulates the shine of the ad photo.  I thought the branches of the trees imitated the wispiness of the skirts pretty well.  I have to laugh a little because Kristin used this exact tree image on her challenge card last week! 

Are you wondering how I did the reflection on the image panel?  It honestly wasn’t very difficult.  First I created the background by using a brayer to apply ink from one of my old Stampin’ Up Spectrum multicolored ink pads.  When that was dry, I inked up the stamp with black ink and stamped it on a piece of acetate I use for my Stamp-a-ma-jig imaging sheet, and then used the SAMJ to help position the image onto the panel.  Once the main image was stamped, I took the acetate sheet, turned it over (ink side down), aligned it with the “right way up” image, and then gently pressed the sheet down onto the image panel.  This allowed the ink to smear a tiny bit so the reflection wouldn’t be super-duper crisp.   Because the acetate is such a glossy, smooth surface, the ink hadn’t dried on it.  When I carefully lifted the acetate back up, there was my watery-looking reflection.

So, there it is.   I’ll be hanging onto this card to add to my next package for Operation Write Home

Supplies:
Stamps: Lovely As A Tree, Trendy Trees (Stampin’ Up)
Cardstock: Creamy Caramel textured, Basic Black, Glossy White (SU)
Ink: Taffy Spectrum pad (SU); Onyx Black (VersaFine)
Other: Basic Black grosgrain ribbon (SU); ribbon charm (Making Memories); brayer

Today’s card is another one for the Splitcoaststampers.com Hope You Can Cling To challenges. This challenge was to use buttons.

I like buttons. I have quite a few of them in my craft supplies. Unfortunately, I don’t often think to use them as embellishments. So this challenge was a good one for me.

A while back I’d seen a card in the Splitcoast gallery that I really liked, and I used a lot of its design elements for my card.  I used the same stamp set.  The layout is pretty much the same, except that I stretched it out for a rectangular card base vs. the original square shape and placed the branches differently.  I also changed the color scheme and simplified the ribbon treatment.  I used less buttons because I didn’t have any really tiny ones.

I have to admit that I’m pleased with my results. I hope you like it, too.

Supplies:
Stamps: Where You Should Be (Ippity by Unity)
Cardstock: Bashful Blue, Spring Showers designer paper (Stampin’ Up); Vintage Cream (Papertrey Ink)
Ink: Chocolate Chip (SU)
Other: buttons, Chocolate Chip grosgrain ribbon (SU); sponge

Here’s another card I made for Operation Write Home.  I’ve admired the clean and simple look of scored frames on a lot of cards I’ve seen online and decided to try that idea.  The flower and the sentiment come from sets by two different stamp companies.  Neither set had seen ink for a while so I thought I’d put them both to use.  For the flower, I stamped off the solid image once on scrap paper before stamping onto the card to get the lighter shade of the outline color.

Supplies:
Stamps: Heartfelt Thanks (Stampin’ Up); Tag Lines (Gina K Designs)
Cardstock: Basics White (Papertrey Ink)
Ink: Rose Red, Mellow Moss (SU)
Other: scoring board (Martha Stewart)

Good Monday morning!  Are you ready for this week’s Paper Therapy challenge?  This time the challenge is to make a card with a hole in it. 

I hadn’t made a suspension card in a long time, so I decided to do that for the challenge.  I thought butterflies would work well for the suspended elements, and chose this designer paper to give the impression of butterflies flitting among the woods on a spring day.  Taffeta ribbon and flowery hardware finish off the card.

Join us at Paper Therapy and show off your creative hole-y-ness!  🙂  The other design team members have come up with some really neat stuff for this challenge, too. Their blogs are linked over to the right – give them a little blog love, too. 

Supplies:
Stamps: Everyday Sayings (Lizzie Anne Designs)
Cardstock: Bashful Blue (Stampin’ Up); LilyKate 6″ x 6″ paper pad (Basic Grey)
Ink: Chocolate Chip (SU)
Other: Very Vanilla taffeta ribbon, silver Hodgepodge Hardware (SU); classic butterfly 3-in-1 punch (Martha Stewart); embroidery floss (DMC)

© 2019 Suffusion theme by Sayontan Sinha