Hello!  I hope your weekend has gotten off to a good start!

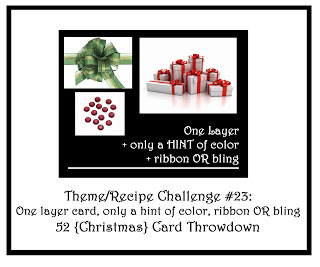
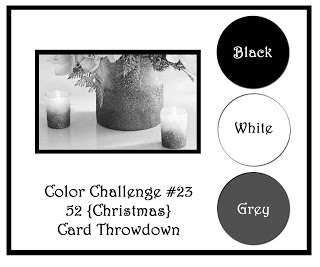
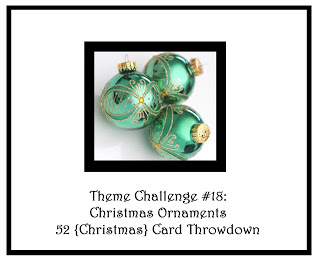
Because it’s a fifth Saturday of the month, this week at 52 {Christmas} Card Throwdown we have a “Pick a Previous” challenge for you.  Louise, our challenge hostess, is asking us to choose a previous 52{C}CT theme for our inspiration this time.  You can find the previous themes at the 52{C}CT site, in the “labels” list in the right sidebar.

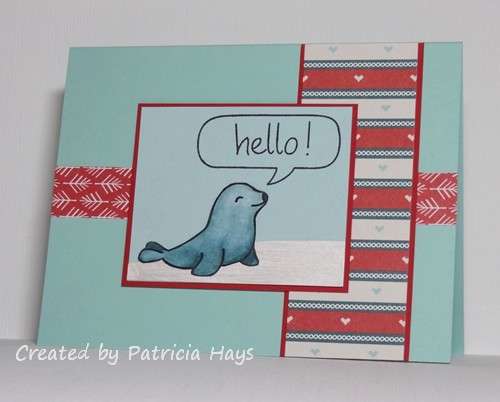
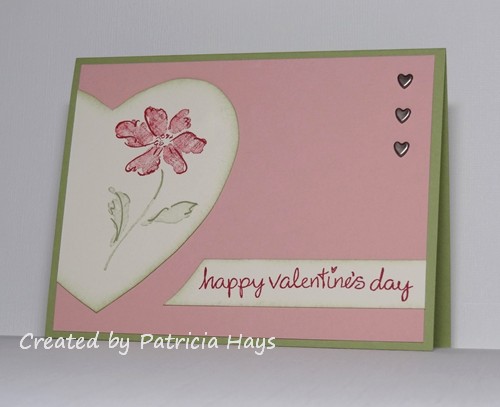
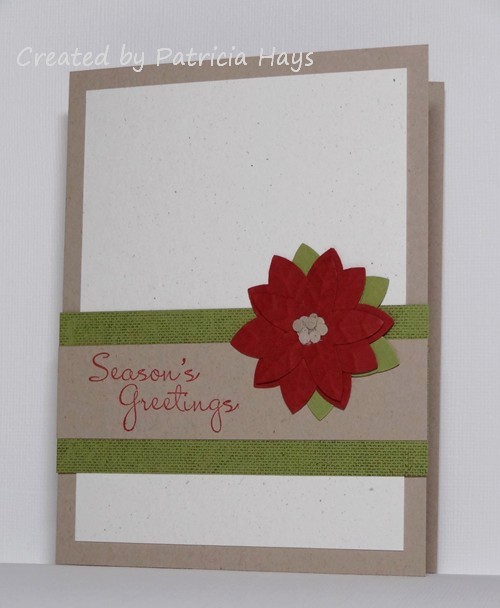
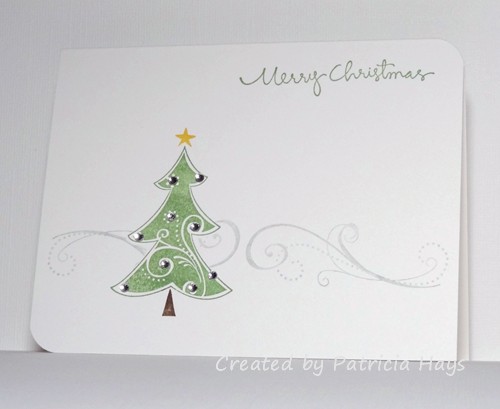
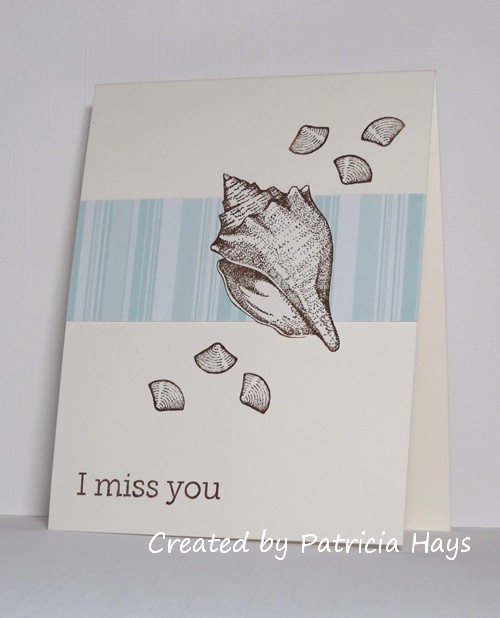
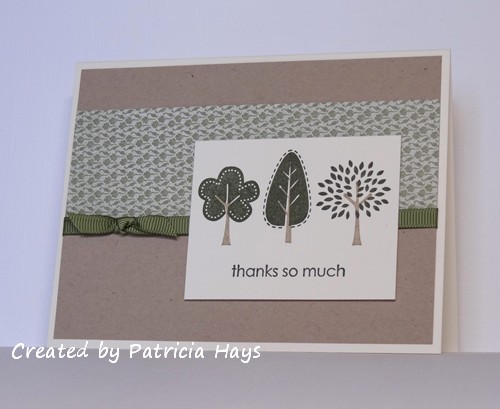
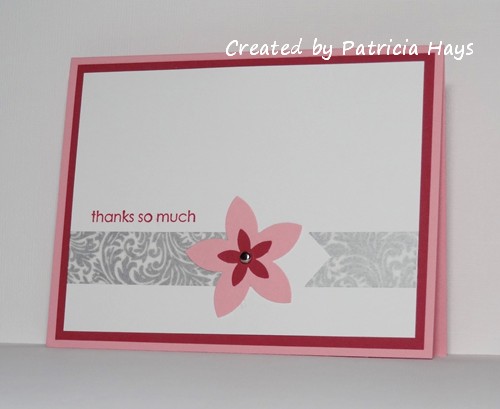
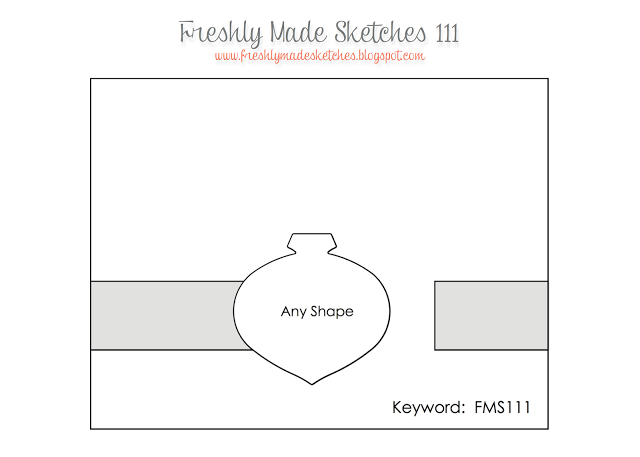
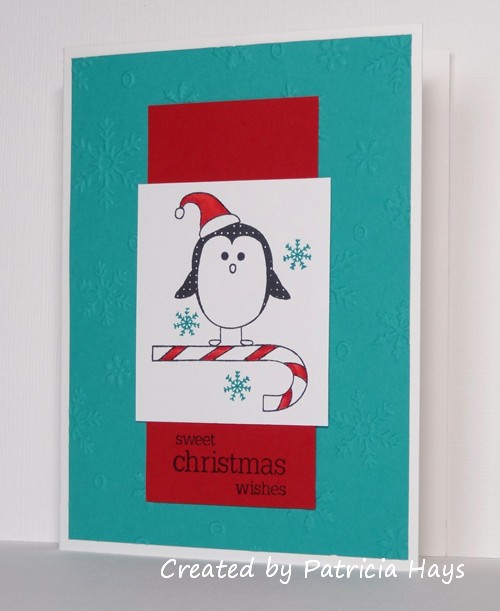
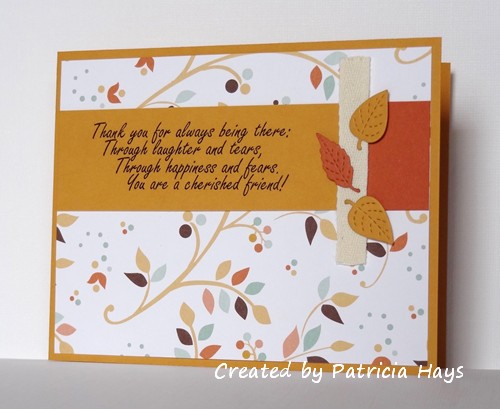
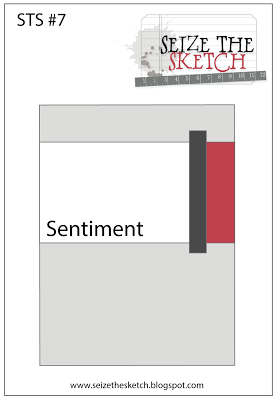
I’ve chosen the June 2013 theme of Christmas ornaments for my card.  The layout for the card is a direct copy from a card I made in February, minus the little baubles at the bottom right corner.  (I was in a creative rut when I was trying to get this card made, and when that happens I tend to just go back to something I’ve done in the past and rework it into something new.)  The main panel is adhered with dimensional adhesive to accommodate the stitching on the back side of the panel.  The ornament was stamped on a scrap piece of cardstock and punched out, and it’s raised up with scrap cardstock shims to allow for the “hanger” thread.  The card is still flat enough to work well for Operation Write Home, so I’ll just set it aside and wait until next summer or fall to send it off to them.

I’m looking forward to seeing the variety of themes that our challenge participants will choose this week!  Be sure to share your card at the 52{C}CT site by 1:00 p.m. Eastern time Friday, December 6.

Supplies:
Stamps: Delightful Decorations (Stampin’ Up)
Cardstock: Naturals White, Afternoon Tea designer paper (SU)
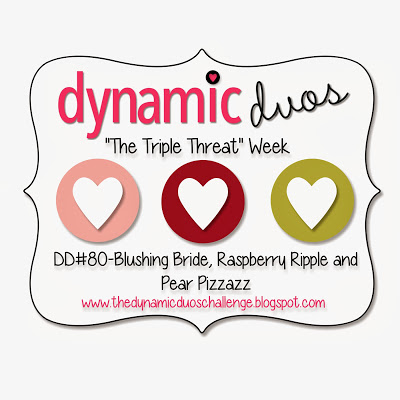
Ink: Raspberry Ripple (SU)
Other: Ornament punch, dimensionals (SU); embroidery floss (DMC); Wonky Rectangle Nestabilities die (Spellbinders)

Hello, and Happy Thanksgiving to all my American visitors!

As usual on Thursdays, there’s a new challenge being presented at CAS – Colours and Sketches.  This week it’s a sketch challenge.  I’ve stretched the sketch out to a landscape oriented rectangle.  It took me a while to settle on my designer papers, image, and sentiment, but once I got those things figured out, the card came together pretty easily.  The “snow” that the seal is on is white cardstock painted with shimmery white paint.  The seal was stamped on a scrap of white cardstock, colored, and then fussy cut before being attached to the image panel.  I do realize that the design in the narrow horizontal strip is supposed to be stick trees, but since my scrap of that paper fit the card lengthwise, I decided to just go with it and let it be kind of an abstract print.  I think it works well for an any-occasion wintry card for Operation Write Home.

My younger son, who usually detests puns, saw this and told me, “This card has the seal of approval.”  I guess that means he likes it!  🙂

What will you create with this sketch?  Share your work with us at the CAS – Colours and Sketches site by 1:00 p.m. Eastern time Wednesday, December 4.  Be sure to check out what the other design team members have made, too!  Thanks for stopping by today!

Supplies:
Stamps: Critters in the Snow, A Birdie Told Me, So Much to Say (Lawn Fawn)
Cardstock: Pool Party, Riding Hood Red, Soft Sky, Whisper White (Stampin’ Up); designer papers from Fa La La 6″ x 6″ paper pad (Lawn Fawn)
Ink: Tuxedo Black (Memento)
Other: Frost White shimmer paint (SU); markers (Copic)

dynamic heartfelt valentine

Comments Off on dynamic heartfelt valentine
Nov 262013

Hello!  Yes, I know it seems strange to be sharing a valentine today when most people in the United States are thinking of Thanksgiving turkey and stuffing and pumpkin pie.  But valentines need to be sent to Operation Write Home by the end of December so that they can be shipped out to the troops stationed overseas, and our military men and women can have time to write in them and send them home to their loved ones by February.

Today’s card is going into my valentine stash for OWH.  I’ve used this week’s Dynamic Duos colors and tweaked one of my own cards from 2007.  This time the Dynamic Duos crew added a third color to the challenge.  The colors suggested “flowers” to me, so I’ve used a fairly large one on my card.  After I got started with this idea I remembered I don’t have any large heart-shaped dies.  (Note to self – put “heart shaped dies” on Christmas list.)  So I traced around a cookie cutter to get my heart shape and then cut it with scissors.  I trimmed the end of the sentiment panel to follow the contour of the heart so that the shapes wouldn’t compete too much against each other.  A trio of heart shaped mini brads finishes off the card.

That’s it for today!  Thanks for stopping by!

Supplies:
Stamps: Heartfelt Thanks (Stampin’ Up); My Silly Valentine (Lawn Fawn)
Cardstock: Pear Pizzazz, Blushing Bride, Very Vanilla (SU)
Ink: Pear Pizzazz, Raspberry Ripple
Other: mini heart brads (Making Memories); heart shaped cookie cutter (Wilton); sponge

Hello!  It’s technique challenge week over at 52 {Christmas} Card Throwdown and Louise has an interesting one for us this week – inking up an acrylic block to create a background.

I chose to ink up my largest acrylic block, which is 4″ x 5″.  I randomly applied three colors of ink to the entire block.  (My ink pads are all the small 1″ cube type, so it was easy to use them to add ink to small areas of the block.)  I spritzed the block with water to blur the lines and help the inks run together a bit.  Then I placed a piece of cardstock onto the block and pressed it with my hands to transfer the ink to the cardstock.  After it dried I trimmed the edges, and the result is what I used for this card.  I added a sentiment stamp and repeated a snowflake stamp several times, and heat embossed the stamping with white embossing powder.  (I originally tried a silver powder, but it didn’t show well against the purple and grey inks.)  After I assembled the card, I added some rhinestones to the snowflake centers to give the card a little more pizazz. And ta-da!  It’s another winter card for Operation Write Home.

I hope you’ll give this technique a try and share your results with us at 52{C}CT!  The linky tool will remain open until 1:00 p.m. Eastern time Friday, November 29.

Thanks for stopping by today!  Have a fantastic weekend!

Supplies:
Stamps: Winter Wishes, Kissmas & Mistletoe (Unity)
Cardstock: Smoky Slate, Midnight Muse, Perfect Plum (Stampin’ Up); Pure Luxury White (Gina K. Designs)
Ink: Craft White, Smoky Slate, Midnight Muse, Perfect Plum (SU)
Other: white embossing powder (Stampendous); rhinestones (SU)

Hello!  We’re back to a color week at CAS – Colours and Sketches.  I couldn’t help but think Christmas when I saw the colors Lizy, our November hostess, chose.  Even though the Christmas deadline for Operation Write Home has passed, and I’ve already planned something different for the Christmas cards my family will send this year, I made a Christmas card for this challenge.  That’s OK – it’ll keep for sending to OWH next fall!

I used Seize the Sketch challenge #8 for the layout.  For the star element of the sketch, I created a poinsettia out of punches.  It’s probably difficult to see in the photo, but I used a stylus to add some veining to the poinsettia petals.  The olive green layer behind the sentiment is stamped with a subtle texture stamp to give it more visual interest as well as some contrast against the poinsettia leaves.

And there it is. Be sure to check out what the rest of the CAS – Colours and Sketches design team did with these colors. Then show us what you can make with them! You can link your creation to the challenge blog until 1:00 p.m. eastern time Wednesday, November 27. Thanks for stopping by today!

All supplies for this card are from Stampin’ Up:
Stamps: Linen, More Merry Messages
Cardstock: Kraft, Naturals White, Old Olive, Cherry Cobbler
Ink: Real Red, Old Olive
Other: 5-petal punch, 1/8″ hole punch

Today’s card combines the current Dynamic Duos color challenge with the current Seize the Sketch sketch challenge.  I’ve used these challenges to create another winter themed card for Operation Write Home.  The snowman was heat embossed on a scrap piece of cardstock and then fussy cut. He’s raised up a bit from the background to add a little dimension to the card.  The photo doesn’t show it, but the black cardstock has a very subtle linen texture.

Thanks for stopping by today!  Comments are always welcome and appreciated!

Supplies:
Stamps: Kissmas & Mistletoe (Unity); Critters in the Snow (Lawn Fawn)
Cardstock: Basic Black textured, Smoky Slate (Stampin’ Up); Pure Luxury White (Gina K. Designs)
Ink: craft White (SU); Tuxedo Black (Memento)
Other: white embossing powder (Stampendous)

Hello there!  I know a lot of people dread Mondays.  But today is a good one, because it’s time for a new challenge at Cards in Envy!  We have a fun one for everyone this time!  We’re calling it “Punch It”.  We want to see your punch art – artwork made from cardstock that’s been punched or die cut.  Rather than seeing a large shape used as a layer, we’d like to see main elements of your card design made from punches or dies.  As always, make sure your card is an A2 size (4.25″ x 5.5″) and is 1/4″ or less in thickness to fit in an envelope.

Over the last few years I’ve seen several cards in the Splitcoaststampers.com gallery where the card maker has used punches or dies to create the characters from Angry Birds.  I’ve always thought it would be fun to make one, and this challenge was the push I needed to go ahead and do it.  I used this particular card for inspiration and measurements.  I used the Word Window punch for the eyebrows and cut off the rounded ends.  I didn’t have a 3/8″ punch for the pupils of the eyes, and 1/4″ punches were too small and looked weird, so I used my 1/2″ punch.  For the beak, I punched a 1″ square, cut it in half diagonally, and then trimmed about 1/8″ off the hypotenuse of one triangle to get the smaller half of the beak. I had a lot of fun creating this bird, but I didn’t consider just how large it would end up being once the head and tail feathers were added.  I had it all assembled and I held it up to cardstock for the card base – and my jaw dropped (not in a good way) when I saw that it was too big to fit on a 4.25″ wide card.  Thankfully, it was just short enough to fit on a 4.25″ tall card, so I didn’t have to start all over and make a smaller bird.  I hadn’t originally planned to borrow the inspiration card’s starburst background idea, but in my state of near panic over the size of the bird, I couldn’t think of a better alternative.  After all, since the bird was going to take up most of the card front, there wasn’t but so much I could do!  To make it a little dissimilar to the inspiration card, I added some green to the bottom of the card to simulate grass.

So now it’s your turn! Check out the Cards in Envy site for all the challenge details, and share your punch art creation(s) with us by 7:00 p.m. eastern time Sunday, December 1. We’d love to have you play along with us!

Supplies:
Stamps: none
Cardstock: Poppy Parade, Whisper White, Basic Black, Daffodil Delight, Soft Sky, Baja Breeze, Wild Wasabi (Stampin’ Up)
Ink: Poppy Parade, Daffodil Delight (SU)
Other: 3.5″ standard circle Nestabilities die (Spellbinders); 1/2″ circle punch, Word Window punch (SU); 1″ circle punch, 1″ square punch (Creative Memories); heart punch (EK Success); sponge

Hello!  It’s hard to believe November is halfway over already!

Over at 52 {Christmas} Card Throwdown we’ve been having fun with Louise‘s challenges this month.  This week she gives us a recipe challenge:  a one layer card, with a small amount of color, and either ribbon or bling.  I definitely have the one layer and the bling parts down, but I’m hoping the rest of my card meets Louise’s idea of a hint of color!  I wanted the tree to have the most color, but I didn’t want it to look like it was just floating on the card, so I added a couple of flourishes to replicate the edge of a drifting snowbank behind the tree.  I stamped the flourishes off on a piece of scrap paper before stamping them on the card, to get a very pale shade of grey.

Now it’s your turn to show us what you can create with this recipe! Link your work to the 52 {Christmas} Card Throwdown site by 1:00 p.m. Eastern time Friday, November 22. We’d love to see what you create! Be sure to check out what the rest of the design team has made, too!

Supplies:
Stamps: Season of Joy, Christmas Greetings (Stampin’ Up)
Cardstock: Pure Luxury White (Gina K. Designs)
Ink: Wild Wasabi, Daffodil Delight, Soft Suede, Smoky Slate (SU)
Other: rhinestones (Bazzill); corner rounder punch (EK Success)

Hello!  It’s time for a new challenge at CAS – Colours and Sketches!

This week Lizy has drawn up a very nice sketch that lends itself well to clean and simple (CAS) styled cards.  I’ve stretched it out to a 4.25″ x 5.5″ rectangular format.  The large circular element of the sketch can be replaced with any shape.  I’ve chosen to use a large seashell.  I enjoyed last week’s color challenge so much that I’ve used it again this week!  🙂  Operation Write Home frequently requests cards with a “missing you” theme, so that prompted the sentiment I chose for this card.  I like that the card turned out gender neutral, so it can be sent to either a man or a woman.

Now it’s your turn!  Show us what you can do with this sketch by linking your card at the CAS – Colours and Sketches website by 1:00 p.m. Eastern time Wednesday, November 20.  Be sure to check out the other design team members’ cards and give them a little love by commenting on them, too!  Thanks for stopping by today!

Supplies:
Stamps: Stipple Shells (Stampin’ Up); Year Round Sentiments (Hero Arts)
Cardstock: Pure Luxury Ivory (Gina K. Designs); Soft Sky Prints designer series paper (SU)
Ink: Soft Suede (SU)

Here’s what I came up with for this week’s Dynamic Duos color challenge.  When I saw this week’s colors in their challenge graphic I knew I wanted to do something with trees.  The hard part was deciding which tree image(s) to use, and then figuring out a layout for the card.  This is actually an old sketch from Lizzie Anne Designs.  But it’s great for quick and simple cards.

Thanks for stopping by today!

All supplies except the ivory cardstock are from Stampin’ Up:
Stamps: Trendy Trees
Cardstock: Kraft, Paisley Petals designer series paper; Pure Luxury Ivory (Gina K. Designs)
Ink: Crumb Cake, Always Artichoke
Other: dimensionals, Always Artichoke grosgrain ribbon

Hello!  It’s color challenge time again at 52 {Christmas} Card Throwdown, and Louise has come up with something pretty unique for us.  She’s challenging us to use the monochromatic scheme of black, white and grey.

Even though I tossed a few ideas around in my head before I started actually working on my card, all of my thoughts were focusing on showing snow in some way.  I finally decided I’d give this snowman image a try since I hadn’t used it yet.  I masked off part of the card’s main panel and sponged along the edges of the area with black and white inks.  I didn’t quite get the effect I wanted with that, but I decided to roll with it anyway.  I also masked and sponged an area of “snow covered ground” at the bottom.  Then I added in my snowman image and heat embossed it with white embossing powder.  Some of the excess powder stayed on the card, but it’s not too bad.  Then I added a coordinating sentiment.  The snowflake eyelet was a literal last-minute decision.  I’d already assembled the card and felt like it was missing something.  I didn’t want to have to pull out the heat embossing supplies again to add a stamped and embossed snowflake in the corner.  So I opted for the eyelet instead, and gently separated the panel from the card base to hammer the eyelet into place.  Then I reassembled the card.  I do think it looks better with the eyelet, but I’m still not completely sold on the sponging.

I hope you’ll visit the other design team members’ blogs, and then create your own card using these colors!  Share your work with us at the 52{C}CT website by 1:00 p.m. Eastern time Friday, November 15. Thanks for visiting today!

Supplies:
Stamps: Kissmas & Mistletoe (Unity)
Cardstock: Smoky Slate, Basic Black (Stampin’ Up); Pure Luxury White (Gina K. Designs)
Ink: craft White (SU); Tuxedo Black (Memento)
Other: white embossing powder (Stampendous); snowflake eyelet (source unknown)

Today’s card is a quick one I made last night when I was finishing up cards for the annual Splitcoaststampers.com Hope You Can Cling To challenges.  One of the HYCCT challenges was to use washi tape.  I combined that with the current Freshly Made Sketches challenge and came up with this:

It was hard getting a good, clear photo showing off the washi tape without having it glare.  Oh well.  Anyway, the colors tie in with the HYCCT cause of supporting breast cancer patients – and even without that bit of background, I think they make a good any-time-of-year card, too.

Thanks for stopping by today!  Comments are always read and appreciated.

Supplies:
Stamps: Trendy Trees (Stampin’ Up)
Cardstock: Pretty in Pink, Rose Red, Whisper White (SU)
Ink: Rose Red (SU)
Other: 5-Petal Flower punch, Spring Bouquet punch, silver mini brad (SU); washi tape (Recollections)

Well hello there!  It’s the first Thursday of the month, which means we have a new hostess of the month over at CAS – Colours and SketchesLizy has planned some fun things for us this time, and she’s starting us off with a really nice, soft, subtle color challenge.

I’ve combined the colors with the same OWH Stars & Stamps sketch I used for yesterday’s card.   (I know, that’s kind of the easy way out, but it’s a nice CAS sketch!)  I decided to use designer paper for my Soft Sky element.  It’s really a pretty simple and straightforward card that doesn’t require a lot of chitchat about how it was made.

Be sure to check out what the other design team members have made with these great colors – I’m sure they’d love it if you left comments for them!  Then create a CAS card using this color scheme and share it with us at the CAS – Colours and Sketches blog by 1:00 p.m. Eastern time Wednesday, November 13.  We’d love to see what you make!

Thanks for stopping by today!

Supplies:
Stamps: My Silly Valentine (Lawn Fawn)
Cardstock: Pure Luxury Vanilla (Gina K. Designs); Soft Suede, Soft Sky Prints designer series paper (Stampin’ Up)
Ink: Soft Suede (SU)
Other: markers (Copic)

Today I’m combining the current Dynamic Duos challenge with Jeanne’s Hope You Can Cling To challenge to put a smile on someone’s face.  In my opinion, there’s no way this darling little penguin can fail in making someone smile, especially with the bright, cheery colors.  The layout is a really old OWH Stars & Stamps sketch that I dug up from the archives because I hadn’t used it before.  However, I did take the liberty of turning the sketch on its side.

That’s it for today!  Thanks for stopping by.  I hope you’ll come back again soon!

Supplies:
Stamps: Sweet Christmas Wishes (Unity)
Cardstock: Real Red, Bermuda Bay (Stampin’ Up); Pure Luxury White (Gina K. Designs)
Ink: Tuxedo Black (Memento); Bermuda Bay (SU)
Other: Snowflake Background embossing folder (Darice); markers (Copic)

The cooler weather lately and the bright red leaves on our maple tree have me realizing that autumn is definitely here, and today’s card reflects the season.  I’ve combined several challenges.  I squashed the current Seize the Sketch layout into landscape orientation, the focus on the sentiment was inspired by the current Lawnscaping challenge, and the die cut leaves make it eligible for Lori’s Hope You Can Cling To challenge.

Thanks for stopping by today!  Comments are always welcome, read and appreciated!

Supplies:
Digital sentiment: A True Friend (Sweet ‘n Sassy Stamps)
Cardstock: More Mustard, Really Rust, Autumn Vine designer paper (Stampin’ Up)
Ink: printer ink
Other: twill tape, dimensionals (SU); Stitched Leaves dies (Lawn Fawn)

© 2019 Suffusion theme by Sayontan Sinha